


15
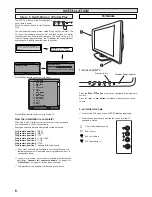
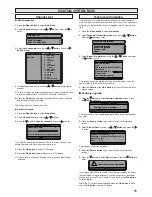
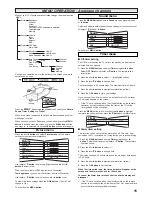
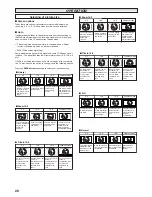
Many of your TV’s functions are controlled through the menu function.
During menu operation a bar at the bottom of the screen show which
controls can be used.
Press the
u
button to
enter
and
exit
the 5 sub menus
Picture
,
Sound
,
Timer
,
Setting
and
Preset
.
When a sub menu is selected its options are displayed and its colour
will change to yellow.
When you have set each Sub menu you can either press the
MENU
button
to exit and clear the screen or press the
5
button
until the
sub menu is re-selected. Using the
7
,
8
button
you can rotate again.
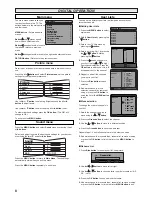
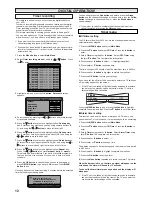
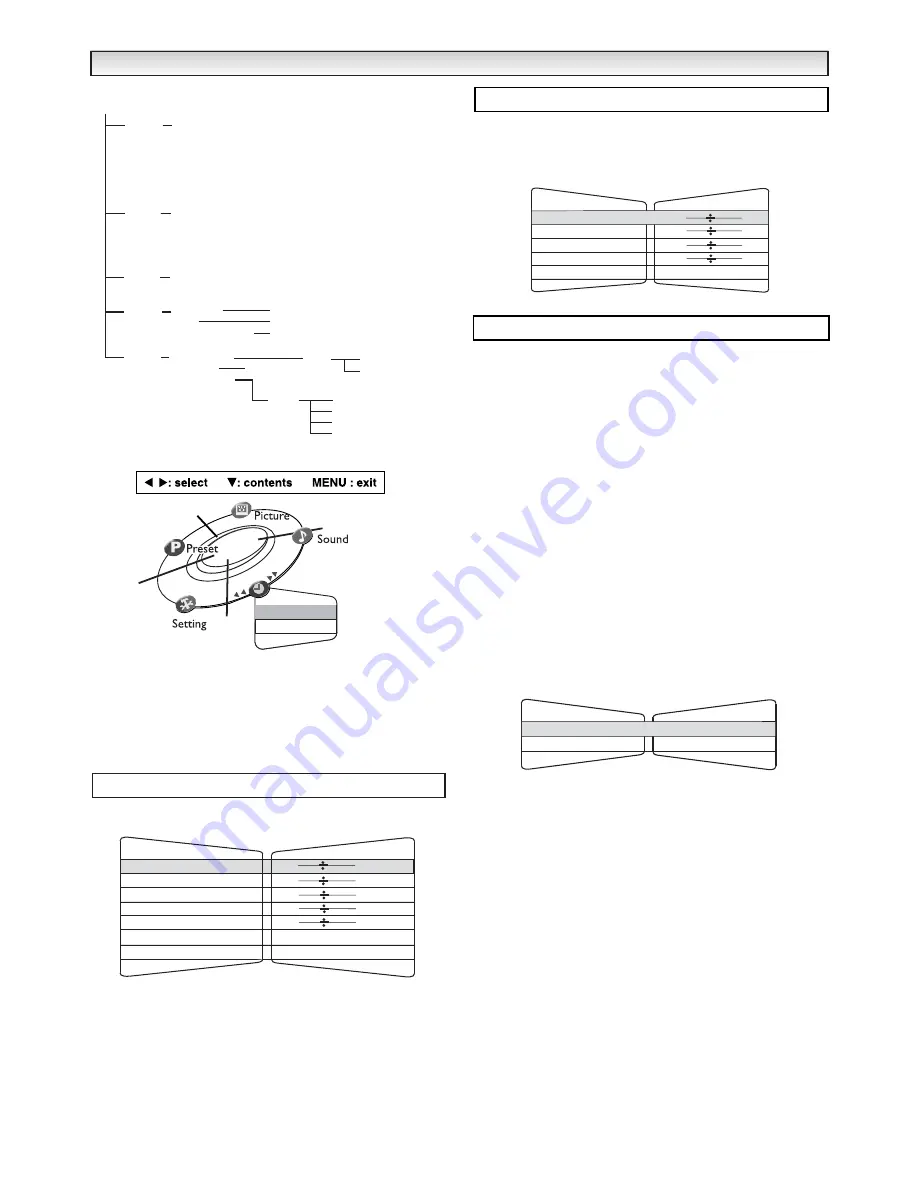
Press the
7
or
8
button
and select
Picture menu
, set the picture
settings for your personal preference.
Use the
e
or
d
button
to select eg. Brightness and the
7
or
8
button
to adjust levels.
Tint :
is only available if NTSC equipment is connected.
Text brightness :
you can set to Minimum, Centre or Maximum.
Use the
e
or
d
button
to select and the
7
or
8
button
to set.
To memorise these settings press the
F/OK button.
(The OK? will
change to OK.)
To exit press the
MENU button
.
Press the
MENU button
and select
Sound
menu by pressing the
7
or
8
button
.
Select and adjust to obtain the best sound settings for your environment
using
e
or
d
and
7
or
8
button
.
To exit press
MENU button
.
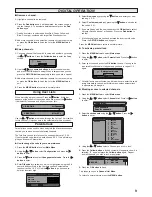
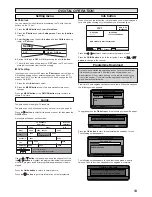
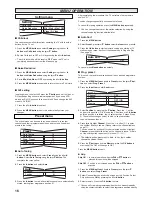
■
Off-timer setting
The Off timer will switch the TV set into the standby mode when the
selected time has elapsed.
1.
Press the
MENU button
and select
Timer
using
7
or
8
button
.
Select
OFF Timer
using the
e
or
d
button
. The complete line
turns yellow.
2.
Press the
7
or
8
button
to select --:-- (highlighted yellow).
3.
Press the
e
or
d
button
to change time.
The time changes in 30 minute steps.The maximum time is 2:00hrs.
4.
Press the
7
or
8
button
to highlight complete line (yellow).
5.
Press the
OK button
to store your settings.
If you have set the off timer, then one minute before the TV switches
off, a display appears on the screen.
✐
If the TV set is switched off by the standby button on the remote
control or by the standby switch on the front of the TV set the
timer settings will be cancelled.
Press the
MENU
button to exit, or press the
7
button
to highlight
complete line yellow and then press the
d
button
to set Alarm timer.
■
Alarm timer setting
This function can be set so that an alarm goes off. This only hap-
pens when the TV is switched on. It may remind you to do something.
1.
Press the
MENU button
and select
Timer
using the
7
or
8
button
. Select Alarm timer using the
e
or
d
button
. The complete
line turns yellow.
2.
Press the
7
or
8
button
to select
--:--
.
3.
Press the
e
or
d
button
to change time.
The display changes in 5 minute steps and the maximum time period
is 3:00 hours.
4.
Press the
7
or
8
button
to highlight complete line (yellow).
5.
Press the
OK button
to set the Alarm.
When the time period is up, the time up signal will appear on the
screen and the alarm will sound for 15 seconds.
To cancel the Alarm timer press any button and the display will
disappear.
✐
If the TV set is switched off by the standby switch on the remote
control, the standby switch on the front of the TV or a power failure
occurs the timer settings will be cancelled.
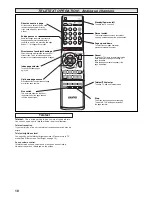
MENU OPERA
MENU OPERA
TION -
TION -
Analogue channels
Analogue channels
Picture menu
Sound menu
Auto Tuning
Auto sort Start
Prog. Preset
Swap
Fine Tuning
Brightness
Contrast
Colour
Sharpness
Tint (only if NTSC equipment is detected)
Text brightness
Memory
Picture
MENU
Sound
Timer
Volume
Bass
Treble
Balance
BBE
OFF Timer
Alarm Timer
Setting
Child lock
AV2
Noise Reduction
ON/OFF
Video/S-video
ON/OFF
Preset
Auto
Channel
Position
Semi
Channel
Position
Skip
Memory
Picture
Memory
Text brightness
Tint
Sharpness
Colour
Contrast
Minimum/Centre/Maximum
OK? / OK
42
19
2
27
Brightness
38
OFF timer
Alarm timer
Timer
Sound
Balance
Treble
Bass
Volume
12
0
0
0
BBE
ON / OFF
eg.
Timer menu
- - : - -
Timer
Alarm timer
OFF timer
- - : - -
OK?
Summary of Contents for CE27LD4-B
Page 23: ...23 ...
Page 24: ...24 Part No 1KA6P1P0194 B N2WK WKA N2YK YKA Printed in U K ...


