


To achieve the utmost in enjoyment and performance, please read this manual carefully before attempting
to operate the unit in order to become familiar with its features, and assure you years of faithful, trouble
free performance and listening pleasure.
Important Notes
* Read instructions - All the safety and operating instructions should be read before the apparatus is operated
* Retain instructions - The safety and operating instructions should be retained for future reference.
* Cleaning Unplug this product from the wall outlet before cleaning. Do not use liquid cleaners or aerosol
cleaners. Use a damp cloth for cleaning.
* Attachment Do not use attachment not recommended by the product manufacturer as they may cause hazards.
* Power Sources -The apparatus should be connected to a power supply only of the type described in the
operating instructions of as marked on the apparatus.
* “To be completely d
the power input, the mains plug of apparatus shall be disconnected
from the mains.” as the disconnect devices is the mains plug of apparatus.
* Power-Cord Protection - Power supply cords should be routed so that they are not likely to be walked on
or pinched by items placed upon or against them, paying particular attention to cords at plugs,
convenience receptacles and the point where they exit from the apparatus
* During lntended Use - The mains plug of apparatus should be easily accessed.
*
Nonuse Periods - The power cord of the apparatus should be unplugged from the outlet when left
unused for a long period of time.
* This apparatus shall not be exposed to dripping or splashing water and that no object filled with liquids
such as vases shall be placed on the apparatus.
* The apparatus should be situated so that its location or position does not interfere with its proper
ventilation. The ventilation should not be impeded by covering the ventilation openings with items
such as newspaper, table-cloths, curtains etc.
* Do not install this apparatus in a confined space, such as a book case or built-in cabinet. Minimum
distance (about 100mm) around the apparatus for sufficient
ventilation.
* No naked flame sources such as lighted candles should be placed on the apparatus.
* Do not use where there are extremes of temperature (below
or exceeding 35 C).
* Sudden changes in the ambient temperature may cause condensation to form on the optical lens inside
the unit. lf this happens, take out the disc, leave the unit for about 1 hour, and then proceed to operate.
* Because of the CD player’s extremely low noise and wide dynamic range, there might be a tendency to
set the volume on the amplifier unnecessarily high.
* Excessive sound pressure from earphones and headphones can cause hearing loss.
* Attention should be drawn to the environmental aspects of battery disposal.
* The caution marking was located at the bottom enclosure of the apparatus.
* The nameplate marking was located at the back enclosure of the apparatus.
* The use of apparatus in moderate climates.
isconnected
5°C
°
ESD Remark: In case of malfunction due to electrostatic discharge, just reset the product
(reconnect of power source may be required) to resume normal operation.
Should any trouble occur, remove the power source and refer servicing to qualified personnel.
For safety reasons, do not remove any covers or attempt to gain access to the inside of the product.
Refer any servicing to qualified personnel.
Do not attempt to remove any screws, or open the casing of the unit; there are no user serviceable parts
inside, refer all servicing to qualified service personnel.
Note:
- This unit will become warm when used for a long period of time. This is normal and does not indicate a
Problem with the unit.
- The CD player includes micro-processors which may malfunction as a result of external electrical Interference
or noise. If the CD player is not working properly, disconnect the power source and then reconnect it.
- Excessive sound pressure from earphones and headphones can cause hearing loss.
- If an unusual conditions occurs in the display window or key button, switch the unit off, then turn on the unit
again.
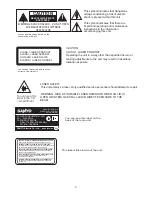
WARNING :
TO PREVENT FIRE OR SHOCK HAZARD, DO NOT EXPOSE THIS APPLIANCE TO
DRIPPING OR SPLASHING.
2
SAFETY PRECAUTIONS