background image

23

To turn the unit on and listen to the last received station, press the
TUNE/BAND button.

Automatic/Manual tuning

1.

Press the TUNE/BAND button to select FM or AM.

2.

Automatic tuning
Press the TUNE/PTY “+” or “–” button for at least 1 second to tune in
a station. The unit will scan up or down the band and receive the next
receivable station. Press the button again to continue.
Manual tuning
Press the TUNE/PTY “+” or “–” button briefly until the desired frequency
is displayed.

To preset stations

Up to 24 FM and 12 AM stations can be preset.

Automatic presetting (APT)
1.

Press the TUNE/BAND button to select FM or AM.

2.

Press the PROGRAM/RANDOM button for at least 3 seconds. “PGM”
blinks.
The automatic tuning mode is set and automatic presetting begins
from the low end of the band.
When 24 FM or 12 AM stations have been preset or the high end of
the band is reached, automatic presetting stops. “PGM” disappears
and the station memorized on channel 1 will be heard.

3.

To preset stations on the other band, follow steps above.

Note:
If APT is activated, all previously programmed stations of the band will be
cleared and new stations will be programmed.

Manual presetting
1.

Tune in the station to be preset as described in “Automatic/Manual
tuning”.

2.

Press the PROGRAM/RANDOM button.

3.

While “PGM” is blinking, press the PRESET “+” or “–” button to select
the channel to be preset.
-

The number button(s) can also be used. Example: Press 9.

4.

While “PGM” is blinking, press the ENTER button.
-

In this example, “103.25 MHz” FM station is preset on FM channel
9.

5.

Repeat steps above to add more preset stations.

-

When presetting a new station, the previous preset station is cleared.

LISTENING TO THE RADIO

Listening to preset stations

1. Press the TUNE/BAND button to select FM or AM.
2. Press the PRESET “+” or “–” button briefly to select the desired

channel.
-

The number button(s) can also be used. Example: Press 9 then
ENTER.

Preset scan tuning
1. Press the TUNE/BAND button to select FM or AM.
2. Press the PRESET “+” (

e

) button for at least 1 second. The channel

number appears. Each of the preset stations is tuned in for 5 seconds.

3. When the desired station has been tuned in, press the PRESET “+”

(

e

) button again to keep the reception locked at that station.

When beat interference is heard

A high-pitched noise called “beat” is sometimes heard during reception of
radio broadcasts. If this occurs,
While pressing the 

n

 button on the main unit, press the TEST button on the

remote control to select “bc-A” or “bc-B”. Select the setting that gives the
best results.

To receive FM stereo broadcasts

Make sure that “MONO” is not displayed. If “MONO” appears, press the
SHIFT + RDS buttons to turn the “MONO” indication off.
“ST” appears when an FM stereo broadcast is received.
-

If the signal from an FM stereo station is weak and reception is poor,
press the SHIFT + RDS buttons to change to the MONO mode. The
reception may be improved, but the sound will be monaural.

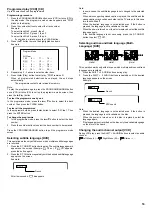
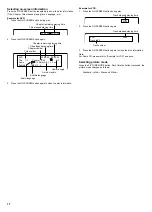
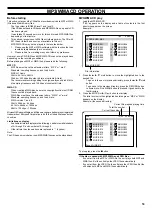
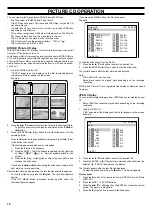
Changing the AM reception frequencies
It is not necessary to perform this procedure in the Europe.
1.

Press the TUNE/BAND button to select “AM”.

2.

While pressing the 

n

 button on the main unit, press the PROGRAM/

RANDOM button on the remote control.

522 - 1611 kHz (9 kHz steps) 

wv

 520 - 1610 kHz (10 kHz steps)

Listening to FM stations with RDS

RDS (Radio Data System) permits FM stations to send additional signals
with the regular programme signals. For example, the stations send their
station names and information about what type of broadcast programmes,
such as sports or music, etc.

When tuned in FM broadcast which provides the RDS service, the “PS”
RDS mode is set automatically and the station name appears on the
display.

Note:
-

Some FM broadcasts do not provide RDS service.

-

RDS may not work correctly if the signal strength is weak.

-

RDS is not available for AM broadcasts.

Selecting the RDS mode
Press the RDS button while listening to an FM station. Each time the
button is pressed, the display mode changes as follows.

PS 

v

 PTY 

v

 RT 

v

 Frequency

PS (Programme Service)

The station name is displayed. If no PS signal is received, “NO PS”
appears, then station frequency is displayed.

PTY (Programme Type)

The broadcast programme type is displayed. If no PTY signal is
received, “NO PTY” appears, then station name or station frequency
is displayed.

RT (Radio Text)

Text messages the station sends will be displayed. If no RT signal is
received, “NO RT” appears.

Frequency

Station frequency (non-RDS service)
After several seconds, the PS mode returns if RDS signal is received.

ST

ST

PGM

ST

PGM

ST

PGM

ST

Summary of Contents for DC-TS760

Page 1: ...INSTRUCTION MANUAL DVD Home Theater System DC TS760 REMOTE CONTROLLER RB TS760ST ...

Page 2: ...y large output from the amplifier which could damage your speakers Suddenchangesintheambienttemperaturemaycausecondensation to form on the optical lens inside the unit If this happens take out the disc leave the unit for about 1 hour and then proceed to operate When carrying the unit be sure to remove any disc which may be inside and turn the power off Wait at least 10 seconds then unplug the main...

Page 3: ...EP 11 RDS indicator RDS 12 FM mono indicator MONO 13 FM stereo indicator ST 14 Chapter indicator C 15 Random play indicator RND 16 Audio channel indicator L R 17 Repeat mode indicators ALL REP 1 A B 18 Programme indicator PGM 19 Dolby Pro Logic indicator s PL Front panel Display ACCESSORIES RB TS760ST remote control R6 HP 7 battery x 2 AM loop aerial FM aerial wire Video lead Front right speaker l...

Page 4: ...3 ...

Page 5: ...nt left speaker Black and Green Centre speaker Black and Gray Surround right speaker Black and Blue Surround left speaker Black and Violet Subwoofer Note The SPEAKERS sockets are designed for use only with the supplied speakers Do not use with other speakers Connecting other speaker may damage the speaker and or the unit If using other speakers check their impedance input power FRONT CENTER SURROU...

Page 6: ...d right speakers Note Take care when installing the speakers They may cause damage or serious injury should they fall from their mountings Front left speaker Front right speaker Centre speaker Surround left speaker Surround right speaker Subwoofer The front centre and surround speakers should be placed at approximately the same distance from the listening position Place the front left and right sp...

Page 7: ...re connecting TV VCR etc When you connect the unit to your TV and other equipment be sure to turn off the power and disconnect all of the equipments from the AC outlet until all the connections have been made Do not connect the MONITOR OUT S VIDEO VIDEO and AV EURO TV AUDIO IN RGB OUT sockets of the unit to a VCR directly The playback picture will be distorted because DVD discs are copy protected ...

Page 8: ... supplied to the PHONES socket for monitoring or for private listening The speakers are automatically disconnected when headphones are connected Manufactured under license from Dolby Laboratories Dolby Pro Logic and the double D symbol are trademarks of Dolby Laboratories DTS and DTS Digital Surround are registered trademarks of Digital Theater Systems Inc Connecting to a TV with an S video lead P...

Page 9: ...O AV SCART lead not supplied Audio lead not supplied Aerial Aerial lead not supplied JCX TS760 TV Aerial Aerial lead not supplied EURO AV SCART lead not supplied EURO AV SCART lead not supplied Aerial lead not supplied JCX TS760 VCR Audio lead not supplied EURO AV SCART RGB input facility EURO AV SCART Audio monitor out Audio equipment such as MD deck etc ...

Page 10: ...9 AUDIO OUT R L IN OUT OUT IN OUT AUDIO OUT R L IN OUT AV AERIAL AERIAL AV AERIAL IN ...

Page 11: ...trol on the main unit The volume level appears on the display VOL 0 VOL MAX To reduce the volume temporarily Press the MUTE button MUTE blinks on the display To restore the previous volume setting press the MUTE button again Selecting the sound mode 1 PresstheSOUNDbuttonrepeatedlytoselectthedesiredsoundmode BASS TREBLE CINE Cinema or QS Q Surround 2 Press the button as desired Sound mode Press Dis...

Page 12: ...HP ST Q Surround effect QS HP MN Surround effect when monaural programme material used 2ch HP Normal 2 channel sound Note When receiving weak FM broadcasts set the mode to 2 1ch The sound quality may improve VARIOUS ADJUSTING Adjusting the speaker volume balance This unit is set to the standard level before shipping from the factory You may not need adjustment But depending on the size of the room...

Page 13: ...at has no movie data cannot be played back This unit is to be used exclusively with the PAL or NTSC colour system discs SECAM system discs cannot be used with this unit For DVD discs The video output signal format can be selected PAL 60 or NTSC when playing back the NTSC DVD discs For MP3 WMA CD please see Page 18 For Picture JPEG CD please see Page 19 Notes on handling discs Do not expose the dis...

Page 14: ... be explained in this instruction manual You may need extra instructions In this case please follow the instructions displayed on the TV screen or jacket or case of the disc may appear on the TV screen during operation This icon means that the function is not available on the disc now 8 cm disc If a menu appears on the TV screen Press the 4 a 5 or b button or the number buttons then press the ENTE...

Page 15: ...the selected title Chapter search DVD 1 Press the SHIFT SEARCH MODE buttons twice during play The chapter search screen appears Example 2 Press the number buttons to enter the chapter number 3 Press the a Play button Play starts from the selected chapter Track search VCD CD Press the number buttons during play or in the stop mode then press the a Play button Play starts from the selected track Tim...

Page 16: ...ring play of the title or track you want to repeat Each time the button is pressed the repeat mode changes as follows TV screen Display Operation DVD Chapter REP 1 Repeat of chapter being played Title ALL REP Repeat of title being played Off Repeat off mode VCD CD 1 REP 1 Repeat of track being played All ALL REP Repeat all tracks Off Repeat off mode During programmed play VCD CD Program 1 REP 1 Re...

Page 17: ...es are recorded 1 PresstheS T ON OFFbuttonduringplay Thesubtitlelanguagemark appears on the screen Example 1 3 en If Off appears press the button again 2 PresstheS T CHbuttonrepeatedlyuntilthedesiredsubtitlelanguage appears on the screen Example After few seconds disappears Note In some cases the subtitle language is not changed to the selected one When a disc supporting closed caption is played t...

Page 18: ...o show the disc information Title Chapter Title elapsed playing time Language etc Example for DVD 1 Press the ON SCREEN button during play 2 Press the ON SCREEN button again 3 Press the ON SCREEN button again to close the disc information Chapter remaining playing time Title elapsed playing time Title elapsed playing time Subtitle language Camera angle Chapter remaining playing time A kind of audi...

Page 19: ...orregistered trademarks of Microsoft Corporation in both the United States and other countries Limitations on display Availablelettersfordisplayarethefollowing capitalorsmallalphabets of A through Z and numbers of 0 through 9 Other letters than those above are replaced in hyphen Note The CD has no music data or non MP3 WMA files cannot be played back MP3 WMA CD play 1 Load the MP3 WMA CD FILE appe...

Page 20: ...s may not be played in the recorded order JPEG files must have the extension letters JPG or jpg JPEG resolution up to 5760 x 3840 KODAK Picture CD play With KODAK Picture CD it is easy to turn film into pictures you can email from your PC and view on the unit Justbringyourfilminforprocessing andchecktheboxforKODAKPicture CD You will get back your prints and negatives as usual plus you will get a s...

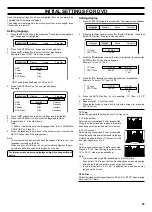
Page 21: ...C discs Language Display Audio Parental TV Type NTSC Disc 4 3 LB PAL 60 TV Type NTSC Disc 4 3 LB PAL 60 4 3 LB 4 3 PS 16 9 TV Type NTSC Disc 4 3 LB PAL 60 4 3 LB 4 3 PS 16 9 Cut off Language Display Audio Parental INITIAL SETTINGS FOR DVD Once the initial settings have been completed the unit can always be operated under the same conditions The settings will be retained in the memory until they ar...

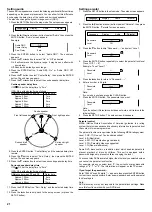
Page 22: ...scs Language Display Audio Parental Password Level Off Password Level 1 Password Level 1 Password Level Off Password Level 1 Language Display Audio Parental Setting audio Thesoundfromspeakerscanreachthelisteningpositionatdifferenttimes depending on the speaker placements You can allow for this difference by changing the delay time of the centre and surround speakers You also can change the dynamic...

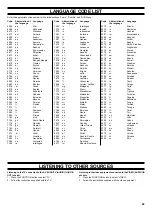
Page 23: ...tese 7789 my Burmese 7865 na Nauru 7869 ne Nepali 7876 nl Dutch 7879 no Norwegian 7967 oc Occitan 7977 om Afan Oromo 7982 or Oriya 8065 pa Punjabi 8076 pl Polish 8083 ps Pashto Pushto 8084 pt Portuguese 8185 qu Quechua 8277 rm Rhaeto Romance 8278 rn Kirundi 8279 ro Romanian 8285 ru Russian 8287 rw Kinyarwanda 8365 sa Sanskrit 8368 sd Sindhi 8371 sg Sangro 8372 sh Serbo Croatian 8373 si Singhalese ...

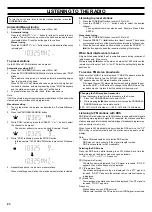
Page 24: ...e PRESET e button again to keep the reception locked at that station When beat interference is heard A high pitched noise called beat is sometimes heard during reception of radio broadcasts If this occurs While pressing the n button on the main unit press the TEST button on the remote control to select bc A or bc B Select the setting that gives the best results To receive FM stereo broadcasts Make...

Page 25: ... be located by specifying the PTY codes 1 Press the RDS button to select PTY while listening to an FM broadcast 2 Press the TUNE PTY or button within 2 seconds to select the desired PTY code The PTY code changes as shown below NEWS v AFFAIRS v INFO v SPORT v EDUCATE v DRAMA v CULTUREvSCIENCEvVARIEDvPOP MvROCK MvEASY M v LIGHT M v CLASSICS v OTHER M v WEATHER v FINANCE v CHILDREN v SOCIAL v RELIGIO...

Page 26: ... memory must be reset The batteries in the remote control are weak or installed incorrectly The remote control is not aimed at the remote sensor window CORRECTIVE ACTION Select the correct function Load a disc or load a playable disc Check the disc logo type colour system and regional code Select the correct input function on the TV Select the correct function Turn up the volume Load a playable di...

Page 27: ...miconductor laser wavelength 650 790 nm Laser output Continuous wave max 1 mW DVD 0 5 mW CD Signal to noise ratio More than 105 dB Wow and flutter Below measurable level Tuner Reception frequency FM 87 5 108 MHz AM 522 1611 kHz General Power requirements AC 230 V 50 Hz Power consumption 120 W 1 5 W standby mode Dimensions 435 W x 65 H x 378 D mm Weight 6 3 kg Speaker system Front left Front right ...

Page 28: ...s the statutory rights available to the purchaser of this equipment Note This guarantee supersedes any other form of guarantee that may inadvertently have been enclosed with or attached to the product August 1978 Thank you for buying Sanyo This equipment should give you many years of pleasure and faithful service but in the event that a fault occurs the following notes for your guidance may be hel...

Reviews: