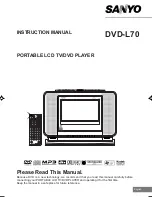
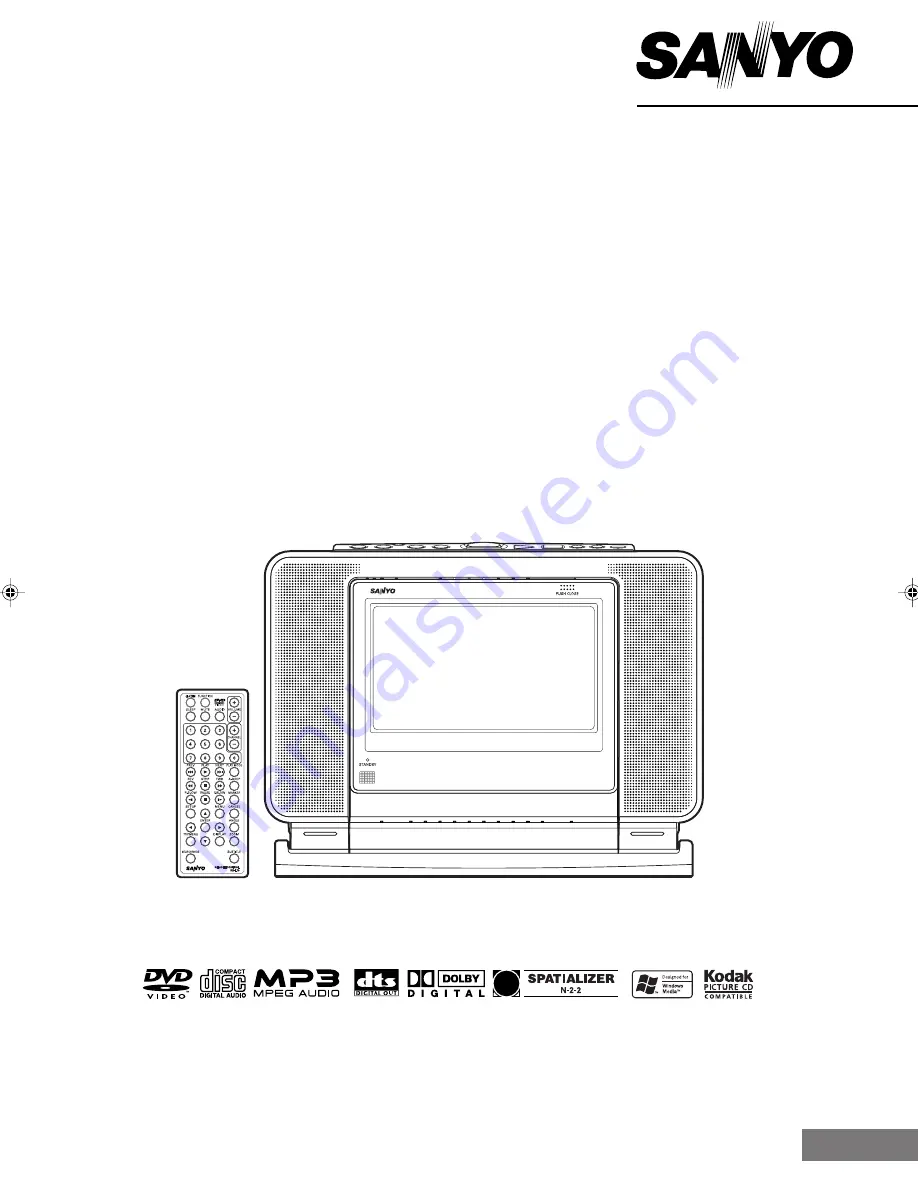
background image

INSTRUCTION MANUAL

PORTABLE LCD TV/DVD PLAYER

DVD-L70

Please Read This Manual.

Because DVD is a new technology, we recommend that you read this manual carefully before
connecting your PORTABLE LCD TV/DVD PLAYER and operating it for the first time.
Keep the manual in a safe place for future reference.

English

  5D90401A COV-P06

26/06/2003, 16:52

1

Summary of Contents for DVD-L70

Page 1: ...0 Please Read This Manual Because DVD is a new technology we recommend that you read this manual carefully before connecting your PORTABLE LCD TV DVD PLAYER and operating it for the first time Keep the manual in a safe place for future reference English ...

Page 2: ...TS AC adaptor 1 Cigarette lighter adaptor 1 Antenna plug 1 Audio Video cable 1 AC code 1 Remote control 1 with a CR2025 battery SETTING OSD LANGUAGE E30 SETTING LANGUAGE E31 SETTING THE ASPECT RATIO OF TV SCREEN E32 SETTING ON SCREEN DISPLAY STATUS DISPLAY OF DISC E33 SETTING JPEG INTERVAL SETTING SELECT FILES E34 DYNAMIC RANGE CONTROL E35 PARENTAL CONTROL SETTING E36 TEMPORARY DISABLING OF RATING...

Page 3: ... equipment may cause harmful interference unless the modifications are expressly approved in the instruction manual The user could lose the authority to operate this equipment if an unauthorized change or modification is made REGULATORY INFORMATION FCC Part 15 This product has been tested and found to comply with the limits for a Class B digital device pursuant to Part 15 of the FCC Rules These li...

Page 4: ...Art 250 Part H NEC NATIONAL ELECTRICAL CODE Ground Clamp Electric Service Equipment 14 Lightning Unplug this apparatus during lightning storms or when unused for long periods of time This will prevent damage to the product due to lightning and power line surges 1 Read These Instructions All the safety and operating instructions should be read before the product is operated 2 Follow All Instruction...

Page 5: ...echnician has used replacement parts specified by the manufacturer or have the same characteristics as the original part Unauthorized substitutions may result in fire electric shock or other hazards 22 Safety Check Upon completion of any service or repairs to this product ask the service technician to perform safety checks to determine that the product is in proper operating condition 23 Disc Tray...

Page 6: ...ill condense on the surface of the glass This is called moisture condensation When moisture might condense on the unit 1 Connect the power cord of the unit to the wall outlet 2 If the disc is in the unit remove the disc using OPEN DISC 3 Press ON to turn on the unit 4 With the power ON wait 1 2 hours before using When moisture might condense on the unit Wait for about 2 hours and start using after...

Page 7: ...te sensor IR PHONES jack VIDEO IN OUT jack AUDIO IN OUT jack DIGITAL OUT Optical jack DC IN jack RF IN jack Base Disc tray Screen LCD panel Operation buttons VOLUME buttons CHANNEL buttons FUNCTION button Skip buttons ON button PLAY button STOP button DISC OPEN button Handle Rod antenna Top ...

Page 8: ...move in order to support the unit Make sure to hold the unit firmly and adjust the angle Notes Be careful not to pinch your finger s between the main unit and the base when adjusting the angle for the base Do not apply force to the base beyond its adjustable range This may cause damage Be careful not to apply force on the LCD screen when adjusting the angle ...

Page 9: ...E button PAUSE button button ENTER button REV button PREV button NEXT button FWD button Direct channel Number buttons R SLOW button A B REP button F SLOW button MENU button button button DISPLAY button MARKER button CANCEL button ANGLE button ZOOM button SUBTITLE button TOP MENU button button SETUP button SEARCH MODE button CHANNEL buttons ...

Page 10: ... the following circumstances If there is an obstruction between the remote and the main unit If direct sunlight or a strong light shines on the remote sensor Caution Warning Keep batteries out of the reach of children If a battery is swallowed consult with a doctor immediately Do not heat dismantle or throw a battery in a fire Do not short out a battery Insert as indicated by the sign Do not use a...

Page 11: ...n 16 9 Tv Screen Display On 16 9 Enter Setup Language Picture Parental Other Sound DRC TV Enter Setup Language Picture Parental Other Sound OSD Language English Enter Setup Other Language Picture Parental Other Sound Password Parental 1 Enter Setup 0 9 Clear Picture control adjustment E48 TV CATV selection E42 To add delete channels E44 Automatic memory tuning E43 Setting the chile lock E38 Settin...

Page 12: ...OSURE DO NOT CONNECT THIS UNIT TO THE POWER USING ANY DEVICE OTHER THAN THE SUPPLIED AC ADAPTOR OR POWER CORD THIS COULD CAUSE FIRE ELECTRICAL SHOCK OR DAMAGE DO NOT USE WITH A VOLTAGE OTHER THAN THE POWER VOLTAGE DISPLAYED THIS COULD CAUSE FIRE ELECTRICAL SHOCK OR DAMAGE DO NOT USE THIS WITH THE AC ADAPTOR COVERED WITH CLOTH ETC OR PRESSED INTO A NARROW AREA THIS RESULTS IN POOR DISSIPATION OF HE...

Page 13: ...nd portion of the plug and remove 3 Remove the blown fuse 4 Put in a new 8A fuse 5 Turn the end portion of the plug and tighten Notes Replace the fuse with one of the same rating If the fuse blows again after replacement contact the store where you purchased the unit or contact a Sanyo Authorized Service Station Traffic safety Do not use while operating a motorized vehicle or boat It may create a ...

Page 14: ... or playback if you use a disc that does not comply with CD standards such as a copy controlled discs specially shaped discs etc We cannot guarantee playback in the CD playback function if you use CDs that do not meet CD standards such as those with Copy Guard etc When playing a CD please check that it has the CD logo symbol and read the notes on the package to be sure that the disc complies with ...

Page 15: ...ys DVDs according to the disc contents the software produc ers designed some playback features may not be available Also refer to the instruc tions supplied with the DVDs A menu screen may appear on the TV screen if the disc has a menu feature In this case press ENTER or PLAY to operate a menu feature The menu screen may not be displayed de pending on the disc s specifications Push the disc tray t...

Page 16: ...to DVD mode or turn the power back on it will start playback from the point at which you stopped it When stopping fully If you press STOP again or unload the disc the unit will clear the stopped point It comes to a full stop and the next time you play it back it will start from the beginning of the disc Still Playback Press PAUSE during normal playback 4 will be displayed for about 4 seconds on th...

Page 17: ...at a time Press PAUSE during still playback One frame is advanced each time you press PAUSE To resume normal playback press PLAY You cannot use Frame Advance with Audio CDs or MP3 WMA JPEG CDs Slow Motion Playback You can use slow motion in either forward or reverse Press R SLOW or F SLOW during normal playback or still playback Each press of the button will change the speed of the slow as follows...

Page 18: ...Corporation in both the United States and other countries 94 CD R Pops 1 Bay Bridge 8 Japan 2 BLUE EYES 9 Lies and Truth 3 Blurry Eyes 10 Rain 4 CLOSE MY EYES 11 Strawberry 5 DIVE TO BLUE 12 Thailand 6 flower 13 Welcome party 7 Honey 14 winter fall Press or to select the folder then press or to select the desired file In case the folder includes more than 15 files press or to display next file lis...

Page 19: ... a special CD that contains your pictures along with software that lets you view enhance share and print your pictures from your computer and view them on this unit To Play the Picture One by One Preparation 1 If a disc loaded remove the disc first 2 Set Select Files setting to All or Pictures Only Usually set to All see page E34 1 Load the disc with the label facing up on the disc tray Please ref...

Page 20: ... next picture and continue the slide show If you press NEXT or PREV during the slide show it skips to the next or previous picture If you press TOP MENU the file list appears 1 2 TOP MENU ANGLE MENU PREV NEXT STOP PLAY PAUSE ENTER To Start the Slide Show The slide show enables you to view pictures files one after another automatically Preparation 1 If a disc loaded remove the disc first 2 Set JPEG...

Page 21: ...EG software with the function that can record data alphabeti cally or numerically 2 Please refrain from making many sub folders by preference However some CD R RWs cannot be played back depending on the recording conditions Before playing back JPEG files please read the following Limitations on display The maximum number for display is 16 letters Available letters for display are the following cap...

Page 22: ...ing the slide show it skips to the next or previous picture If you press MENU the thumbnail pictures appear Indicates MP3 file 0 9 Enter Play Mode Menu Indicates WMA file Indicates JPEG file If the disc is mixed with MP3 WMA and JPEG files 1 Press 4 a 5 or b to move the highlighted box to the desired file Example 2 Press ENTER to start playback or slide show If you start from the MP3 or WMA file t...

Page 23: ...1 of the selected title Audio CD DVD Picture Zoom This unit will allow you to zoom in on the frame image You can then make selections by switching the position of the frame Locating Desired Scene You can specify the position in a DVD or CD disc from which you wish to playback and easily get to that point and start play ing With DVD discs you can specify an elapsed time from the be ginning or a tit...

Page 24: ...een The unit stores the points that you want to watch again up to 3 points Press or to select the Marker 1 3 Press ENTER Playback starts from the marked scene Press MARKER during playback or stop mode Press MARKER during playback or stop mode Press or to select the Marker 1 3 Press CANCEL Press MARKER again to close the Marker screen Some discs may not work with the marking operation The marking i...

Page 25: ... Repeat Off Enter Play Mode DVD Audio CD MP3 WMA JPEG CD Repeat Chater Enter Play Mode Play Mode Off Repeat All Enter Play Mode CD DVD MP3 CD DVD 1 3 2 PLAY 1 2 Press PLAY MODE during playback or stop mode DVD Audio CD MP3 WMA JPEG CD Press A B REP during playback The start point A is selected Repeat Playback With DVD discs you can play the same chapter or title repeatedly With Audio CD MP3 WMA JP...

Page 26: ... Make sure Play Mode is selected Press or to select Program Playback and press ENTER Program playback starts in the programmed order Even if you stop using STOP if you press PLAY it will start the program playback again When you wish to stop the program playback follow steps 1 2 and select Off in step 3 and press PLAY MODE The program remains until the CD is removed or power is turned off To delet...

Page 27: ... language etc using the DVD menu Changing Angles When playing back a disc recorded with multi angle facility you can change the view angle DVD 1 3 2 1 3 2 1 2 Press ENTER The playback of the selected title will start Press TOP MENU Title menu appears on the screen Press MENU The DVD menu appears on the screen Press or to select the desired item Press or to select the desired title 1 2 Notes Depend...

Page 28: ...atedly during playback until your de sired language appears Off 1 3 Eng DVD 1 2 SUBTITLE SUBTITLES CHANGING SOUNDTRACK LANGUAGE Subtitles Changing Soundtrack Language You can select the language when you play a multilingual disc Notes If the desired language is not found out af ter pressing the SUBTITLE or AUDIO several times the language is not recorded on the disc Changing soundtrack language or...

Page 29: ... like Dolby Digital 5 1 ch or Dolby Surround while using just 2 speakers You cannot change the level DVD CD DVD CD 2 1 Press or to select Karaoke vocal setting then press or to select On or Off OTHER SOUNDTRACK SETTINGS Setting Spatializer This unit equipped with a SPATIALIZER N 2 2 It can produce the effect of being in a cinema or a concert hall Note You may not be able to make settings for Karao...

Page 30: ...ss SETUP in the stop mode Language is selected Press to select Other Press to select OSD Language then press or ENTER Press or to select your desired language Press ENTER The selected language remains The OSD Language is changed Press SETUP to close the screen 1 2 3 4 5 6 SETTING OSD LANGUAGE 2 3 1 6 4 3 5 CD DVD MP3 JPEG WMA You can choose from three different languages English Spanish and French...

Page 31: ...close the screen Language Menu Subtitle Audio Picture Parental Other Francais English Espanol Other Sound Enter Setup English Automatic English Notes If you select a menu or subtitle language that has not been recorded onto a DVD disc the default language setting of the disc will be used for menus and subtitles If the selected soundtrack language is not recorded on the disc the original language w...

Page 32: ... your desired screen type Notes If the DVD disc is not formatted in the pan scan style it displays 4 3 style Depending on the screen size that was recorded onto the disc it may not be displayed according to the settings SETTING THE ASPECT RATIO OF TV SCREEN Cut off Cut off 4 3 Letterbox Select when a conventional TV set is connected When the wide screen disc is played back the black bands appear a...

Page 33: ...Interval Select Files All Off Language Picture Parental Other Sound Enter Setup 5 Press DISPLAY during playback Each press of DISPLAY the status display of the disc will appear on the screen and change as follows 02 25 05 04 Track 11 99 00 08 40 01 12 33 00 08 40 01 12 33 Title 1 99 Chapter 1 999 1 9 1 8 Eng DolbyDigital 1 32 Eng DVD 1 Nothing is displayed 2 3 Audio CD If you place a disc in the d...

Page 34: ...nguage is selected 2 Press to select Picture Setting JPEG Interval You can continuously play back all JPEG files automatically JPEG 5 Press SETUP to colse the screen Setting Select Files When playing back a CD containing a mixture of MP3 WMA and JPEG files only MP3 WMA or JPEG files can be displayed on the file menu Repeat steps 1 2 above 4 Press to select Select Files 3 Press or ENTER to select y...

Page 35: ...r a DVD disc The settings will be retained in the memory until they are changed even if the power is turned off or the disc is replaced Language Picture Parental Other Sound DRC TV Enter Setup Language Picture Parental Other Sound DRC Std Std TV Enter Setup DVD Language Picture Parental Other Sound Enter Setup 2 3 1 6 4 3 5 DYNAMIC RANGE CONTROL Notes This function works only during playback of Do...

Page 36: ...Parental 1 1234 Language Picture Parental Other Sound Password Parental 1 1234 Language Picture Parental Other Sound Password Parental 1 DVD PARENTAL CONTROL SETTING Parental Control MPAA Motion Picture Association of America Guideline is a rating system that provides advanced cautionary information to parent about the content of movie programs The parental lock level is equivalent to the followin...

Page 37: ...r disc exceeds the parrental control level 1 Parental Control Level Cancel Picture Enter selected YES selected NO Depending on the DVD disc the disc may try to temporarily cancel the rating level that you have set It is up to you to decide whether to cancel the rating level or not Press ENTER Playback will commence if the entered password was correct Place a DVD disc on the disc tray and push the ...

Page 38: ...ep 4 Note Even if ON is selected for the CHILD LOCK if DISC OPEN is pressed for 5 seconds or more the disc tray will open Even if you pressed DISC OPEN next the tray would not open unless you press it for 5 seconds or longer If you wish to open the disc tray immediately select OFF in step 4 CHILD LOCK OFF SCREEN SIZE 16 9 FULL LANGUAGE IDIOMA LANGUE C D B A SETUP CHILD LOCK OFF SCREEN SIZE 16 9 FU...

Page 39: ...sformer Attach the Transformer to the Combiner then attach the Combiner to Antenna Plug supplied then attach the plug to the Antenna Jack Connect the VHF 75 ohm cable and UHF 300 ohm Twin lead Wire to the Combiner Attach the Combiner to Antenna Plug supplied first then attach the plug to the Antenna Jack 75 ohm Coaxial Cable 300 75 ohm Matching Transformer Antenna Jack or Antenna Plug supplied 300...

Page 40: ...ibe to a cable TV service in which basic channels are unscrambled and premium channels require the use of a Converter Descrambler box you may wish to use a signal Splitter and an A B Switch box available from the Cable company or an electronics supply store Follow the connections shown below With the switch in the B position you can directly tune any nonscrambled channels on your unit With the swi...

Page 41: ...uage of your choice On screen language selection step 4 will automatically appear on the screen when you press MENU initially Select the language you prefer first then proceed with the other menu options Press or to select LANGUAGE then press or Press or to select the desired language English ENGLISH Spanish ESPAÑOL or French FRANCAIS then press ENTER Press SETUP twice to close the TV menu screen ...

Page 42: ...enna set the TV CATV menu option to the TV mode When shipped from the factory this menu option is in the CATV mode TV CATV CATV ADD DELETE DELETE AUTO CH MEMORY C D B A SETUP TV CATV CATV ADD DELETE DELETE AUTO CH MEMORY C D B A SETUP TV CATV TV ADD DELETE DELETE AUTO CH MEMORY C D B A SETUP 1 5 FUNCTION 3 2 4 TV VHF UHF channels CATV CABLE TV channels Press SETUP The TV menu screen will appear Pr...

Page 43: ...The TV will begin memorizing all the channels available in your area TV CATV CATV ADD DELETE DELETE AUTO CH MEMORY C D B A SETUP TV CATV CATV ADD DELETE DELETE AUTO CH MEMORY C D B A SETUP 1 4 3 2 3 FUNCTION Press SETUP The TV menu screen will appear Press or to select 4 Press SETUP twice to close the TV menu screen Preparation Press FUNCTION to select the TV mode ...

Page 44: ...lection 0 9 or CHANNEL or Press SETUP The TV menu screen will appear Press or to select ADD or DELETE whichever function you want to perform 5 6 BRIGHTNESS CONTRAST COLOR TINT SHARPNESS BACK LIGHT C D B A SETUP 0 16 0 0 0 NORM TV CATV CATV ADD DELETE DELETE AUTO CH MEMORY C D B A SETUP TV CATV CATV ADD DELETE DELETE AUTO CH MEMORY C D B A SETUP TV CATV CATV ADD DELETE ADD AUTO CH MEMORY C D B A SE...

Page 45: ...t Please use mini plug headphones If you connect headphones the speakers are muted Notes The display that appears when the unit is operated will disappear after a few seconds to 1 minute in order to preserve the LCD screen When you will not use it for some time such as when you are traveling unplug the AC adaptor from the outlet Rod Antenna PHONES FUNCTION STANDBY indicator ON CHANNEL VOLUME VOLUM...

Page 46: ...p timer press SLEEP repeatedly until the display turns to 0 If you press SLEEP while working the sleep timer the remaining time until power off is displayed To change the time setting press SLEEP repeatedly and set the desired time Stereo and Second Audio Program SAP This unit is equipped with a feature known as Multi channel TV Sound or MTS MTS broadcasts greatly enhance TV viewing by bringing yo...

Page 47: ...of the channel and sound will be displayed on the TV screen The sound reception status will disappear after about 4 seconds If you press once more the display will disappear Press DISPLAY again to clear the call display CHANNEL DISPLAY STEREO CH 013 Stereo or SAP second audio pro gram audio status When MONO broadcasting is received no indication is dis played ...

Page 48: ...raininess BACK LIGHT Darker Lighter Switches the brightness of the LCD display in 3 levels Press SETUP The TV menu screen will appear is selected Press or to adjust the setting When adjusting another item repeat steps 2 3 1 3 4 2 Press or to select BRIGHTNESS BRIGHTNESS CONTRAST COLOR TINT SHARPNESS BACK LIGHT C D B A SETUP 0 16 0 0 0 NORM BRIGHTNESS CONTRAST COLOR TINT SHARPNESS BACK LIGHT C D B ...

Page 49: ...FF SCREEN SIZE 16 9 FULL LANGUAGE IDIOMA LANGUE C D B A SETUP 3 CHILD LOCK OFF SCREEN SIZE 16 9 FULL LANGUAGE IDIOMA LANGUE C D B A SETUP BRIGHTNESS CONTRAST COLOR TINT SHARPNESS BACK LIGHT C D B A SETUP 0 16 0 0 0 NORM 5 Notes When you switch the screen size for pictures from DVD refer to page E32 Even if you change the screen size utilizing the steps on the right the TV screen will have a screen...

Page 50: ...tar 3030 Bengali Bangla 1224 Hebrew 1933 Nepali 2415 Telugu 3015 Bhutani 1436 Hindi 1819 Norwegian 2425 Thai 3018 Bihari 1218 Hungarian 1831 Oriya 2528 Tibetan 1225 Breton 1228 Icelandic 1929 Panjabi 2611 Tigrinya 3019 Bulgarian 1217 Indonesian 1924 Pashto Pushto 2629 Tonga 3025 Burmese 2335 Interlingua 1911 Persian 1611 Turkish 3028 Byelorussian 1215 Irish 1711 Polish 2622 Turkmen 3021 Cambodian ...

Page 51: ... and unplug the power plug from the AC outlet Connecting while the power is on could cause damage to the speaker s Please make sure that the connecting plugs are securely inserted in each device If not fully inserted it may cause noise Using an AV Amplifier with Built in Digital Surround If you are using an Amplifier with a built in digital surround as follows you can enjoy the various audio syste...

Page 52: ...er or TV Game You can use this unit as a monitor by connecting it to a game machine or video integrated camera Press the external input button to switch to the external input mode External will be displayed on the screen Main Unit Side TO AUDIO L R IN OUT Audio cable not supplied TO AUDIO L R IN Stereo Component System Audio Video cable supplied TO AUDIO L R IN TO VIDEO IN TO VIDEO IN OUT TO AUDIO...

Page 53: ... correct Display is not set to On Parental is set Multiple languages are not recorded on the disc Subtitles are not recorded on the disc The subtitle function is OFF Multiple angles are not recorded on the disc You are trying to do something prohibited Disc upside down No data on the disc The first file playback is not unwanted one on a CD containing a mixture of MP3 WMA and JPEG files Select File...

Page 54: ...right orientation The antenna wire is either cut off or detached The antenna is not facing the right orientation The batteries in the remote control are installed incorrectly The batteries in the remote control are weak The remote control is not pointed at the remote sensor of the main unit There is an obstacle in the path of the remote control and the main unit The remote control is too far from ...

Page 55: ...oise ratio 90 dB Harmonic distortion 0 06 Wow and flutter Below Measurable Level LCD TV Section Model 7 V Screen size 154 width x 87 height x 177 diagonal mm Display method Transmission TFT color LCD panel Drive method TFT thin layer transistor active matrix drive method Number of pixels 336 960 horizontal 480 x vertical 234 x 3 Effective pixel ratio 99 99 or greater Viewing angle From above 30 de...

Page 56: ...yo Service Depot when you make a claim under this Warranty You the original retail purchaser are responsible for any costs of TRANSPORTING the product to and from SANYO Canada Inc or an authorized Sanyo Service Depot You also are responsible for the cost of any MAINTENANCE necessary in respect of the product WARRANTY BECOMES VOID This warranty becomes void if the product s serial numbers are alter...

Reviews: