background image

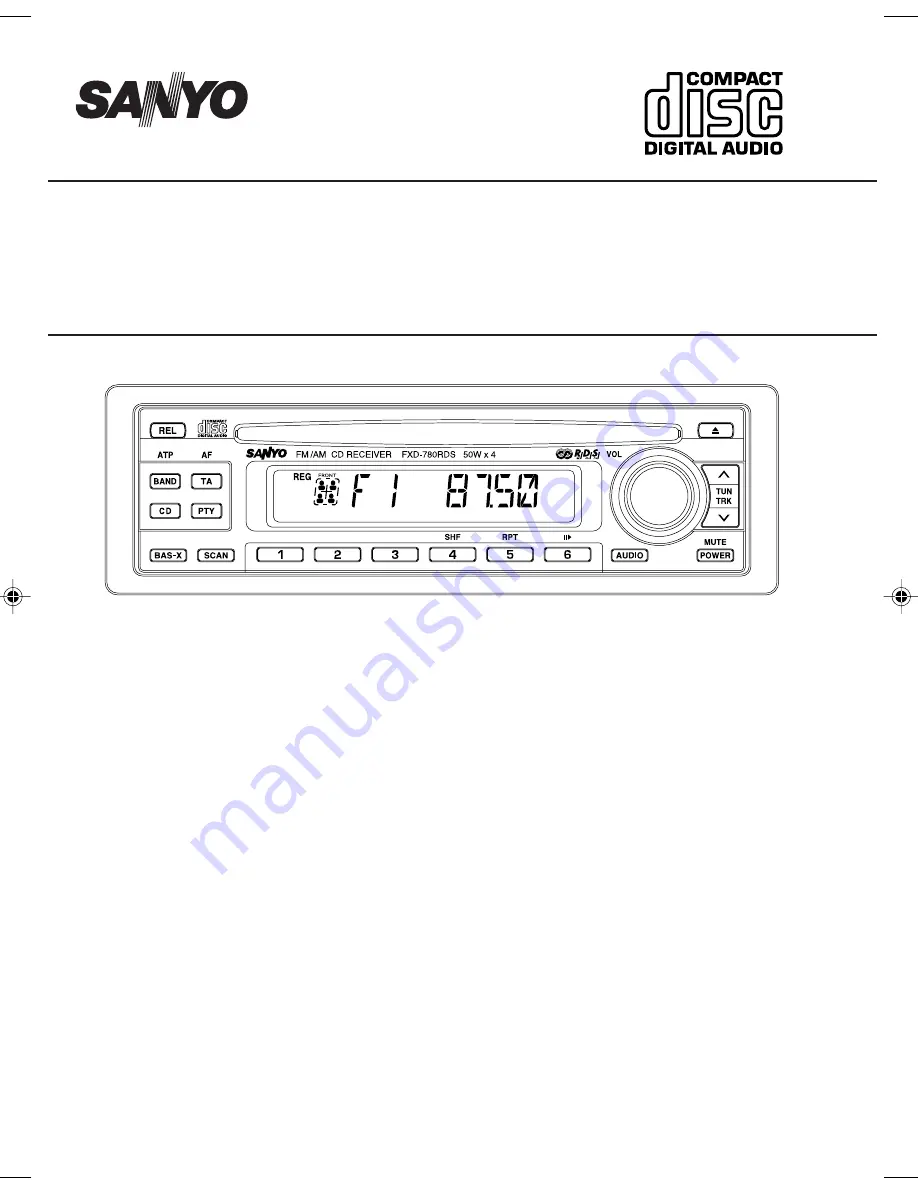
FXD-780RDS

OPERATING INSTRUCTIONS .....................  1~24

Full Panel Detachable
High Power FM/AM Stereo Receiver
Compact Disc Player with CD Changer Controller
ISO Mounting with Removable Trim Ring

CDC

- - DISC - +

with CD Changer Control

 780RDS/CDC_Cover

8/20/02, 5:59 PM

1

Summary of Contents for FXD-780RDS

Page 1: ...80RDS OPERATING INSTRUCTIONS 1 24 Full Panel Detachable High Power FM AM Stereo Receiver Compact Disc Player with CD Changer Controller ISO Mounting with Removable Trim Ring CDC DISC with CD Changer Control ...

Page 2: ... all electrical connections for any short circuits and have your car s voltage regulator checked also Do not install the unit where it will be exposed to direct sunlight or hot air discharged from the car heater Do not expose the unit to water or moisture To avoid damaging the unit never insert anything other than a compact disc into the disc slot This unit should not be adjusted or repaired by an...

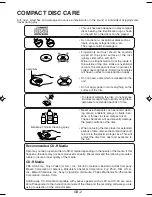
Page 3: ...d periods of time remove the compact disc and return it to the plastic storage case This will protect the disc from dust and exposure to the sun This unit has been designed to play compact discs bearing the identification logo shown on the left No other discs can be played COMPACT DISC CARE Dirt dust scratches and warpage can cause a deterioration in the sound or intermittent skipping some tracks ...

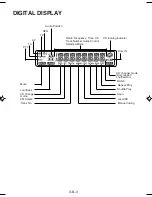
Page 4: ...ereo Manual tuning Track No Local DX Loudness TA TP AF REG PTY BAS X Disc IN Audio Position Radio Frequency Time CD Track Number Audio Control Selected Mode Shuffle Play Repeat Play Scan Mute CD changer mode CD changer mode Disc repeat shuffle scan ...

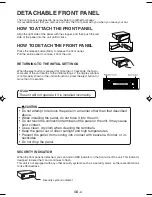
Page 5: ...unctions press the eject button for more than 10 seconds Note The unit will not operate if it is installed incorrectly CAUTION Do not attempt to remove the panel in a manner other than that described above When installing the panel do not force it into the unit Do not touch the connection terminals of the panel or the unit It may cause poor contact Use a clean dry cloth when cleaning the terminals...

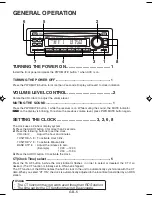
Page 6: ...hour display system 1 Press the AUDIO button 3 for more than 2 seconds 2 Press the following buttons to set the clock VOL dial 2 Adjust the hour and minutes TUN TRK 8 To activate Hour blink TUN TRK 8 To activate Minute blink BAND ATP 6 Adjust the minutes to zero Example 12 29 12 00 12 30 13 00 3 Press the AUDIO button 3 to activate the clock CT Clock Time select 5 Press the TA AF button 5 while th...

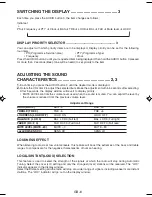
Page 7: ...VEL controls the volume level used when the sound is muted You can adjust the level by the volume is reduced from the previous volume level Adjustment Range BASS BAS 0 BAS 5 BAS 5 TREBLE TRE 0 TRE 5 TRE 5 LOUDNESS LOUD OFF LOUD ON LOUD OFF BALANCE L 0 R 0 BAL L9 R0 Full left BAL L0 R9 Full right FADER R 0 F 0 FAD R0 F9 Full front FAD R9 F0 Full rear MUTE LEVEL MUTE 20 MUTE 0 MUTE 80 Local DX SENS ...

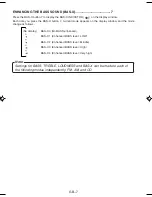
Page 8: ...nt mode appears on the display window and the mode change as follows Note Settings for BASS TREBLE LOUDNESS and BAS X can be made to each of the following modes independently FM AM and CD BAS X 0 No BASS enhanced BAS X 1 Enhanced BASS level LOW BAS X 2 Enhanced BASS level Middle BAS X 3 Enhanced BASS level High No display BAS X 4 Enhanced BASS level Very high ...

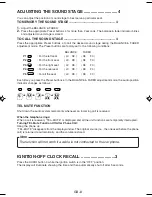
Page 9: ...l the seat L0 R0 R0 F0 Each time you press the Preset buttons 4 in the BALANCE FADER adjustment mode the audio position indicator changes as follows 1 2 3 4 SHF 5 RPT TEL MUTE FUNCTION Shut down the audio system temporarily whenever an incoming call is received When the telephone rings When a call is received TEL MUTE is displayed and all the unit functions are temporarily interrupted Turning TEL ...

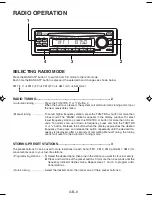
Page 10: ... press the TUN TRK button for more than 0 5 sec onds To quickly scan up or down in frequency press and hold the TUN TRK or button Release the button when the display approaches the desired frequency then press and release the button repeatedly until the desired fre quency is displayed After 4 seconds of completing Manual Tuning the tuning control will revert to the Automatic Tuning mode STORING PR...

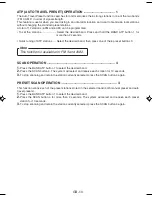
Page 11: ...en press one of the 6 preset buttons 3 Note This function is available for FM 3 and AM 2 SCAN OPERATION 4 1 Press the BAND ATP button 1 to select the desired band 2 Press the SCAN button 4 The system will select and receive each station for 10 seconds 3 To stop scanning and retain the station currently selected press the SCAN button 4 again PRESET SCAN OPERATION 4 This function scans each of the p...

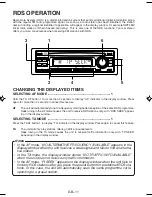
Page 12: ...ramme Seek tuning in the AF mode causes the unit to receive RDS stations only with RDS SEEK appear ing in the display window SELECTING TA MODE 1 Press the TAAF button 1 to display TA indicator in the display window Press again to cancel this feature TA The unit will only play stations offering traffic announcements Seek tuning in the TA mode causes the unit to receive traffic information only with...

Page 13: ...he tuner may tune to another regional programme in the network RECEIVING TRAFFIC ANNOUNCEMENTS 1 3 The Traffic Announcement TA and Traffic Programme TP data allows the radio to automatically tune in to an FM station which broadcasts traffic announcements while you are listening to other programme sources 1 Press the BAND ATP button 3 to select the FM band 2 Press the TA AF button 1 to display the ...

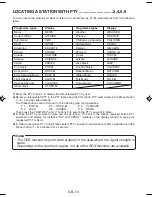
Page 14: ...HER M 1 Press the PTY button 2 to display the last selected PTY by user 2 Select your requested PTY in the PTY table using the VOL dial 6 PTY memorized in the Preset button 1 6 4 can be called directly The Preset buttons are factory set to the following type of programmes P 1 POP M P 2 ROCK M P 3 CLASSICS P 4 JAZZ P 5 VARIED P 6 NEWS Then press the TUN TRK and buttons 5 to search the PTY you want ...

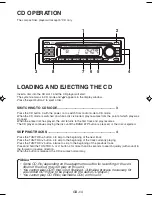
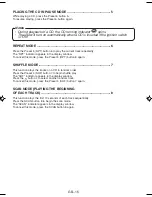
Page 15: ...resumes The CD player continues playing the disc until the BAND ATP button is pressed or the disc is ejected SKIPPING TRACKS 4 Press the TUN TRK button 4 to skip to the beginning of the next track Press the TUN TRK button 4 to skip to the beginning of the track currently playing Press the TUN TRK button 4 twice to skip to the beginning of the previous track Press and hold the TUN TRK or button 4 f...

Page 16: ... window To cancel this mode press the Preset 5 RPT button 6 again SHUFFLE MODE 7 This function plays the tracks on a CD in random order Press the Preset 4 SHF button 7 to begin shuffle play The SHF indicator appears in the display window Press the button 4 to select another random track To cancel this mode press the Preset 4 SHF button 7 again SCAN MODE PLAYING THE BEGINNING OF EACH TRACK 8 This f...

Page 17: ...D IN PAUSE MODE 2 While playing a CD press the Pause button 2 to place the changer in the pause mode To resume playing press the Pause button 2 again SELECTING A DISC 3 4 Press the DISC button 3 to select the next disc Press the DISC button 4 to select the preceding disc SKIPPING TRACKS 5 Press the TUN TRK button to skip to the beginning of the next track Press the TUN TRK button to skip to the be...

Page 18: ...ds SHF and ap pears in the display window The system selects a disc at random and plays all tracks on that disc When all tracks have been played the next disc is selected and Shuffle play is repeated To cancel the track shuffle or disc shuffle mode press the SHF button 7 again The system will remain in this mode until it is cancelled SCAN MODE PLAYING THE BEGINNING OF TRACKS OR DISCS 8 This functi...

Page 19: ...rly Mechanical problem Eject and re insert CD ERROR MECK ERR ERROR SIGNS CD changer If a problem should occur while operating the CD changer one of the following error signs may be dis played Refer to the table below to identify the problem then take the suggested corrective action If the error persists or MECA ERR and 09 ERROR appears contact your nearest dealer No magazine No disc Up side down C...

Page 20: ...sc or the player If this occurs wait for the road surface to improve before using the CD player Safety For safer driving keep the volume at a moderate level to enable you to hear outside sounds such as emergency vehicle sirens Cleaning the unit Clean the unit with a soft dry cloth Stains should be removed by wiping the surfaces with a soft cloth immersed in lukewarm water and wrung dry Never use s...

Page 21: ...een affected by electrical noise The road surface is rough The unit is not mounted se curely The disc is defective The disc is dirty The antenna cable is not con nected The signal are weak Turn up the volume control Check the 12V and ground connections Switch the ignition to the ON or ACC position Replace the fuse with another 10A fuse Eject the disc then insert it again Wait for the road surface ...

Page 22: ...f Sleeve 1 and Screws 1 1 Removable Trim Ring Unlock Levers 1 2 INSTALLATION 1 BEFORE INSTALLATION When mounting the unit in a car keep the unit as level as possible If the unit must be mounted at an angle due to the design of the vehicle make sure the unit does not tilt by more than 30 max 30 ...

Page 23: ...nugly in the cutout 3 Attaching the Mounting Strap to the underside of the dash board using screw Attach the back of the unit to the Mounting Strap using support stem bolt and hardware UNIT REMOVAL 1 Insert the unlock levers into the slots on each side of the unit until they click into place 2 Pull the levers to remove the unit Notes Handle the unlock levers carefully to avoid injuring your finger...

Page 24: ...Connect each speaker wire directly to each speaker terminal All speaker common wires must remain floating 1 Antenna socket Insert the plug from the antenna installed in your vehicle into this socket If your vehicle has a dual antenna system a dual antenna to single antenna cable adaptor may be required 2 12V Constant Power Supply Yellow Connect this wire to the 12V power terminal which receives po...

Page 25: ... the new 10 amp fuse LINE OUT CONNECTIONS The unit has a built in CD changer controller and line out terminals You can use a compatible Sanyo CD changer and a separate rear channel amplifier to upgrade your system White Left Red Right RCA Line out Jacks External Amplifier Rear Speaker CD Changer CD Changer DIN Socket CD Changer DIN Socket Connect the 8 pin DIN cable which is supplied with the comp...

Page 26: ...SANYO Electric Co Ltd Printed in Singapore Issue date 08 02 288F0630 ...

Reviews: