background image

Do not use in hot and cold rooms (locations)

!

When the unit is used in rooms (locations) with low temperature, the picture may 
leave trails or appear slightly delayed. This is not a malfunction, and the unit will 
recover when the temperature returns to normal.

!

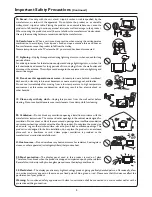
Do not leave the unit in a hot or cold location. Also, do not leave the unit in a location 
exposed to direct sunlight or near a heater, as this may cause the cabinet to deform 
and the 

 to malfunction.

!

Storage temperature:  0°C to +50°C  

!

Working temperature: 5°C to +40°C 

screen

About Temperature

About After-Image

The extended use of fixed image program material can cause a permanent 


on the screen.

This background image is viewable on normal programs in the form of a stationary fixed 
image. This type of irreversible screen deterioration can be limited by observing the 
following steps:

A. Reduce the brightness/contrast setting to a minimum viewing level.

B. Do not display the fixed image for extended periods of time.

C. Turn the power off when not in actual use.

Important Information Regarding Use of Video Games, Computers, 
Captions or Other Fixed Image Displays.

after-image

!

Do not allow a still picture to be displayed for an extended period, as this can cause a 

permanent after-image to remain on the screen.

Examples of still pictures include logos, video games, computer images, teletext and 

images displayed in 4:3 mode.

CAUTIONS:

!

The permanent after-image on the screen resulting from fixed image use is not an 

operating defect and as such is not covered by the warranty.

!

This product is not designed to display fixed images for extended periods of time.

Cleaning and 
Maintenance

To clean this unit, wipe with a soft, dry cloth.
If the surfaces are extremely dirty, use a soft cloth dipped in a soap and water solution or 
a weak detergent solution.

!
!
!

Use eyeglass cleaner to remove stubborn dirt from the screen.
Never use alcohol, paint thinner or benzine to clean this unit.
Before using a chemically treated cloth, read the instructions that came with the 

cloth carefully.

Important Notice

3

Summary of Contents for LCD-47XR8DA

Page 1: ...INSTRUCTION MANUAL LCD 47XR8DA LCD TV Before connecting operating or adjusting this product please read the manual completely Please keep this manual for future reference ...

Page 2: ...nections 9 Basic Operations 13 Memorizing the Channels 15 Channel and Program Selection 19 Timer Setup 26 EPG Operation 28 Teletext Subtitle Specifications 34 Picture Adjustment 20 Sound Adjustment 21 System Setup 23 Rating and Lock Setup 24 29 Screen setup for D SUB PC Mode 30 Hotel Mode Setup 31 Troubleshooting 32 ...

Page 3: ...et and disconnect the cable system 9 Entering of objects and liquids Never insert an object into the product through vents or openings High voltages are present in the product and inserting an object can cause electric shock and or short internal parts For the same reason do not spill water or liquid on the product 10 Servicing Refer all servicing to qualified service personnel Servicing is requir...

Page 4: ...ich may result in fire electric shock or other hazards 19 Clean only with dry cloth Unplug this product from the wall outlet before cleaning Do not use liquid cleaners or aerosol cleaners Use a damp cloth for cleaning 20 Ventilation Do not block any ventilation openings Install in accordance with the manufacturer instructions The vents and other openings in the cabinet are designed for ventilation...

Page 5: ...play the fixed image for extended periods of time C Turn the power off when not in actual use Important Information Regarding Use of Video Games Computers Captions or Other Fixed Image Displays after image Do not allow a still picture to be displayed for an extended period as this can cause a permanent after image to remain on the screen Examples of still pictures include logos video games compute...

Page 6: ...n a leakage of chemicals and or explosion Be sure to follow the instructions below Place batteries with their terminals corresponding to the and indications Different types of batteries have different characteristics Do not mix batteries of different types Do not mix old and new batteries Mixing old and new batteries can shorten the life of new batteries and or cause old batteries to leak chemical...

Page 7: ...ot fall upon the screen Total darkness or a reflection on the picture screenmay cause eyestrain Softand indirectlightingisrecommended for comfortable viewing Optimum reception of colour requires a good signal and will generally mean that an outdoor antenna must be used The exact typeand positionofthe antenna willdependuponyourparticulararea It is recommended that the 75 ohm coaxial cable be used t...

Page 8: ...ch item 5 MENU Press this button to access Menu main page 6 SOURCE To access input source select menu 7 POWER Press this button to turn the unit ON from STANDBY mode Press it again to turn the set back to STANDBY Functions of CH VOL MENU SOURCE and POWER are also provided to the remote control This operation manual provides a description based on operating functions with the remote control Main Un...

Page 9: ...et Top Box 4 Headphone jack Connect to your headphones 5 AV inputs Video Audio L R Receive video audio signal from external sources such as VCR or DVD player 6 AV outputs Video Audio L R Connect to your VCR to record programs 7 RS232 interface For service use The user cannot operate the unit through this terminal 8 Antenna input Connect to your cable system or outdoor antenna 9 S PDIF digital audi...

Page 10: ...splays input source menu LIST Displays the channel list P MODE Selects picture mode 1 2 3 4 5 6 7 8 9 10 11 12 13 14 15 16 17 18 19 20 21 22 23 24 25 26 27 28 31 Below is teletext control buttons CH Changes channel up and down 8 Colored buttons RED GREEN YELLOW BLUE Direct access to the colored items or corresponding pages Teletext TTX Used to enter or exit teletext mode Teletext Subtitle Displays...

Page 11: ...ls Refer to the operating manual of the external device as well When connecting an external device turn the power off to avoid any issues Cautions before connecting Connections Connecting digital coaxial audio Audio Processor HIFi System OR S PDIF IN Coaxial Coaxial cable For a full Home Theater sound experience you must connect your Hi Fi or Audio processor to the S PDIF OUT Coaxial terminal on t...

Page 12: ...details refer to your camcorder user manual 4 Insert the tape into the camcorder and press Play button Note Connecting an HDMI device HDMI cable Device with HDMI output Connect the HDMI cable between the HDMI1or HDMI2 interface on the unit and HDMI output on the device To play from the device using HDMI How to connect a device using HDMI Connection 1 Turn on your TV then press SOURCE button The In...

Page 13: ...input jacks on the unit and AUDIO output jacks on the device Audio cable Connecting a Computer How to connect 1 Turn on your TV then press SOURCE button The Input Source menu opens 2 Press5or6to select D SUB then press OK to confirm 3 Turn on your computer and adjust the display properties as required To play video from a computer Connect a D Sub cable between the D SUB jack on the computer and th...

Page 14: ...videotape for recording 3 Press the Record button to begin recording To record program Insert the plug of the headphone into the TV s Headphone jack When using headphones adjust the headphone volume so as to avoid excessive levels as hearing damage may result Headphones Only analog TV programs and AV input source can be output through the AV output jacks Connecting Headphones Note S VIDEO VCR for ...

Page 15: ...e Menu Exit OPTION menu LOCK menu CHANNEL menu Tint 0 Picture Sound Time Option Lock Channel Select Move Menu Exit Sound Mode User Treble 50 Bass 50 Auto Volume Balance 0 Spatial Off Off Picture Sound Time Option Lock Channel Select Move Menu Exit Clock 28 Sep 2008 15 30 Off Time On Time Auto Sleep Sleep Timer Time Zone Off VIC GMT 10 Off Off Off Set Password Block Program Parental Guidance No Blo...

Page 16: ...TV Watch the ATV signal AV Watch the signal from the AV input terminals Component 1 Watch the signal from the COMPONENT 1 input terminals Component 2 Watch the signal from the COMPONENT 2 input terminals D SUB Watch the signal from the D SUB input jack HDMI 1 Watch the signal from the HDMI 1 input jack HDMI 2 Watch the signal from the HDMI 2 input jack Select Move DTV AV Component 1 Component 2 D ...

Page 17: ...mory 1 Press MENU and the main menu screen displays And before you start Auto Tuning it is necessary to select a country firstly Then the TV begins memorizing all ATV DTV channels available in your area During the process you can press MENU to skip the search or EXIT to stop Auto Tuning Country Selection Australia Cancel Start 3 Highlight Auto Tuning item and press 4or OK to access 2 Press 3or4to ...

Page 18: ...cture and sound effect use Fine Tune Navigate to ATV Manual Tuning submenu highlight Current CH item press 3or4 to select a channel you want to perform fine tune 1 Press 6 to select Fine Tune item and then use 3or4 button to fine tune until the best possible picture and sound are obtained 2 During the process press EXIT to exit and RED button to save the effect 3 Note Fine Tune is only for analog ...

Page 19: ... NAME 17 Setting Favorite Channels You can set up favorite channels list so that you can quickly browse through your favorite channels by using Favorite button 1 Navigate to the Channel menu press 5or6 to select Programme Edit item press 4 or OK to open the Programme Edit menu 2 Use 6or5 to select your favorite program use AV LIST button to mark the selected program as favorite a favorite symbol a...

Page 20: ...t menu has more than one page you may press5or6 to scroll the page upward or downward To restore a skipped channel navigate to the Programme Edit menu select the channel and press BLUEbutton to cancel the skip symbol Note 2 3 To skip unnecessary channels After auto search you can skip unnecessary channels so that only the channels you want to watch can be selected by CH CH If you want to skip more...

Page 21: ...me seconds or press OK to go directly to that channel When selecting the TV will indicate the channel through the information banner Method 4 Using channel list Press LIST button to display the channel list Use 5or6to select a channel and then press OK button If the channel list has more than one page you may press 5or6 to scroll the page upward or downward Note Method 5 Using favorite channel lis...

Page 22: ...Contrast Brightness Sharpness Adjusts image contrast Color Temperature Adjusts screen brightness for easier viewing of dark picture such as night scenes and black hair Adjusts image sharpness and displays a sharp image Selects one of three automatic color adjustments Sets to Warm to enhance hotter colors such as red or set to Cool to see less intense colors with more blue You can select from Warm ...

Page 23: ... Auto Volume Balance 0 Spatial Off Off Option Description Sound Mode Selectsadesiredsoundmode YoucanselectfromStandard Music Movie SportsandUser Standard Select for normal programs Note To quickly change the sound mode press the S MODE button repeatedly Movie Select for a movie program Sports Select for a sports program Treble Bass Balance Adjusts Bass low sounds Adjusts Treble high sounds Adjusts...

Page 24: ...ing a stereo broadcast press the STEREO button to select Stereo or Mono When Mono is selected the TV sound is output monaurally When the TV set is receiving bilingual program press the STEREO button to select DUAL A or DUAL B Bilingual This enables the selection of the reception mode when receiving an IGR signal To let you enjoy IGR broadcasting this TV set receives IGR system stereo and bilingual...

Page 25: ... PDIF You can select Auto or PCM Note To select Auto is recommended Note You should first set this item to On before performing system update function Select Off to turn off the function Hearing Impaired Only for digital programs Press 3 4 to select On to display the subtitles if available for the hearing impaired Select Off to turn off the function Note If there is no OTA information detected thi...

Page 26: ...sword is 0000 2 The Password setup sub menu is used to set a new system password or to change an existing system password By default the system password is 0000 and you may change it To access Parental Guidance to lock or unlock channels to view locked channels etc the system password is required To create a new password Use the number buttons to input a new password 4 digit 5 Input the new passwo...

Page 27: ...is such that parents may not want their children to view the program M Mature Audience Suitable for mature audience MA Mature Adult Audience May contain mature themes profane language graphic violence and sexual situations AV Adult Audience Strong violence R Restricted viewing Not for children under age 17 Strong elements of sex and or violence Picture Sound Time Option Lock Channel Select Move Me...

Page 28: ...me Press 5or6 to select Hour or Minute item and press 3or4to adjust the value 4 Option Description Volume Mode Program Number Sets desired volume for the On program Selects one source to be viewed through On timer Selects a broadcasting program for On timer After setting On Timer you can press 5 6 3or4to navigate through the following three options and adjust the options 5 When finished use 5or6 t...

Page 29: ...menu press 6 to access Press 3or4to select On or Off Press 5or6 to select Auto Sleep item 2 When there is no signal input for a certain time the unit will turn off automatically You may directly press SLEEP button on the remote control to set sleep timer After you have set sleep timer when the last 30 seconds have come up the Power Off screen will appear to remind you after how many seconds the TV...

Page 30: ...ELLOW button again to exit Use 5 6 3or4to navigate among the channels and program events and press INFO button to get more detailed information if available about the programme you choose If you want to switch between TV and Radio programmes please press TV Radio 2 3 Opereation Press OK to tune to the channel you have selected To clear the EPG window press EXIT button or EPG button Note The EPG wi...

Page 31: ...n sub pages which are automatically displayed successively This button is used to stop or resume sub page acquisition Reveal button Press the button to reveal the concealed information such as games solutions Press the button again to hide the information Size button Press this button several times to display the upper then the lower part of the screen and then return to the normal size teletext p...

Page 32: ...adjust an option To confirm press OK Press MENU and the main menu screen displays 2 5 Vertical Position Moves the image on the screen up or down Press MENU to return to previous menu Press EXIT to exit the menu screen directly 3 Within the menu press 5 or 6 to scroll through the page upward or downward until you select the Screen item then press 4or OK to access Press 3or4to select the Picture men...

Page 33: ...o select On to lock the Channel menu and Lock Tuning item in Lock menu Select Off to release Press 3 4 to select On to lock the input source of the unit to AV Select Off to return to normal operation Press 3 4 to select On or Off When the Panel Lock is set to On buttons on the control panel on the main unit are not active To restore please set it to Off Note When the item is set to On the Channel ...

Page 34: ...ges Make sure the power cord is plugged in Press POWER on the TV or on the remote control Try another channel it could be station trouble Select a proper picture mode Adjust the brightness in the video setting Check the antenna connections Adjust the color saturation in the video setting Check the antenna connections Try another channel it could be station trouble Adjustthe antenna Movethe TVawayf...

Page 35: ...act and may be accompanied by a slight creaking noise This is not a malfunction Control buttons do not operate Disconnect the power cord and wait for a few seconds Then re plug the power cord and turn on the unit again If your problem is not solved turn your unit off and then on again Never attempt to repair a defective TV yourself Cautions Note Some settings such as volume setting etc may not be ...

Page 36: ...y AC100 240V 50 60Hz Power Consumption 300W Dimensions mm 1362 W x 791 H x 271 D Unit Weight kg 35 Specifications Design and specifications are subject to change without notice Note 34 TV System Analogue CCIR PAL B G NTSC AV Digital DVB T 2K 8K OFDM ...

Page 37: ...5944033680 Ver 1 0 ...

Reviews: