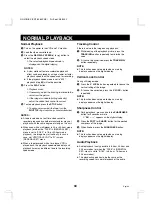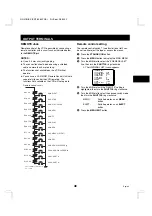
NORMAL PLAYBACK
Normal Playback
1
Turn on the power to the VCR and TV monitor.
2
Load the video cassette tape.
3
Press the REC/PLAY SPEED
l
(or
j
) button to
select the playback speed mode.
ø
The selected playback speed mode is
displayed on the digital display.
NOTES:
œ
A slow motion effect or accelerated playback
effect can be achieved by using a slower or faster
playback speed than the speed used for recording.
œ
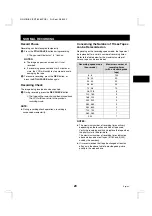
If the playback speed mode is set to “000”,
playback (step
4
) will not be possible.
4
Press the PLAY button.
ø
Playback starts.
ø
If necessary, adjust the tracking to eliminate the
noise from the picture.
ø
If the image is unstable (rolling vertically),
adjust the vertical lock control to correct.
5
To stop playback, press the STOP button.
ø
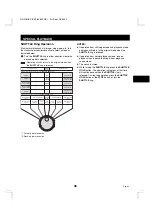
To advance (or rewind) the tape, turn the
SHUTTLE ring clockwise (or counterclockwise).
NOTES:
œ
A tape recorded on a real time video cassette
recorder produced by another manufacturer may not
play back with the same degree of clarity on this unit.
œ
When used with a multiplexer in 24- or 40-hour mode
playback (or when the “TAPE” in (GENERAL SET)
menu is set to “E-180”, in 18- or 30-hour mode
playback), the image may roll vertically. In such a
case, set “VERTICAL SYNC” to “N” in menu
(GENERAL SET) menu.
œ
When a tape recorded with a time lapse VCR is
played back, the playback speed mode display and
playback time may be different due to the recording
speed mode.
Tracking Control
If there is noise in the image during playback,
1
While looking at the playback picture, press the
T button repeatedly to minimize the
noise.
2
If it cannot be minimized, press the TRACKING–
button repeatedly.
NOTE:
œ
This function does not operate when a warning
display appears on the digital display.
Vertical Lock Control
During still image mode,
1
Press the V. LOCK+ button repeatedly to reduce the
vertical rolling of the image.
2
If it cannot be corrected, press the V. LOCK– button
repeatedly.
NOTE:
œ
This function does not operate when a warning
display appears on the digital display.
Sharpness Control
1
During playback, press and hold the SHARPNESS
button for 3 seconds or more.
ø
“
SH@-:-
” appears on the digital display.
2
Press the SOFT (or SHARP) button for the desired
sharpness of the image.
3
When finished, press the SHARPNESS button.
NOTE:
œ
This function does not operate when a warning
display appears on the digital display.
Audio Playback
œ
Audio playback is only possible in 8-hour, 24-hour and
40-hour modes (or when the “TAPE” in (GENERAL
SET) menu is set to “E-180”, in 6-hour, 18-hour and
30-hour modes).
œ
The playback speed has to be the same as the
recording speed, for normal playback of the audio.
RQ4QR/EX (SRT-8960P GB) Fri. Sept., 06/2002
34
English

