English
9
Using the Control Panel
(“admin” only)
A
For cameras without panning and tilting functions
1
2
3
4
5
6
7
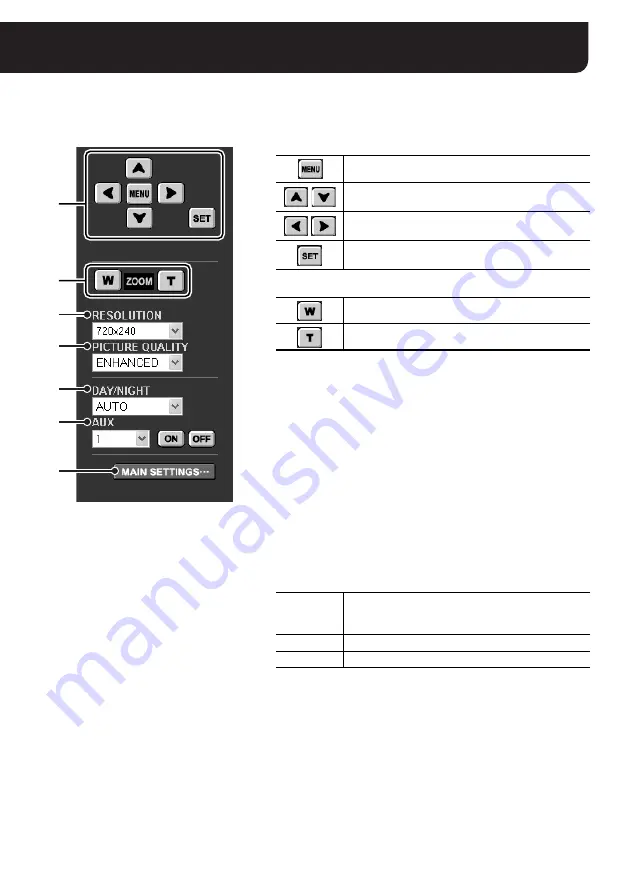
Control Panel
1
Camera configuration buttons (See page 21)
Used for changing the camera settings.
2
[ZOOM] buttons
3
RESOLUTION
Specifies the video resolution at four levels.
Note:
When either [AUDIO INPUT] and/or [AUDIO OUTPUT] are
configured to “ON” on the [AUDIO SETTINS] screen,
[RESOLUTION] cannot be configured to 640 x 480.
4
PICTURE QUALITY
Specifies the video quality at five levels.
Note:
If [PRE/POST] is set at other than “0%/100%” on the [IMAGE
TRANSFER SETTINGS] screen, the values of [RESOLUTION] and
[PICTURE QUALITY] cannot be changed.
5
DAY/NIGHT (only for the cameras with this function)
Allows you to change the DAY/NIGHT switching conditions
configured using the camera menu.
6
AUX
These buttons are reserved for additional functions.
The function corresponding to the number selected in the pull-down
menu will be performed. The function allocated to respective
numbers depends on the camera models.
7
[MAIN SETTINGS] button (See page 12)
Displays the menu buttons for an administrative user (“admin”).
Displays the configuration menu.
Moves the cursor up/down in the configuration
menu.
Moves the cursor to the left/right in the
configuration menu or changes the setting value.
Switches to the next screen or confirms the
settings specified.
Zooms the camera out.
Zooms the camera in.
AUTO
Switches the video display automatically between
color and black-and-white depending on daytime or
nighttime brightness.
COLOR
Always displays the color video image.
B/W
Always displays the black-and-white video image.


