background image

PRECAUTIONS

In case of problem

Do not use the camera if smoke or a strange odour comes from the
unit, or if it seems not to function correctly. Disconnect the power
cord immediately, and consult your dealer (or a Sanyo Authorized
Service Centre).

Do not open or modify

Do not open the cabinet, as it may be dangerous and cause
damage to the unit. For internal settings and repairs, consult your
dealer (or a Sanyo Authorized Service Centre).

Do not put objects inside the unit

Make sure that no metal objects or flammable substance get inside
the camera. If used with a foreign object inside, it could cause a
fire, short-circuits or damages.

If water or a liquid gets inside the camera, disconnect the power
cord immediately, and consult your dealer (or a Sanyo Authorized
Service Centre). Be careful to protect the camera from rain, sea
water, etc.

Be careful when handling the unit

To prevent damages, do not drop the camera or subject it to strong
shock or vibration.

Install away from electric or magnetic fields

If installed close to a TV, radio transmitter, magnet, electric motor,
transformer, or audio speakers the magnetic field they generate will
distort the image.

Protect from humidity and dust

To prevent damage to the camera, do not install it where there is
greasy smoke or steam, where the dampness may get too high, or
where there is a lot of dust.

Protect from high temperatures

Do not install close to stoves, or other heat generating devices, such
as spotlights, etc., or where it could be subject to direct sunlight, as
that could cause deformation, discoloration or other damage.

Be careful when installing close to the ceiling, in a kitchen or boiler
room, as the temperature may rise to high levels.

Install where the temperature range will stay between –10° C and
50° C. (no condensation)

Cleaning

Dirt can be removed from the housing by wiping it with a soft cloth. To
remove stains, wipe with a soft cloth moistened with a soft detergent
solution and wrung dry, then wipe dry with a dry soft cloth.

Do not use benzine, thinners or other chemical products on the
housing, as they may cause deformation and paint peeling. Before
using a chemical cloth, make sure to read all accompanying
instructions. Make sure that no plastic or rubber material comes in
contact with the housing for a long period of time, as that may
cause damage or paint peeling.

Mounting Surface

The mounting surface material must be strong enough to secure
the camera.

Plaster- board without a backing plate is not recommended.

L5QA2/US,US2, L5QB2/US, US2, L7QA2/US, US2  GB  2002, 4, 24

English

Summary of Contents for VDC-C1074VA

Page 1: ...ILING TYPE VDC C2074VA Color High Resolution VDC C2024V Color Standard VDC M2024V Black White CONTENTS INFORMATION TO USER 1 PRECAUTIONS 2 INSTALLATION 3 ADJUSTMENT 4 5 SPECIFICATIONS 6 INCLUDED ACCESSORY Hexagonal Wrench 1 pc About this manual Before installing and using the camera please read this manual carefully Be sure to keep it handy for later reference L5QA2 US US2 L5QB2 US US2 L7QA2 US US...

Page 2: ...in accordance with the instructions may cause harmful interference to radio communications However there is no guarantee that interference will not occur in a particular installation If this equipment does cause harmful interference to radio or television reception which can be determined by turning the equipment off and on the user is encouraged to try to correct the interference by one or more o...

Page 3: ...midity and dust To prevent damage to the camera do not install it where there is greasy smoke or steam where the dampness may get too high or where there is a lot of dust Protect from high temperatures Do not install close to stoves or other heat generating devices such as spotlights etc or where it could be subject to direct sunlight as that could cause deformation discoloration or other damage B...

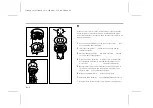
Page 4: ...nd then secure it by tightening the four or more screws G 4 mm diameter screws recommended 5 Determine the lens position in accordance with the location of the objects to be viewed and then tighten it in that position Refer to page 4 for lens adjustment details 6 Align the viewing window H with the lens position 7 Return the dome assembly A to its original position and secure it E Input power wire...

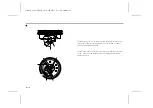
Page 5: ...RIS OFF 120 IRE USER SETTING ON 100 IRE SETTING OFF AGC 26 dB MAXIMUM ON AGC 20 dB MAXIMUM OFF AUTO TRACKING WHITE BALANCE OFF OFF OFF AUTO WHITE BALANCE OFF ON OFF PUSH LOCK OFF ON ON INDOOR 3200 K ON OFF OFF OUTDOOR 6500 K ON ON ON 4200 K ON OFF ON 4700 K ON ON OFF LINE LOCK Use the V R to adjust if the TV monitor synchronization is unsteady LEVEL Use the V R to adjust if the backlight compensat...

Page 6: ...e knob M Focus ring To adjust the focus loosen the focus ring knob turn the focus ring to the side or to the N side to make the adjustment and then tighten the knob Angular Limit Gimbal Bracket Gimbal Bracket INPUT POWER Horizontal Vertical Adjustment Screw Horizontal Vertical Adjustment Adjustment Screws for Camera Rotation Tilt Adjustment Screws Tilt Camera Lens Perpendicular Direction Camera Ro...

Page 7: ...ion ON OFF selectable manually center focus separate photometry method B W cameras ON fixed Backlight compensation iris level adjustment Manual V R Flickerless function ON OFF selectable manually B W cameras None Gain control Selectable manually Built in lens Variable focal lens F2 0 2 8 f 4 8 mm Manual angle of field adjustment function Horizontal pan 360 Vertical tilt 80 Drip prevention structur...

Page 8: ...nce This warranty does not apply to uncrating setup installation removal of the product for repair or reinstallation of the product after repair This warranty does not apply to repairs or replacements necessitated by any cause beyond the control of SFC including but not limited to any malfunction defect or failure caused by or resulting from unauthorized service or parts improper maintenance opera...

Reviews: