– 19 –
1. Shaft cover batt
2. Spring cover batt
3. Comp, cover batt
4. Spacer holder joint
5. Two screws 1.7 x 4
6. Screw 1.7 x 2.5
7. Two screws 1.7 x 3.5
8. Cover joint inner
9. Two screws 1.7 x 3.5
10. Earth joint LCD
11. Pull the LCD from the body.
12. Holder LCD
13. Screw 1.7 x 3.5
14. Holder joint base
15. Two screws 1.7 x 2.5
16. Two screws 1.7 x 3.5
17. Two screws 1.7 x 4.5
18. Cover LCD back
19. Spacer mic2
20. Dec LCD top
21. Four screws 1.7 x 2
22. Earth LCD A
23. Holder joint R
24. Holder joint L
25. Pull the assy joint
from the LCD.
26. Four screws 1.7 x 3
27. Cover LCD inner
28. FPC
29. FPC
30. Four screws 1.7 x 2.5
31. FPC
32. LCD
33. Three screws 1.7 x 2
34. VF1 board
35. Holder LCD
36. Gasket LCD
37. Cover LCD front
38. Assy joint
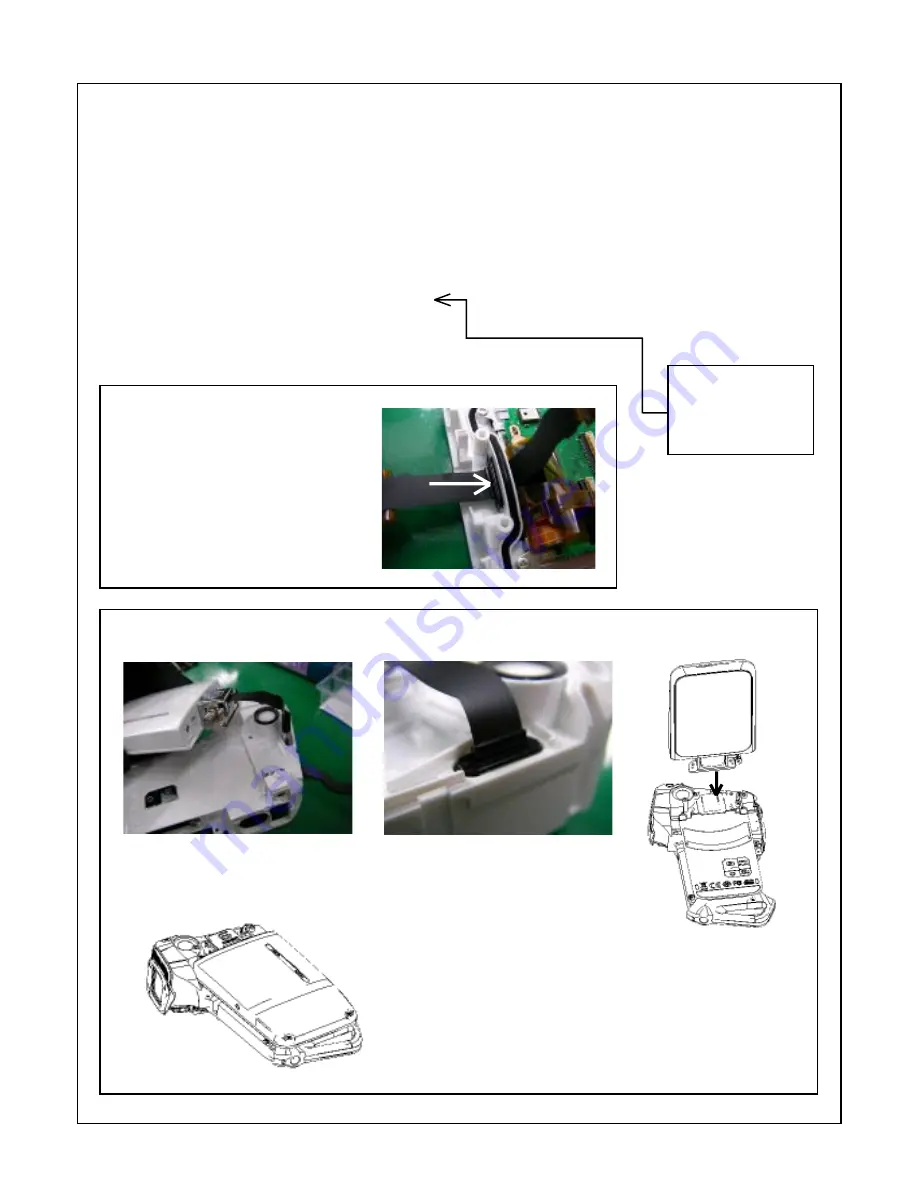
Installing the ASSY JOINT (RUBBER)
to the COVER LCD FRONT (step 28)
Install so that the rubber will not come out.
Installing the LCD to the CABI RIGHT (step 11)
1. Insert the FPC of the LCD into the
CABI RIGHT.
2. Install the rubber of the ASSY JOINT
to the cabinet.
3. Install the LCD joint
to the cabinet.
4. After installing, close the LCD.
When reassembling
The air leak test should
be carried out between
steps 20 and 21.


