– 17 –
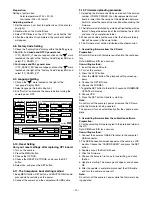
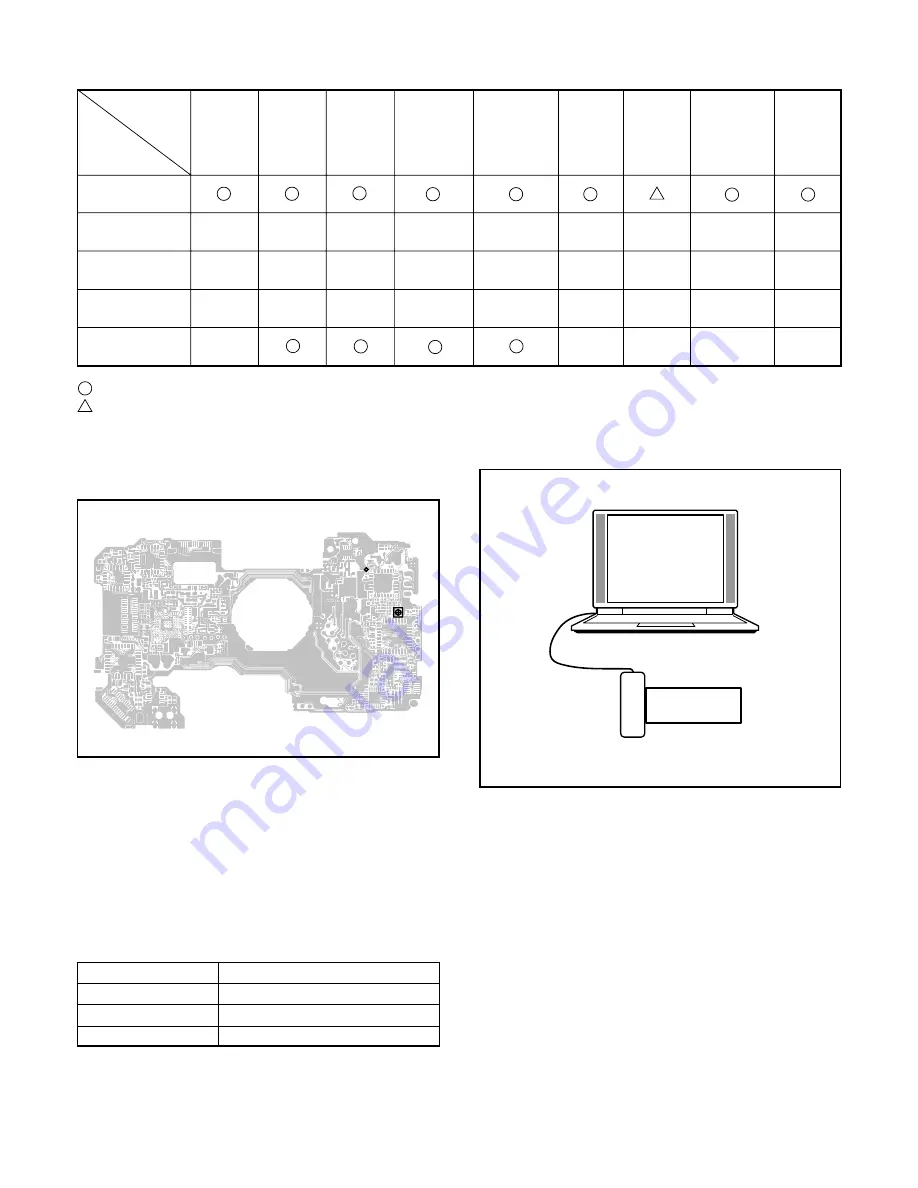
3-7. Adjust Specifications
[CP1 board (Side B)]
Note:
1. Frequency adjustment is necessary to repair in the CP1
board and replace the parts.
Preparation:
1. Remove the cabinet front. You can see VR501 and CL501
in the CP1 board.
2. Insert the SD card.
3. Turn on the power switch, and set the camera mode.
1. IC501 Oscillation Frequency Adjustment
Adjustment method:
1. Adjust with VR501 to 499.5
±
1 kHz.
2. Lens Adjustment
Preparation:
If using a ready-made collimator, set to infinity.
Note:
Do not vibrate during the adjustment.
Adjustment method:
1. Set the camera 0 cm from the collimator. (Do not enter any
light.)
2. Set the camera so that it becomes center of the screen in
the collimator.
3. Double-click on the DscCalDi.exe.
4. Click the Focus, and click the Yes.
5. Lens adjustment value will appear on the screen.
6. Click the OK.
Measuring Point
ADJ. Location
Measuring Equipment
ADJ. Value
CL501
Frequency counter
VR501
499.5
±
1 kHz
Camera
Collimator
VR501
CL501
COMPL PWB CP-1
(636 089 9087)
IC501
Oscillation
Frequency
Adjustment
Lens
Adjustment
AWB
Adjustment
CCD White
Point Defect
Detect
Adjustment
CCD Black
Point And White
Point Defect
Detect
Adjustment In
Lighted
Factory
Cord
Setting
USB storage
information
registration
Language
Setting
COMPL PWB ST-1
(636 089 9100)
COMPL PWB TB-1
(636 089 9117)
COMPL PWB TB-2
(636 089 9124)
LENS ASSY
(645 080 4755)
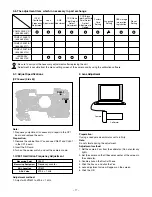
3-6. The adjustment item which in necessary in part exchange
Reset
Setting
: Be sure to carry out the necessary adjustments after replacing the unit.
: Adjustment is possible from the menu setting screen of the camera and by using the calibration software.


