QUICK START FOR CAPTURING IMAGES
Capturing images (see page 56)
Now that preparation is completed, your digital camera is
ready to capture images. Here we will capture still images, but
your digital camera can take sequential shots and even film
video clips.
5
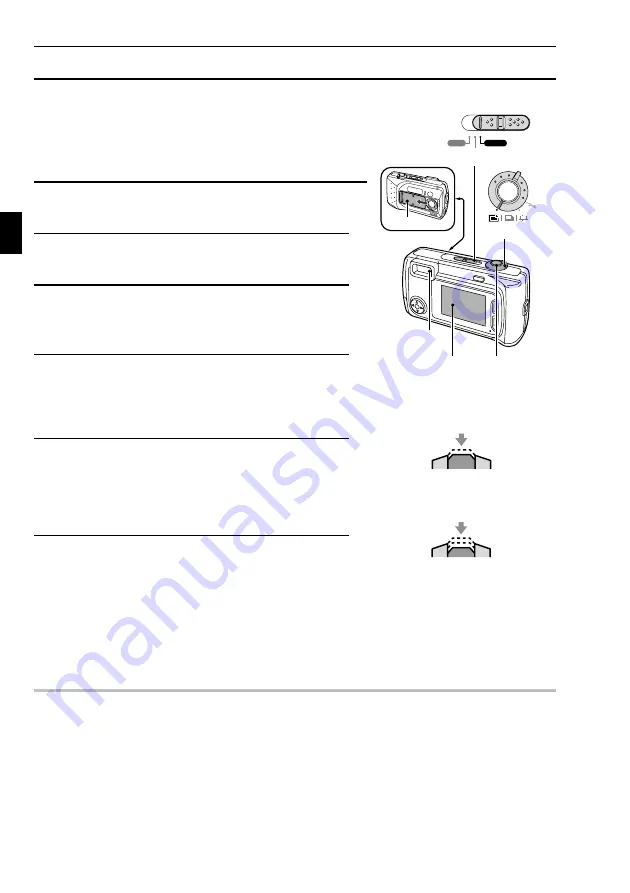
Turn the selector dial to
v
.
6
Set the main switch to “CAMERA.”
7
Open the lens cover.
An image appears in the LCD monitor.
8
Point the camera lens to the subject.
Compose the desired image by looking at the LCD
monitor.
9
Press the shutter release button halfway
(focus-lock).
The autofocus locks on the subject and the image
in the LCD monitor appears clearly.
10
Finish pressing the shutter release button all the
way.
The image is captured.
In the still image shooting mode, you can view the image captured on the LCD monitor by
holding the shutter release button down.
The stand-by indicator will flash in red while the image is being written to the memory.
Another image can only be captured when the stand-by indicator lights green again.
HELP
What if the digital camera turns off by itself
The power save function activated (see page 28). Perform the operations given below
During shooting
: Open and close the lens cover or press the shutter release button.
During playback
: Open and close the lens cover or move the main switch from “PLAY” and
back to “PLAY.”
PLAY
CAMERA
MONITOR OFF
Main switch
Lens cover
Stand-by
indicator
Selector dial
LCD
monitor
Shutter release
button
Push completely
Push halfway
17
English


