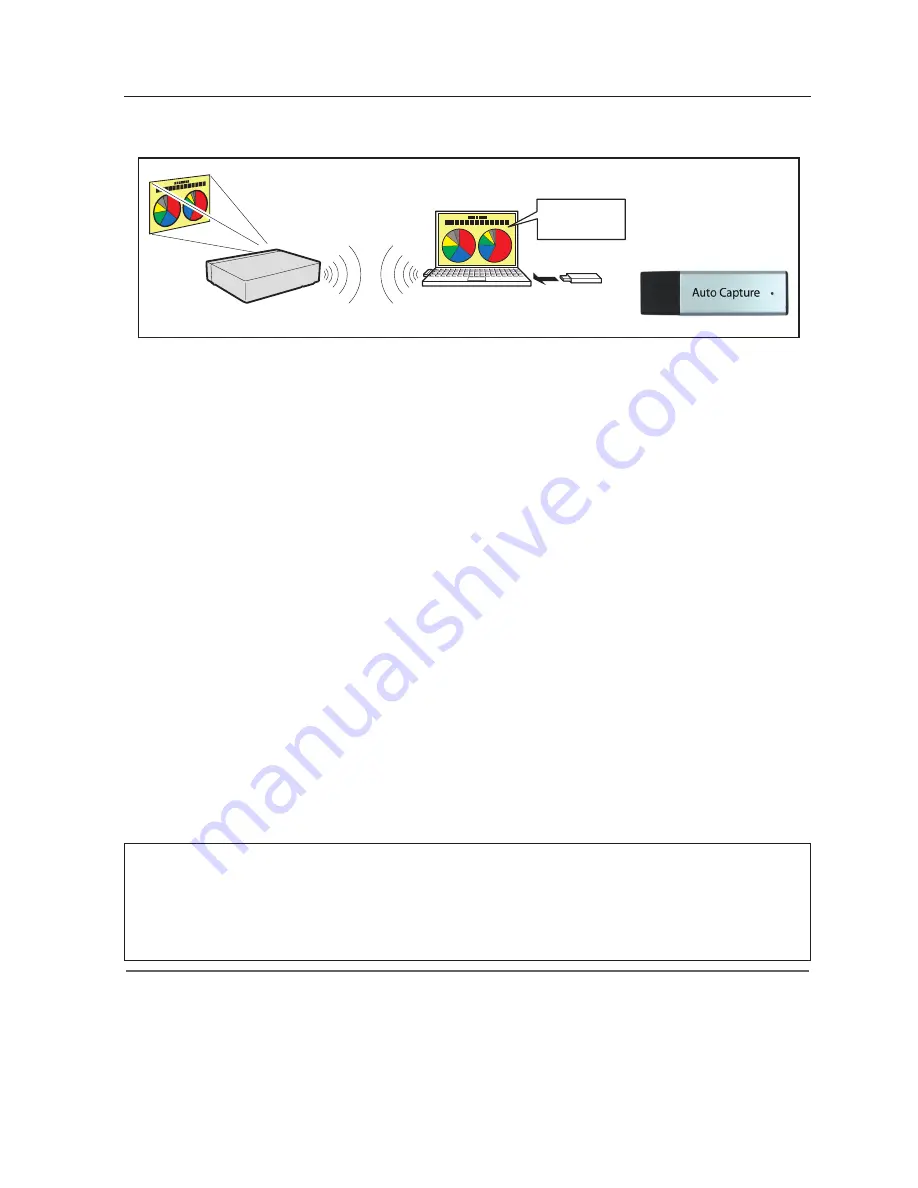
PC1
*
USB memory provides
Auto Capture program.
PC2
Project this screen
image with PJ1.
PJ1
The real time capture function can run automatically on the computer without the Network Viewer
& Capture 5 software installed by executing the Auto Capture program in the USB thumb drive
connected to the computer. The USB thumb drive for Auto Capture is supplied with this projector.
1. Turn on the projector and select “Network” from the Input menu of the projector.
2. Select “LAN mode select” from the "Network" menu of the projector and press
SELECT
button. Select
"Wired 1/2/3" or “Wireless Simple” with the Point
ed
buttons.
(
+
p.41)
3. By connecting the above USB thumb drive, the removable disk window appears. Select "[Network
Capture 5] Open Program using the program provided on the device." and then click
OK
.
4. Automatically, the activated executable file configures the Easy wireless setting. (If the network
adaptor selecting window appears, select an option according to your network environment.) Then,
it searches the projector, and starts the real time capture of the computer screen.
5. If the auto-run program does not start automatically, double-click "WinAutoCap5" in the USB thumb
drive. (The auto-run program works only with Windows XP and Windows Vista.)
*The connection process of AutoCapture is different according to the equipped LAN adapter..
In case of only the wired LAN adapter is provided in the computer:
Connect to the network with the wired LAN adapter and search a projector.
In case of only the wireless LAN adapter is provided in the computer:
Change the LAN setting of the computer to SIMPLE and search a projector with the wireless LAN adapter.
In case of both the wired and wireless LAN adapters are provided in the computer:
When "Usually set it to a network adapter to use" is not checked; the network selection window is displayed.
6. For the following operations, refer to Page 92.
Using the real time capture
[4] Control by the computer with USB memory
✐
If the error message appears, check item "Parameter set up" (
+
p.90).
✐
When your computer provides multiple network adaptors, and "Select normal network adaptor" on the parameter
setup window is un-checked, the network adaptor selecting window (
+
p.26) will appear.
✐
When plural projectors are found, the real-time capture will not start, but will become standby status. Release the
wireless LAN SIMPLE setting of the projector which is not for the real-time capture.
✐
When the software of Network Capture 5 is not installed in the computer, the sound data is not transferred. If you
want to transfer the sound data, install the software beforehand.
✐
If the specified files are copied in the root of commercial USB memory, you can also perform the AutoCapture.
* Start capturing of
the PC1.
Setting condition for automatically starting the real time capture function
Projector:
Power: On, Input mode: Network, LAN mode select: Wired 1/2/3 or Wireless Simple
The searching result becomes only one projector.
Computer PC1:
Log in by Administrative
The wireless LAN card or the wired LAN card: Provided, Network Capture 5 software: NIL
Activate WinAutoCap5 in USB thumb drive
Summary of Contents for WXU700 - WXGA LCD Projector
Page 16: ...16 Chapter 1 About LAN functions ...
Page 64: ...64 Chapter 6 Basic setting and operation ...
Page 112: ...112 Chapter 8 Network capture functions ...
Page 132: ...132 Chapter 9 Network Viewer functions ...
Page 136: ...136 Chapter 10 Network Projector Windows Vista ...
Page 154: ...SO WIN KY7AC NETWORK OWNER S MANUAL FOR WINDOWS SANYO Electric Co Ltd ...


