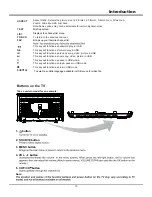


Using your TV
14
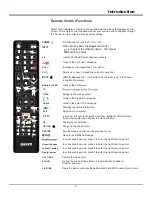
Accessing channels
Using the
numeric
buttons
:
press the corresponding
numeric buttons on the remote control to access the
channels.
Using the
buttons
:
press the
buttons on
the remote control or the corresponding buttons on the
TV set to scroll through the channels.
Using the
LIST
buttons
:
press the
LIST
buttons on
the remote control to display the channel list and press
Ÿź
/ and
OK
to select channels.
Watching connected devices
Press
H O M E
o r
I n p u t
on the remote control.
Press
Ÿź
/ to select your desired
source, and then press
OK
Volume
Volume control
: press the
VOL +/-
buttons on the
remote control or the corresponding buttons on the TV
set to increase or decrease the volume.
Sound mute
: press the
button to temporatily mute
the sound. Press this button again or the
vol +
button
to restore the sound.
CH /
CH /
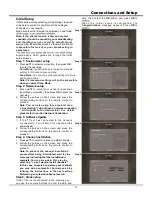
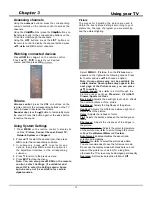
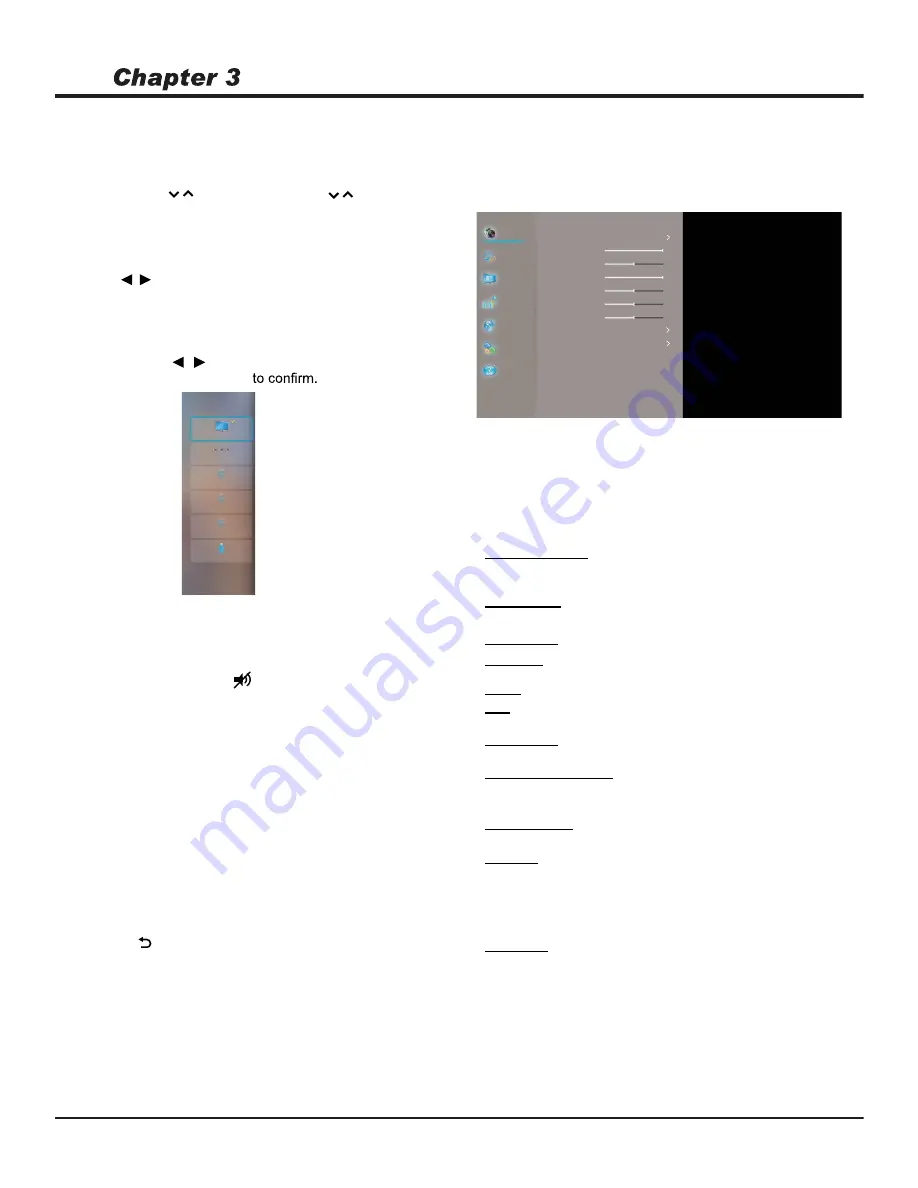
Using System Settings
1. Press
MENU
on the remote control to display its
options:
Picture, Sound, Channel, Smart TV,
Network, System
and
Support
.
Picture preset
2. Press
Ÿź
to select the desired item, then press
OK
to enter the corresponding submenu.
3. In submenus, press
Ÿź
to select menu
options, then press
OK
to enter the option list,
the adjustment interface, or the corresponding
submenu.
4. Press to return to the previous menu.
5. Press
EXIT
to close the menu.
Note: You can also press M E N U on the remote
control, select Settings (if available) and
press OK to enter the Settings menu. Some
options may not be available for certain
signal sources.
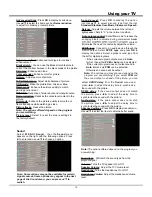
Picture
The menus for adjusting the picture are used to
obtain the best picture settings according to your
preference, the type of program you are watching
and the ambient lighting.
Select
MENU > Picture
, then the
Picture
menu
appears on the right with the following options. Press
ŹWRHQWHUDQGXVHŸźWRFKRRVHDQRSWLRQ
Note: Some options may not be available for
certain modes. Some options may appear in the
next page of the Picture menu, you can press
ŸźWRVZLWFK
:
Use
ŻŹ
to scroll through the
picture preset settings:
Standard, Vivid,Soft
Cinema, Sports
and
User.
Brightness:
Adjusts the brightness of the picture.
Contrast:
Adjusts the difference between light and
dark areas of the picture.
Color :
Adjusts the richness of color.
Sharpness:
Adjusts the crispness of the edges in
the picture.
Tint:
Adjusts the balance between the red and green
levels.
Colour temperature:
Adjusts the colour temperature
of the picture. Use
ŻŹ
to scroll through the colour
settings:
Cool,Normal,Warm
and
Custom.
Back Light:
adjusts the backlight level which affects
the overall brilliance of the picture.
Overscan:
Set Overscan function to
Auto format:
Enables/disables the aspect ratio
selection automatically.
Aspect:
8VHŻŹWRVHOHFWWKHSLFWXUHVL]H1RWH
You are recommended to use the full screen mode.
Do not use the display mode with black bars on both
sides of the picture (such as 4:3) for a long time,
otherwise the TV screen may be damaged permanently.
On
or
Off
.
Source
TV
AV
HDMI1
HDMI2
HDMI3
USB
Picture preset
Backlight
100
100
50
50
50
50
Normal
Brightness
Contrast
Color
Tint
Sharpness
Color temperature
Overscan
Advanced settings
Picture reset
Standard
Picture
Sound
Channel
Smart TV
Network
System
Support
On
...
...


