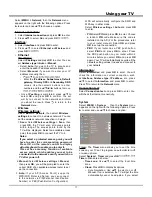
background image

Using your TV

17

Select 

MENU  >  Network

,  then  the 

Network 

menu 

appears on the right with the following options. Press 

Ź

 to enter and use 

Ÿź

 to choose an option.

Internet connection:

1.  Select 

Internet connection

 and press 

OK

 to enter.

2. 

3UHVVŸź

 to select 

On

 and press 

OK

Interface:

1.  Select 

Interface

 and press 

OK

 to enter.

2.   Press 

Ÿź

  to  select 

Ethernet  or  Wireless

  and 

press 

OK

•   


Ethernet

    IP settings:

     Select 

IP settings 

and press 

OK

 to enter. You can 

set 

Address type

 to

 Auto

 or 

Manual

.

    •   Select 

Auto 

if  you  want  the TV  to  acquire  and 

enter the needed IP address automatically.

    •   Select 

Manunal 

if  you  want  to  enter  your  IP 

address manually, then:

      - 
      -   

   Enter the 

IP address. Subnet mask, Default 

gateway, Primary DNS

 and 

Secondary DNS 

values.  Use  the  numeric  buttons  to  enter 
numbers and the 

Ÿź

 /   buttons to move 


•   Once

  IP  setting

  is  completed,  press 

Ÿź

  to 

select 

OK

  and  press 

OK

  to  confirm.  The  set 

will  try  to  connect  to  the  network  and  inform 
you  about  the  result.  Press 

  to  return  to  the 

Network

 menu.

•   


Wireless

    Wireless settings:


Select 

MENU  >  Network

,  then  select 

Wireless 

settings

 to connect to a wireless network. You can 

set the wireless network connection in 3 ways:
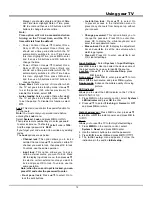
    1.  

 Scan:

  Select 

Wireless  settings  >  Scan

,  then 

press 

OK

,  the  TV  will  scan  all  access  points 

within  range.  The  access  points  found  by  the 
TV will be displayed. Select an available access 
point, then press 

OK

 to connect the TV to it.

Notes:  

     If you select a protected access point, you will 

have  to  enter  the  corresponding  password. 
Press  OK  on  the  remote  control  to  display 
virtual keyboard to enable you to enter it.


This  set  has  a  memory  function  of  available 
access  points,  which  enables  your  set  to  be 
connected to the network even if you switch on 
TV after power off.

    2.  

 Manual:

Select 

Wireless  settings  >  Manual

then press 

OK

, you will be prompted to enter the 

correct SSID of an available wireless router to set 
up the connection. 

    3.  

 A u t o :

I f   y o u r   A P ( A c c e s s   P o i n t )   s u p p o r t s 

WPS(WiFi  Protected  Setup),  you  can  connect 
to  the  network  via  PIN(Personal  Identification 
Number)  or  PBC(Push  Button  Configuration). 

WPS  will  automatically  configure  the  SSID  and 
WPA key in either mode.

       Select 

Wireless  settings  > Auto

  and  press 

OK


to enter.

      •   

PIN

: Select 

PIN

 and press 

OK

 to enter. Choose 

a  random 

PIN

  code.  Make  sure  this  code  is 

installed on the AP. (For the procedures, refer 
to  your  router  manual.)  Select 

OK

  and  press 

OK

 to set up the connection.

      •   

PBC

:  If  your  router  has  a  PBC  push  button, 

select 

PBC

  and  press 

OK

  to  enter.  Press 

the  PBC  push  button  on  your  router  within  2 
minutes  before  you  select 

OK

  and  press 

OK 

again. Your TV will automatically acquire all the 
network setting values it needs and connect to 
your network.

Information:

Select 

Information 

and  press 

OK

  to  enter. You  will 

check  the  information  on  current  connection,  such 
as 

Interface, Address  type,  IP  address

,  etc.,  press 

Ÿź

  to  select 

Information

  and  press 

OK

  to  enter. 

Press   to return to the 

Network

 menu.


Connection test:

Select 

Connection  test 

and  press 

OK

  to  enter. You 

will check the Internet connectivity.
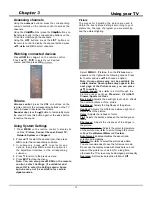
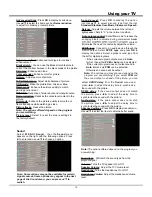
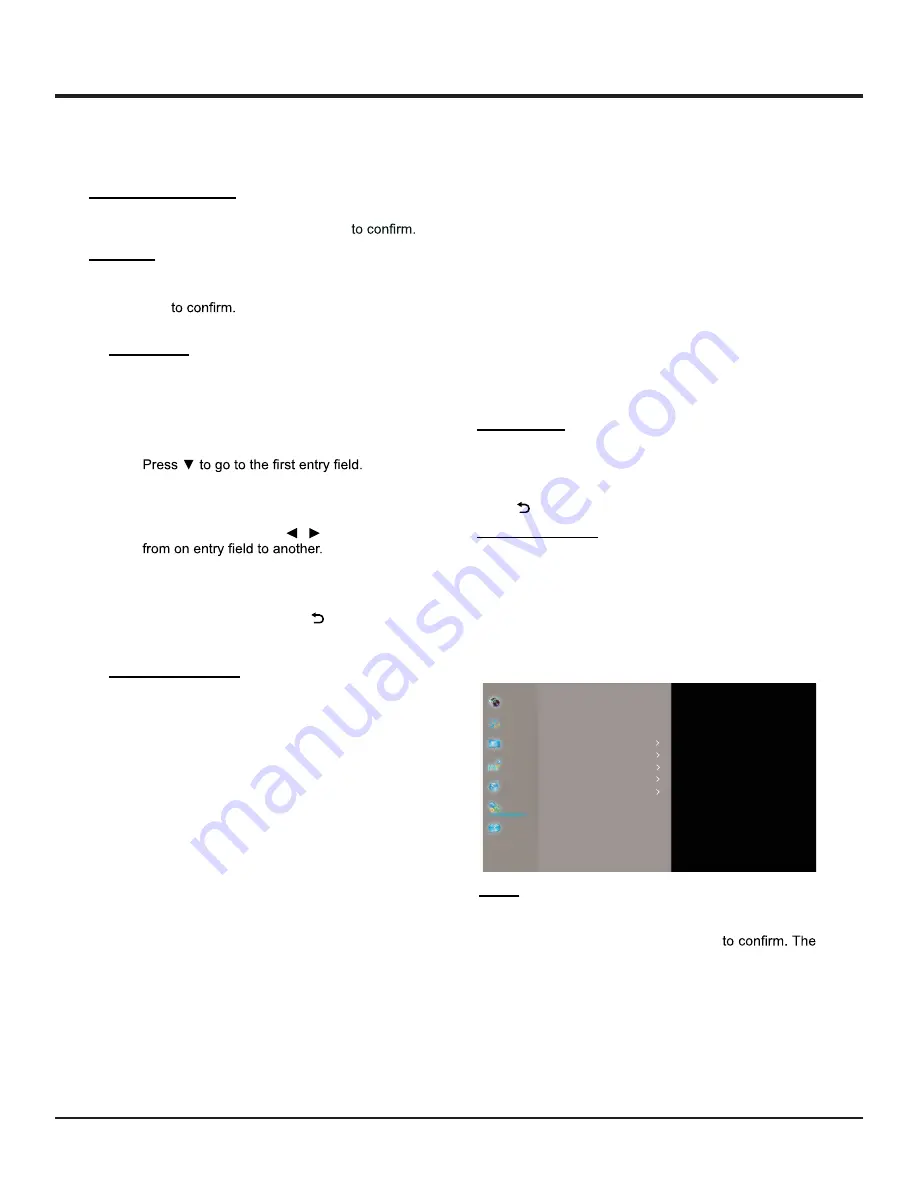
System

Select 

MENU  >  System

,  then  the 

System

  menu 

appears on the right with the following options. Press 

Ź

WRHQWHUDQGXVHŸźWRFKRRVHDQRSWLRQ
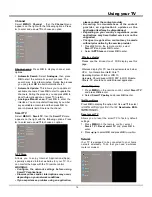
Timer:

  The 

Timer

  menu  allows  you  to  set  the  time 

zone on your TV set, to program an automatic turn-off 
or wake-up timer .   
Select 

System > Timer

 and press 

OK

Timer

 options are as below:

    •   

Time  zone:

  Use 

Ÿź


to  select  the  local  time 

zone.

    • 

Clock:

 Press 

OK

 to display its options:

      •   Synchronization:  Use 

Ÿź

  to  select on  or off 

Manual. If on is selected, the TV will get the time 
automatically cannot  be  adjusted.  If  you  select   

Picture

Sound

Channel

Smart TV

Network

System

Support

Input settings

Location

Auto source

Sports mode

LED Indicator

Instant power on

Reset

Timer

Lock

...

...

...

...

Home

On

Off

Normal

Off

Summary of Contents for XT-43S8100FS

Page 1: ...re detailed Electronic Copy of this Manual or much further contents go to product page at our website www sanyoappliance in Thank you for purchasing this Sanyo product Please read these instructions carefully before operating this Product and retain them for future reference The images shown in this manual are for illustrative purposes only ...

Page 2: ...nel Troubleshooting Safety Precautions 22 23 Specifications Table of Contents ATTENTION This product is qualified for the BEE Star rating in the Home Mode The Objectives of Star Labeling Program is designed to promote energy efficient products and practices When the television is initially set up it is designed to meet the BEE Star Labeling requirements while maintaining optimum picture quality Ch...

Page 3: ...duct according to the method recommended by the manufacturer This is a safety feature When mounting the product on a wall or ceiling be sure to install the product according to the method recommended by the manufacturer This is a safety feature 3 Introduction 110 240 V 50 60 Hz Sanyo service center Sanyo service center ...

Page 4: ...hat the wall can support the weight of the TV set and wall mount assembly Follow the mounting instructions provided with the wall mount The TV set must be installed on a vertical wall Make sure to use only screws suitable for the material of the wall Make sure that the TV set cables are placed so that there is no danger of tripping over them All other safety instructions about our TV sets are also...

Page 5: ...5x20 43 49 class 12 mm 400mm 200mm M6 12 Standard accessories Optional accessories Sanyo service center Sanyo service center Sanyo XT 43S8100FS XT 49S8100FS FULL HD LED TV E mail helpline sanyoappliance in Need help Please Call at Toll Free No 1800 419 5088 To obtain a more detailed Electronic Copy of this Manual or much further contents go to product page at our website www sanyoappliance in Than...

Page 6: ...LDO DQG WKH FRUUHFW WHUPLQDWLQJ plug are required If a communal aerial system is used you may require the correct connection cable and plug between the wall aerial socket and the TV Your Sanyo Service Centre or dealer may be able to assist you in obtaining the correct aerial system for your particular area and the accessories required Any matters regarding aerial installation upgrading of existing...

Page 7: ...ng connected Keep the TV away from electronic equipment video equipment etc or equipment with an infrared sensor Otherwise distortion of image sound may occur or operation of other equipment may be interfered R L VIDEO HDMI SOUND OUT 2 Note If your device has an HDMI connection we recommend you use that to get the best quality possible If the external device has a DVI output only use a DVI to HDMI...

Page 8: ...e only in TV mode AUDIO OUT Cable are often color coded to connectors Connect red to red white to white TV Introduction HEADPHONE Rear of the TV Recorder Player Rear of the TV External Equipment HEADPHONE Headphone cable R L AUDIO OUT SPDIF cable ...

Page 9: ...ff Exit the menu and return to the previous menu Goes to the browser homepage HOME Goes to the smart TV homepage Exits the menu system Brings up the menu system up down left and right direction buttons Highlights different items in the menu system and adjusts the menu controls Confirms your selection Brings up the option menu numeric buttons Enters channel numbers Goes to the YouTube homepage when...

Page 10: ...de This key will function as play pause in USB mode This key will function as stop in USB mode This key will function as backward play in USB This key will function as forward play in USB This key will function as previous song video picture in USB This key will function as next song video picture in USB Displays the channel list menu Not Supported To select a subtitle language available in USB so...

Page 11: ...t must not be connected to a DC supply If the plug is detached from the cable do not under any circumstances connect it to a mains socket as there is a risk of electric shock The location of the power socket of the television might differ depend on the model 3 Connect an outside aerial to the ANTENNA CABLE IN socket at the back of the TV set The aerial socket 75 OHM VHF UHF cable can be used for N...

Page 12: ... Service Provider Connecting to a wired network To connect to a wired network 1 Ensure you have An ethernet cable long enough to reach your TV A router or modem with an available Ethernet port A high speed internet connection An Ethernet LAN port on the back of the TV 2 Connect your ethernet cable to the router and to the Ethernet port on the back of the TV 3 Use the Network Settings Connecting to...

Page 13: ...section Network Connection Step 3 Software Update 1 If the TV set has connected to the network successfully it will search for upgrade files automatically 2 Follow the guides on the screen and press the corresponding buttons on the remote control to proceed Step 4 Channel installation 1 3UHVV Ÿ ź WR VHOHFW RQWLQXH WR LQVWDOO FKDQQHOV 2 Follow the guides on the screen and press the corresponding bu...

Page 14: ...or adjusting the picture are used to obtain the best picture settings according to your preference the type of program you are watching and the ambient lighting Select MENU Picture then the Picture menu appears on the right with the following options Press Ź WR HQWHU DQG XVH Ÿ źWR FKRRVH DQ RSWLRQ Note Some options may not be available for certain modes Some options may appear in the next page of ...

Page 15: ...tadium User Music Cinema and Speech Auto volume control Select On mode to reduce the annoying blasts in volume during commercial breaks Eliminates the need to constantly adjust the volume SPDIF type Connect to an audio device through the SPDIF output Select SPDIF type and press OK to content display the options Select a proper sound type from the list for digital programs If the current program ou...

Page 16: ... process you can press OK to abort Automatic update or press to return Analogue Manual scan Press OK to enter the interface You can input start frequency by number keys avaliable on remote and then press OK to search press to Fine tune the chanel Ż Ź Picture Sound Channel Smart TV Network System Support Picture Sound Channel Smart TV Network System Support Channel scan Internet connection Smart TV...

Page 17: ...ress OK you will be prompted to enter the correct SSID of an available wireless router to set up the connection 3 Auto If your AP Access Point supports WPS WiFi Protected Setup you can connect to the network via PIN Personal Identification Number or PBC Push Button Configuration WPS will automatically configure the SSID and WPA key in either mode Select Wireless settings Auto and press OK to enter...

Page 18: ... lock To unlock use the same operation Input lock This option allows you to lock a certain external source you want to lock Press OK to display Input lock menu then press Ÿ ź to select a certain external source you want to lock and press OK to lock To unlock use the same operation Note when the current input is locked you can press OK and enter the password to enter Front panel lock Press Ÿ ź to s...

Page 19: ...sic content available Dailymotion Press this icon to enter into Dailymotion application This will allows you to enjoy the variety of online video s Note Changes in application may be made without prior notice to the customer MENU Support then the Support menu appears with the following options Press Ź to enter and use Ÿ ź to choose an option Software update Select System Software update press OK t...

Page 20: ...r Right direction button to select your desired file and press OK to Play 3 The Play console includes Fast Backward Previous Play Pause Next Fast forward Repeat and List icons Use Left Right key of remote to navigate on the Play console 4 Press Return key of remote to Stop playing 1 Under the following conditions this system cannot decode the file and the file cannot be play normally The parameter...

Page 21: ... 264 1080P 30fps 62 5Mbps Main ProĮůe High ProĮůe Level4 2 MP4 mp4 mov AVI avi MKV mkv VC1 1080P 30fps 40Mbps Advanced ProĮle Level3 Simple ProĮle Main ProĮůe MPEG program stream MPG MPEG AVI avi MKV mkv Audio Audio codec Sample rate Channel Bit Rate Container MPEG1 2 Layer1 16KHz 48KHz Up to 2 32Kbps 448Kbps Music MP3 mp3 MPEG1 2 Layer2 16KHz 48KHz Up to 2 8Kbps 384Kbps Music MP3 mp3 MPEG1 2 Laye...

Page 22: ...e may happen Normal picture no sound It is usually caused by local interference such as cars daylight lamps and hair driers Adjust the antenna to minimize the interference Unorderly ripples on the picture Perhaps the TV can not recognize the resolution set by the PC Suggest to change to the best resolution or other standard resolutions of the Windows system Blank screen when connected computer sys...

Page 23: ...or x 3 RJ45 x 1 Aerial connector x 1 USB 2 0 TYPE A Connector x 2 DC 5 V MAX 500 mA HEADPHONE LAN USB ANTENNA HEADPHONE x 1 16 W 8 W 8 W VIDEO RCA PIN Type x 1 RCA PIN Type x 2 AUDIO L R PAL B G D K I NTSC AV HDMI connector x 3 RJ45 x 1 Aerial connector x 1 USB 2 0 TYPE A Connector x 2 DC 5 V MAX 500 mA HEADPHONE x 1 XT 43S8100FS XT 49S8100FS Specifications 123 2 cm 0 5 W 0 5 W 2 073 600 1920 W x ...

Reviews: