Page 7 of 9
7
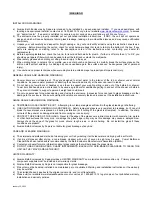
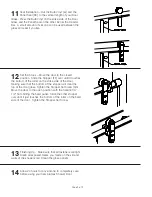
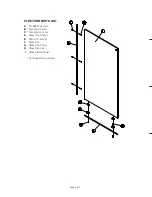
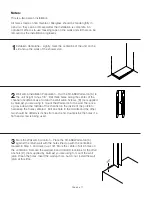
Door Panel – Mount the roller assemblies to the Door Panel
[P], making sure that the Roller Back Plate [Q], the Back Plate
Sleeve [R] and the Back Plate Gasket [S] are to the outside. The
Back Plate Gasket has the large holes. Place a Mid Plate Gasket
[T] and the Mid Plate [U] on the inside of the glass and secure
the Roller Plate [V] to the entire assembly with the Roller Screws
[W]. Set aside the Anti-Jump [X] piece and Anti-Jump Screws [Y]
until after the door has been mounted to the header Bar. Install
your handle option at this time. Place the Door Glass inside the
shower enclosure with the Rollers facing out and the handle so that
it is on the side of the enclosure that the door will strike against.
CAUTION:
Make sure that you set the Door Glass on something
so that the glass and/or the floor of the enclosure are not damaged.
Cardboard packing material works fine.
8
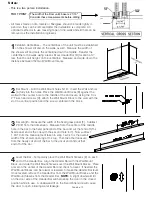
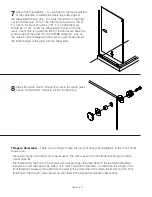
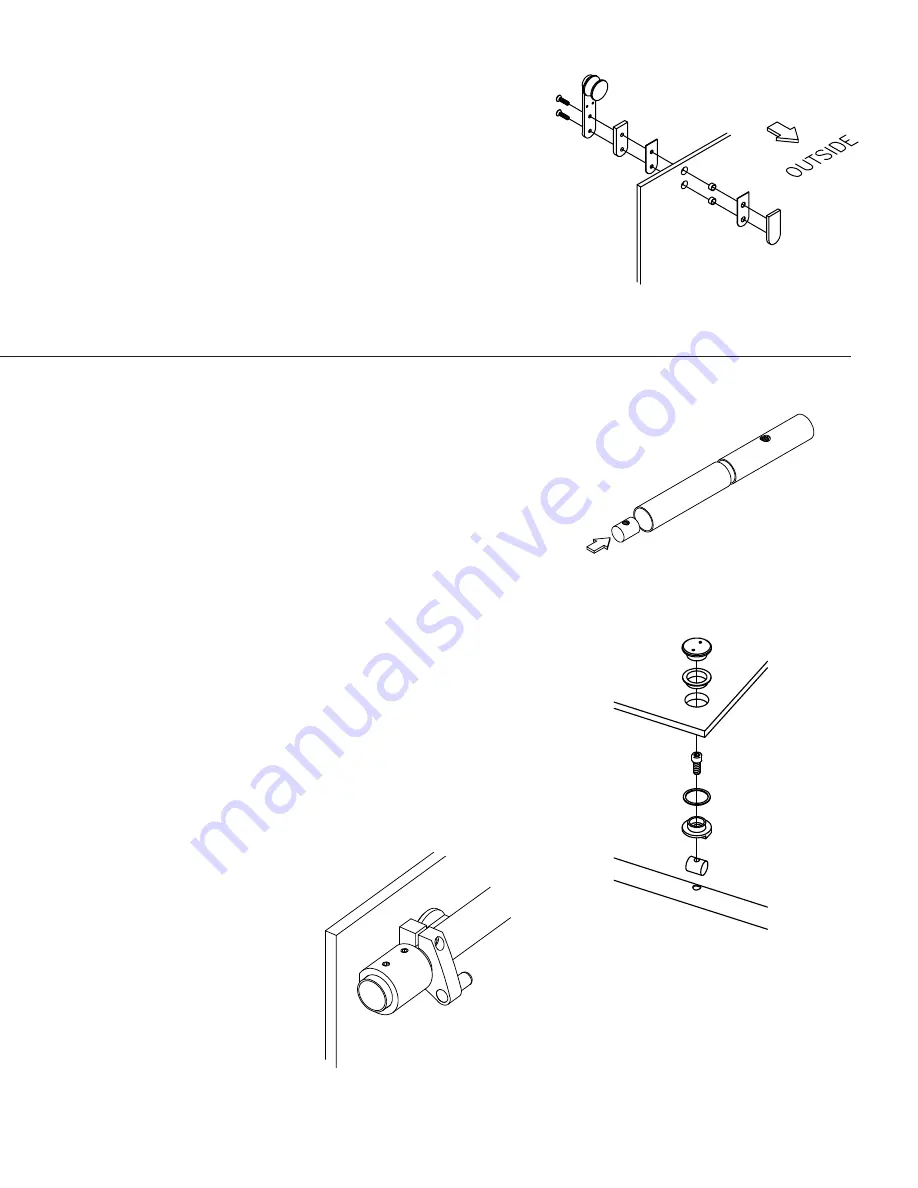
Load the Bar – Place the Fixed Panel [F] on a flat surface with
the mounting holes hanging off the edge, and the inside of the
panel facing down. Place the Header Bar [D] on the Fixed Panel
with the holes facing up. Using a thin rod, or straightened wire
coat hanger, push the Glass Mount Threaded Rods [Z] into the end
of the Header Bar and line one up with each hole in the bar. Put
a 5/16” x 3/4” Socket Cap Screw [AA] through the Glass Mount
[BB] and snug it down into a rod inside the Header Bar
(DO NOT
TIGHTEN)
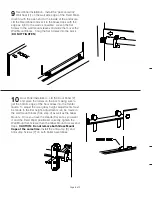
. Place a Glass Mount Washer [CC] on top of the Glass
Mount. Repeat for the other hole. Place a Glass Mount Bushing
[DD] on each of the Glass Mount Caps [EE]. Move the Header
Bar below the glass panel and Line the middle hole of the bar
up with the hole located 1 1/2” from the edge of the Fixed Panel.
Thread the Wall Mount Caps onto the Wall Mounts until Snug
(DO
NOT TIGHTEN)
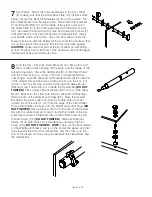
Place a Stopper [FF] on both ends of the Header
Bar with the rubber bumper on each facing the middle of the bar
(oriented as shown). Slide them toward the middle and snug the
Stopper Screw [CC] (
DO NOT TIGHTEN
). Slide a Wall Mount
Sleeve [E] on both ends of the Header Bar, and snug one Set
Screw [HH] (
DO NOT TIGHTEN
).
NOTE
: There are two flat surfaces
on the Wall Mount Sleeve, one is on the end of the sleeve and that
goes towards the end of the Header Bar, and the other is on the
side of the sleeve and that one goes between the Fixed Glass and
the Header Bar.


