background image


http://www.sapido.com.tw/                                                                                                User Manual 1.0 


73 

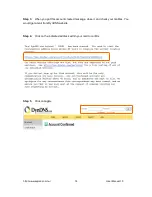
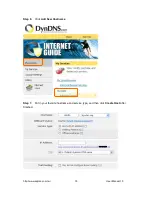
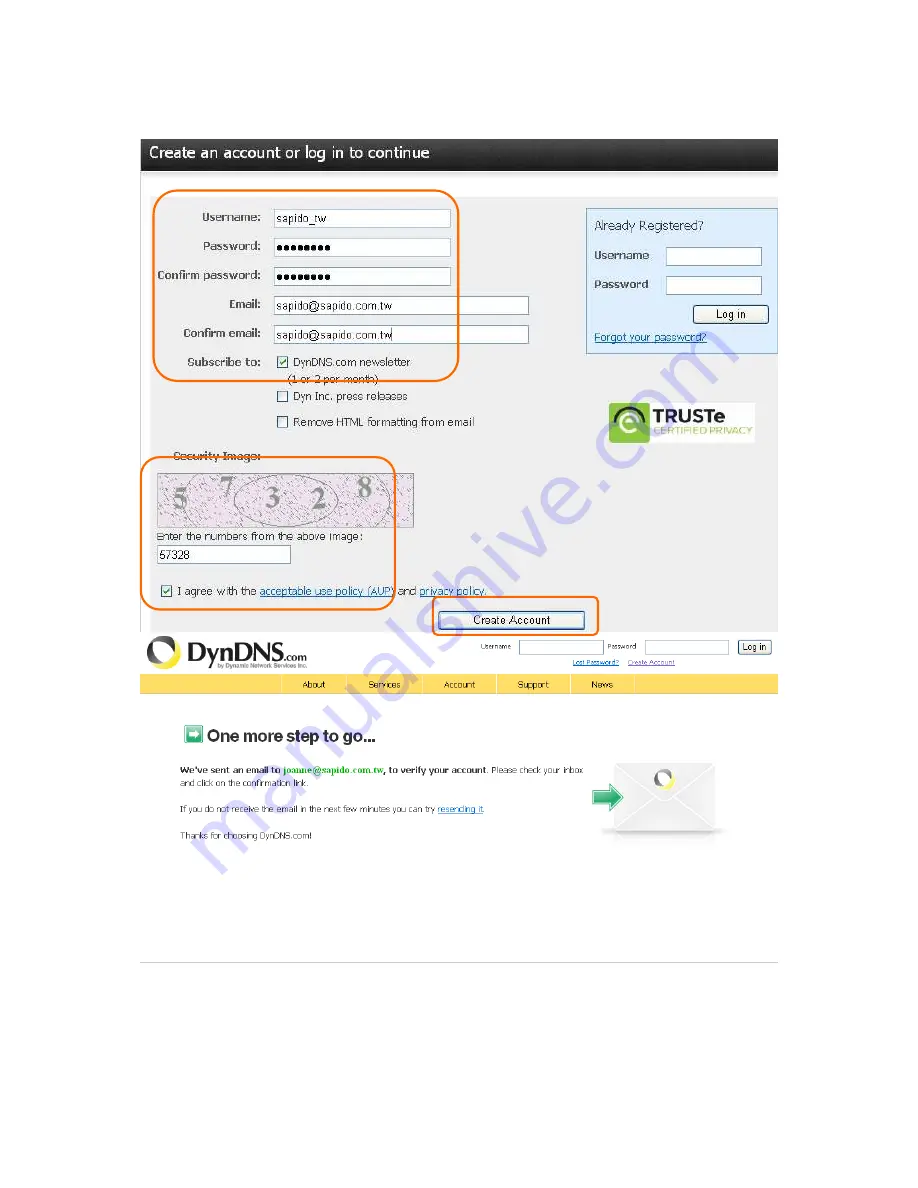
Step 2.  Fill in the form as required, and then click on Create Account button. 


Summary of Contents for RB-1632

Page 1: ...http www sapido com tw User Manual 1 0 1 ...

Page 2: ...to an outlet on a circuit different from that to which the receiver is connected Consult the dealer or an experienced radio TV technician for help FCC Caution 1 The device complies with Part 15 of the FCC rules Operation is subject to the following conditions 2 This device may not cause harmful interference and this device must accept any interference received including interference that may cause...

Page 3: ...entre of Ny Ålesund Russian Federation none Only for indoor applications Note Please don t use the product outdoors in France CE Statement of Conformity Our product has been tested in typical configuration by Ecom Sertech Corp and was found to comply with the essential requirement of Council Directive on the Approximation of the Laws of the Member Sates relating to Electromagnetic Compatibility 89...

Page 4: ...er s instructions for adjusting the backrest to fit your body properly An adjustable chair that provides firm comfortable support is best Adjust the height of the chair so your thighs are horizontal and your feet flat on the floor The back of the chair should support your lower back lumbar region ...

Page 5: ...98 ME 14 2 3 2 Windows 2000 15 2 3 3 Windows XP 15 2 3 4 Windows Vista Windows 7 17 2 4 Router IP Address Lookup 18 2 4 1 Connect the Router s management Interface by Web Browser 19 Chapter 3 Internet Connection 21 3 1 Plug and Play 21 3 2 Router Mode Using as a broadband router 21 3 2 1 WAN Interface Ethernet Port 22 3 2 1 1 Static IP 22 3 2 1 2 DHCP Client 24 3 2 1 3 PPPoE 25 3 2 1 4 PPTP 26 3 2...

Page 6: ...tering 49 5 2 4 URL Filtering 50 Chapter 6 Advanced Setup 51 6 1 Dynamic DNS Setting Router 52 6 2 Wireless Advanced Setup 52 6 2 1 WDS Settings 54 6 2 2 WPS 59 6 3 System Management Router AP WiFi AP 60 6 3 1 Change Password 61 6 3 2 Upgrade Firmware 61 6 3 3 Profile Save 62 6 3 4 Time Zone Setting 66 6 3 5 UPnP Setting 67 6 4 Log Status 68 6 4 1 Network Config 68 6 4 2 Event Log 69 6 5 Logout 71...

Page 7: ...http www sapido com tw User Manual 1 0 7 8 8 Others 86 8 9 USB Device 86 Chapter 9 Appendices 87 9 1 Operating Systems 87 9 2 Browsers 87 9 3 Communications Regulation Information 87 ...

Page 8: ...quired RB 1632 saves up to 80 energy consumption than legacy 802 11n products without compromise performance 1 2 Features With latest Green WLAN technology no more setting or push button required to save up to 80 energy without compromise performance 3G USB external modem support Compact credit card sized Plug and Play yet feature rich design Auto WAN type detection brings the most convenience dur...

Page 9: ...Filter URL Filter SPI DoS Protection IP Packet Filter Operation Requirement Operating Temp 0 C 40 C 32 F 104 F Storage Temp 20 C 70 C 14 F 158 F Operating Humidity 10 to 85 Non Condensing Storage Humidity 5 to 90 Non Condensing Peak Gain of the Antenna 2dBi 2 45GHz Transmitted Power Typical 802 11b 19 2dBm normal temp rang e 802 11g 16 2dBm normal temp rang e 802 11n 20MHz 40MHz 14 2dBm normal tem...

Page 10: ...0 seconds When status indicator turns from flashing to solid the process is completed All settings are back to default Ethernet Port 2 RJ 45 Ethernet 10 100 Ports 1 3 2 LED Indicator Status Description Status LED Indicator Solid Flashing STATUS Operation OK Green Reset Firmware updates in progress WAN LAN Ethernet connected Transmitting Data LAN Ethernet connected Transmitting Data WIRELESS WPS Op...

Page 11: ... card CP IP and at least one web browser software installed E g Internet Explorer 5 0 Netscape Navigator 7 x Apple Safari 2 03 or higher version At lease one 802 11g 54Mbps or one 802 11b 11Mbps wireless adapter for wireless mobile clients Recommended OS Win2000 or WinXP Linux 2 1 Build Network Connection Administrator can manage the settings for WAN LAN Wireless Network NTP password User Accounts...

Page 12: ...d you want to make the wireless LAN communication 2 1 3 Wi Fi AP Mode Switch to AP mode if a router is already set at the hotel or the house and you want to make the wireless LAN communication Switch to WiFi AP Mode If you want to connect to the internet wirelessly through PC and game device without wireless LAN function equipped ...

Page 13: ... or Network Termination Unit 2 3 Network setup After the network connection is built the next step what you should do is setup the router with proper network parameters so it can work properly in your network environment Before you connect to the wireless router and start configuration procedures your computer must be able to get an IP address from the wireless router automatically use dynamic IP ...

Page 14: ...o to section 2 3 3 Windows Vista please go to section 2 3 4 2 3 1 Windows 95 98 ME 1 Click Start button it should be located at lower left corner of your computer then click control panel Double click Network icon and Network window will appear Select TCP IP then click Properties 2 Select Obtain an IP address from a DHCP server and then click OK ...

Page 15: ...window will appear Select Internet Protocol TCP IP then click Properties 1 Select Obtain an IP address automatically and Obtain DNS server address automatically then click OK 2 3 3 Windows XP 1 Click Start button it should be located at lower left corner of your computer then click control panel Double click Network and Internet Connections icon click Network Connections then double click Local Ar...

Page 16: ...http www sapido com tw User Manual 1 0 16 2 Select Obtain an IP address automatically and Obtain DNS server address automatically then click OK ...

Page 17: ...ntrol panel Click View Network Status and Tasks and then click Manage Network Connections Right click Local Area Network then select Properties Local Area Connection Properties window will appear select Internet Protocol Version 4 TCP IPv4 and then click Properties 2 Select Obtain an IP address automatically and Obtain DNS server address automatically then click OK ...

Page 18: ... IP address setup was completed please clicks start run at the bottom lower corner of your desktop Input cmd and then click OK Input ipconfig then press Enter key Please check the IP address followed by Default Gateway In this example the gateway IP address of router is 192 168 1 1 ...

Page 19: ... 2 4 1 Connect the Router s management Interface by Web Browser After your computer obtained an IP address from wireless router please start your web browser and input the IP address of the wireless router in address bar and the following message should be shown Please click admin to login the RB 1632 Notes The default IP of the wireless router is 192 168 1 1 Enter the User name and Password in to...

Page 20: ...http www sapido com tw User Manual 1 0 20 ...

Page 21: ...Play The RB 1632 supports three types of Internet connection method 3G 3 5G modem card wire or wireless connection via xDSL Cable modem Just connect the 3G 3 5G modem card or Ethernet cable to RB 1632 the router will recognize it automatically 3 2 Router Mode Using as a broadband router Shift the router to router mode before get into the setting menu Setp 1 Open a Web browser and enter http 192 16...

Page 22: ... that you contract with the provider The RB 1632 provides five selections for the WAN access type Static IP DHCP Client PPPoE PPTP L2TP Check with your ISP if you don t know the WAN type 3 2 1 1 Static IP Select WAN under the IP Config menu and choose Ethernet Port for the WAN Interface Its associated setting will show up ...

Page 23: ...bnet Mask address Default Gateway Input ISP Default Gateway Address DNS Input DNS information which is provided by your ISP Clone Mac Address Some ISPs require MAC address registration In this case enter the MAC address registered to the provider to Clone MAC Address Apply Change Reset Click on Apply Change to save the setting date or you may click on Reset to clear all the input data ...

Page 24: ...ISP DNS Select Attain DNS Automatically Or select Set DNS Manually if you want to specify the DNS and enter the DNS provided by your ISP in DNS 1 2 3 Clone Mac Address Some ISPs require MAC address registration In this case enter the MAC address registered to the provider to Clone MAC Address Apply Change Reset Click on Apply Change to save the setting date or you may click on Reset to clear all t...

Page 25: ...PPoE Item Description WAN Access Type Select PPPoE User Name Input your user name provided by your ISP If you don t know please check with your ISP Password Input the password provided by your ISP Service Name Input the service name provided by your ISP ...

Page 26: ...DNS Manually if you want to specify the DNS and enter the DNS provided by your ISP in DNS 1 2 3 Clone Mac Address Some ISPs require MAC address registration In this case enter the MAC address registered to the provider to Clone MAC Address Apply Change Reset Click on Apply Change to save the setting date or you may click on Reset to clear all the input data 3 2 1 4 PPTP ...

Page 27: ... don t know please check with your ISP User Name Input PPTP account provided by your ISP Password Input the password provided by your ISP DNS Select Attain DNS Automatically Or select Set DNS Manually if you want to specify the DNS and enter the DNS provided by your ISP in DNS 1 2 3 Clone Mac Address Some ISPs require MAC address registration In this case enter ...

Page 28: ... to Clone MAC Address Apply Change Reset Click on Apply Change to save the setting date or you may click on Reset to clear all the input data 3 2 1 5 L2TP Item Description WAN Access Type Select PPTP Server IP Address Host Input your server IP address or Host Name provided by your ISP ...

Page 29: ... and enter the DNS provided by your ISP in DNS 1 2 3 Clone Mac Address Some ISPs require MAC address registration In this case enter the MAC address registered to the provider to Clone MAC Address Apply Change Reset Click on Apply Change to save the setting date or you may click on Reset to clear all the input data 3 2 2 WAN Interface 3 5G USB dongle Setp 1 Select WAN under the IP Config menu and ...

Page 30: ...er Name supplied by the provider Password Enter the password supplied by the provider Phone Number Enter the subscribing access point s phone number Always Dial on demand If your 3G USB adapter is a pay as you go plan base select Dial on demand and disconnect the connection when you don t use the internet Apply Change Click Finish to complete the setting Setp 2 Rebooting this product is started Pl...

Page 31: ...ttp www sapido com tw User Manual 1 0 31 3 2 3 WAN Interface Wireless Setp 1 Select WAN under the IP Config menu and choose 3 5G usb dongle for the WAN Interface Its associated setting will show as below ...

Page 32: ...een power off power on condition When this product is used as an access point the IP address has to be changed The default IP under AP mode is 192 168 1 254 Setp 1 Open a Web browser and enter http 192 168 1 254 Default Gateway into the blank Setp 2 Enter the User name and Password in to the blank and then Click Login The default values for User Name and Password are admin all in lowercase letters...

Page 33: ...CP When enable DHCP server you can set static DHCP to a network device with specified MAC address Device Name Input a name for this router 802 1d Spanning Tree Disable or Enable the 802 1d Spanning Tree Protocol STP Clone Mac Address Some ISPs require MAC address registration In this case enter the MAC address registered to the provider to Clone MAC Address Apply Change Reset Click on Apply Change...

Page 34: ...http www sapido com tw User Manual 1 0 34 Login to enter ...

Page 35: ...t connection with RB 1632 2 The WLAN adapter is finished installation and plug in your computer laptop There are two ways to setup a wireless LAN between RB 1632 and your wireless adapter A Setup with WPS button if your wireless adapter has a real WPS button Setp 1 Press the WPS button 1 from RB 1632 and wait for Wireless WPS LED light 2 changed into red Setp 2 Press the WPS button 3 from the adap...

Page 36: ...lity Setp 2 Press the WPS button 1 from RB 1632 and wait for Wireless WPS LED light 2 changed into red Setp 3 Back to the WLAN adapter utility and click its PBC button The utility will start searching the destination connection Setp 4 Confirm the information form the Utility ...

Page 37: ... 1 0 37 Setp 5 After completes the WPS setup Please confirm that it can be connected to the Internet 4 1 2 Wireless LAN setup from Web Browser The Wireless Basic Settings include Band Mode SSID Channel Number and other wireless settings ...

Page 38: ...ID Service Set identifier users can define to any or keep as default Channel Width Please select the channel width it has 2 options 20MHZ and 40MHZ Control Sideband Enable this function will control your router use lower or upper channel Channel Number Please select the channel it has Auto 1 2 11 or 13 options Broadband SSID User may choose to enable Broadcast SSID or not Data Rate Please select t...

Page 39: ...give the bottom layer user search Apply Change Reset Click on Apply Change to save the setting date or you may click on Reset to clear all the input data 4 1 2 1 Multiple APs The RB 1632 can register up to 4 SSIDs wireless LAN group It can be used as if there are multiple wireless LAN access points with one product Each SSID could be set with different data rate WMM and access type Item Descriptio...

Page 40: ...act as Station and AP at the same time It can use Station function to connect to a Root AP and use AP function to service all wireless stations within its coverage Example When users enable the Universal Repeater to connect to the upper level device please fill in the upper level device s channel and SSID Click on Apply Changes to save the settings Please disable the DHCP service first Users can u...

Page 41: ...ignificant degradation of data throughput on the wireless link There are five Encryption types supported None WEP WPA TKIP WPA2 AES and WPA2 Mixed Enabling WEP can protect your data from eavesdroppers If you do not need this feature select None to skip the following setting 1 Encryption WEP Key a Set WEP Key This section provides 64bit and 128bit WEP encryptions and two different shared key format...

Page 42: ...b Personal Pre Shared Key Pre Shared Key type is ASCII Code the length is between 8 to 63 characters If the key type is Hex the key length is 64 characters 3 Apply Change Reset Click on Apply Changes to save setting data Or click Reset to reset all the input data 4 3 Wireless Access Control Access Control allows user to block or allow wireless clients to access this router Users can select the acc...

Page 43: ...n and click on Delete Selected button Take the wireless card MAC address 0018F8638A54 as the example 1 Please select Deny Listed in Wireless Access Control Mode first and then fill in the MAC address what you plan to block in the MAC Address field Click Apply Changes to save the setting 2 The MAC address what you set will be displayed on the Current Access Control List ...

Page 44: ...http www sapido com tw User Manual 1 0 44 3 The wireless client will be denied by the wireless router ...

Page 45: ...ess Item Description Enable Port Forwarding Select to enable Port Forwarding service or not IP Address Specify the IP address which receives the incoming packets Protocol Select the protocol type Port Range Enter the port number for example 80 80 or 20 22 Comment Add comments for this port forwarding rule Apply Change Reset Click on Apply Changes to save the setting data Or you may click on Reset ...

Page 46: ...TCP UDP Configuration 5 1 2 DMZ The DMZ feature allows one local user to be exposed to the Internet for special purpose applications like Internet gaming or videoconferencing When enabled this feature opens all ports to a single station and hence renders that system exposed to intrusion from outside The port forwarding feature is more secure because it only opens the ports required by that applica...

Page 47: ...hanges Reset Click on Apply Changes to save the setting data Or you may click on Reset to clear all the input data 5 2 Firewall 5 2 1 Port Filtering When enabled packets are denied access to Internet filtered based on their port address Item Description Enable Port Filtering Select Enable Port Filtering to filter ports Port Range Enter the port number that needs to be filtered ...

Page 48: ...the input data Current Filter Table It will display all ports that are filtering now Delete Selected Delete All Click Delete Selected will delete the selected item Click Delete All will delete all items in this table Reset You can click Reset to cancel Port 80 has been blocked as the following illustrate IP 192 168 1 X Port 80 80 5 2 2 IP Filtering When enabled LAN clients are blocked filtered fro...

Page 49: ... Reset Click on Apply Changes to save the setting data Or you may click on Reset to clear all the input data Current Filter Table It will display all ports that are filtering now Delete Selected Delete All Click Delete Selected will delete the selected item Click Delete All will delete all items in this table Reset You can click Reset to cancel 5 2 3 MAC Filtering When enabled filtering will be ba...

Page 50: ...pply Changes Reset Click on Apply Changes to save the setting data Or you may click on Reset to clear all the input data Current Filter Table It will display all ports that are filtering now Delete Selected Delete All Click Delete Selected will delete the selected item Click Delete All will delete all items in this table Reset You can click Reset to cancel 5 2 4 URL Filtering URL Filtering is used...

Page 51: ... Reset to clear all the input data Current Filter Table It will display all ports that are filtering now Delete Selected Delete All Click Delete Selected will delete the selected item Click Delete All will delete all items in this table Reset You can click Reset to cancel Notes This function will not be in effect when the Virtual Server is enabled Please disable Virtual Server before activate the ...

Page 52: ...After entering click on Apply Changes to save the setting or you may click on Reset to clear all the input data Item Description Enable Disable DDNS Select enable to use DDNS function Each time your IP address to WAN is changed and the information will be updated to DDNS service provider automatically Service Provider Choose correct Service Provider from drop down list here including DynDNS TZO Ch...

Page 53: ... will be fragmentized The allowed range is 256 2346 and default length is 2346 RTS Threshold This value should remain at its default setting of 2347 The range is 0 2347 Should you encounter inconsistent data flow only minor modifications are recommended If a network packet is smaller than the present RTS threshold size the RTS CTS mechanism will not be enabled The router sends Request to Send RTS ...

Page 54: ...o one and transmit it It can reduce the problem when mass packets are transmitting Short GI Users can get better wireless transmission efficiency when they enable this function RF Output Power Users can adjust RF output power to get the best wireless network environment Users can choose from 100 70 50 35 and 15 Apply Changes Reset Click on Apply Changes to save the setting data Or you may click on...

Page 55: ... to setup WDS connections Step 1 Please check the MAC address and Channel number from the upper lever device Step 2 Set the connection mode to AP WDS from Wireless Basic Setting and then select the channel number in this example is 11 Click Apply Changes to save the setting ...

Page 56: ...http www sapido com tw User Manual 1 0 56 Step 3 Enable WDS function from the page WDS Setting and then fill in the upper level device MAC address Click Apply Changes to save the setting data ...

Page 57: ...http www sapido com tw User Manual 1 0 57 Step 4 The WDS AP List will show the WDS device MAC address after reboot Step 5 Set Broadcast SSID to disable from page Wireless Basic Setting ...

Page 58: ...w sapido com tw User Manual 1 0 58 Step 6 Go to the upper level device WDS setting page and fill in the MAC address Step 7 You will receive an IP address from the upper lever device Input the MAC address here ...

Page 59: ...S button at real panel to easy enable the WPS function PIN model in which a PIN has to be taken either from a sticker label or from the web interface of the WPS device This PIN will then be entered in the AP or client WPS device to connect PBC model in which the user simply has to push a button either an actual or a virtual one on both WPS devices to connect Please follow instructions below to ena...

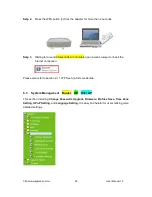
Page 60: ...to 3 minutes open a web browser to check the internet connection Please also refer to section 4 1 1 WPS set up for more details 6 3 System Management Router AP WiFi AP This section including Change Password Upgrade Firmware Profiles Save Time Zone Setting UPnP Setting and Language Setting It is easy and helpful for users making more detailed settings ...

Page 61: ...he router There is certain risk while doing firmware upgrading Firmware upgrade is not recommended unless the significant faulty is found and published on official website If you feel the router has unusual behaviors and is not caused by the ISP and environment You can check the website http www sapido com tw to see if there is any later version of firmware Download the firmware to your computer c...

Page 62: ...r page by forgetting your password or the router has problem you can t solve You can push the reset button for 10 seconds with a stick The router will reboot and all settings will be restored to factory default settings If the problem still exists you can visit our web site to see if there is any firmware for download to solve the problem 6 3 3 Profile Save Users can create a backup file that cont...

Page 63: ...http www sapido com tw User Manual 1 0 63 a Save Configuration 1 Click Save 2 Please click Save to save the configuration to your computer ...

Page 64: ...http www sapido com tw User Manual 1 0 64 3 Select the location which you want to save file then click Save b Load configuration file 1 Click Browser 2 Select configuration file then click Open ...

Page 65: ...ttp www sapido com tw User Manual 1 0 65 3 Click Upload to upload configuration file to RB 1632 4 After 90 seconds RB 1632 will reboot automatically C Reload factory default setting 1 Please click Reset ...

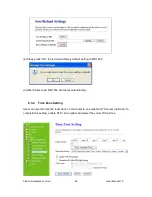
Page 66: ...ctory default setting to RB 1632 3 After 90 seconds RB 1632 will reboot automatically 6 3 4 Time Zone Setting Users can synchronize the local clock on the router to an available NTP server optional To complete this setting enable NTP client update and select the correct Time Zone ...

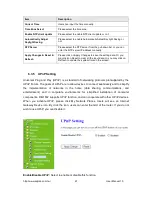
Page 67: ... data Or you may click on Refresh to update the system time on the screen 6 3 5 UPnP Setting Universal Plug and Play UPnP is a standard of networking protocols promulgated by the UPnP Forum The goals of UPnP are to allow devices to connect seamlessly and to simplify the implementation of networks in the home data sharing communications and entertainment and in corporate environments for simplified...

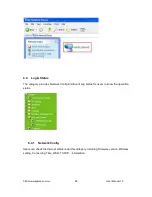
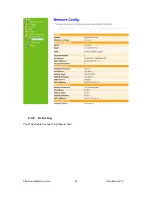
Page 68: ... The category provides Network Config and Event Log status for users to know the operation status 6 4 1 Network Config Users can check the Internet status under this category including Firmware version Wireless setting Connecting Time WAN TCP IP information ...

Page 69: ...http www sapido com tw User Manual 1 0 69 6 4 2 Event Log You may enable the event log feature here ...

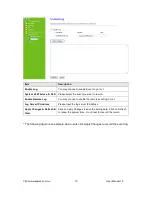
Page 70: ...rd Enable Remote Log You may choose to enable the remote event log or not Log Server IP Address Please input the log server IP Address Apply Changes Refresh Clear Click on Apply Changes to save the setting data Click on Refresh to renew the system time or on Clear to clear all the record The following figure is an example when users click Apply Changes to record the event log ...

Page 71: ...http www sapido com tw User Manual 1 0 71 6 5 Logout This function logs out the user ...

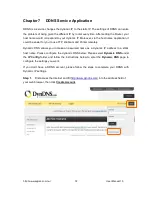
Page 72: ... for you to use FTP Webcam and Printer remotely Dynamic DNS allows you to make an assumed name as a dynamic IP address to a static host name Please configure the dynamic DNS below Please select Dynamic DNS under the IP Config folder and follow the instructions below to enter the Dynamic DNS page to configure the settings you want If you don t have a DDNS account please follow the steps to complete...

Page 73: ...http www sapido com tw User Manual 1 0 73 Step 2 Fill in the form as required and then click on Create Account button ...

Page 74: ...er Manual 1 0 74 Step 3 When you got this account created message close it and check your mailbox You would get a mail from DynDNS website Step 4 Click on the indicated address within your mail to confirm Step 5 Click on login ...

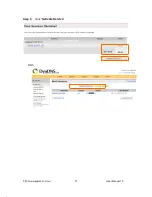
Page 75: ...http www sapido com tw User Manual 1 0 75 Step 6 Click Add New Hostname Step 7 Put in your favorite hostname and service type and then click Create Host after finished ...

Page 76: ...http www sapido com tw User Manual 1 0 76 Step 8 Your hostname has been created when you see the following page ...

Page 77: ...http www sapido com tw User Manual 1 0 77 Step 9 Click Activate Service Filish ...

Page 78: ... exceed 37 of bandwidth Check to see that the network does not exceed 10 broadcast messages per second Verify network topology and configuration 8 2 LED 1 Why doesn t RB 1632 power up A Check if the output voltage is suitable or check if the power supply is out of order 2 The Internet browser still cannot find or connect to RB 1632 after verifying the IP address and LAN cable the changes cannot be...

Page 79: ...vided by the Router A Yes the Router mode allows for customization of your public IPs and Domain 8 4 OS Setting 1 Why can t my computer work online after connecting to RB 1632 A It s possible that your Internet protocol TCP IP was set to use the following IP address Please do as the following steps Windows 2000 XP Start Settings Network and Dial up Connections double click on Internet Protocol TCP...

Page 80: ...s this data correct If the data isn t correct Please input ipconfig release press Enter input ipconfig renew press Enter Possible Solution 3 Verify the connection setting of your Web browser and verify that the HTTP Proxy feature of your Web browser is disabled Make these verifications so that your Web browser can read configuration pages inside your router Launch your Web browser Internet Explore...

Page 81: ... Why can t my USB devices and LAN ports work properly after setting the DHCP A There are two rules over here Rule1 After connecting USB devices please reboot your Router Rule2 Before finishing the DHCP setup please don t connect any computer to LAN ports because the conflict of having the same IP may occur and cause some computers a lot of trouble Notice Make sure that you always click on the Appl...

Page 82: ... or not If your ISP is using dynamic IP addressing DHCP then the DHCP protocol does not have the authentication feature Some Cable service providers often use the following to determine user s identification 6 Q Why is that I can ping to outside hosts but cannot access Internet websites A Check the DNS server settings on your PC You should get the DNS servers settings from your ISP If your PC is r...

Page 83: ...ation of encryption also includes the use of a shared key A HEX key is the most common but other formats are also used This key identifies the workstation to the router as a trusted member of this network Different manufacturers can implement this key technology in ways that might prevent them from working correctly with another vendor s products So pay attention to detail is going to be the key t...

Page 84: ...o interference is causing a problem see if connection is possible when close to the Wireless Access Point Remember that the connection range can be as little as 100 feet in poor environments 3 Q Wireless connection speed is very slow A The wireless system will connect at highest possible speed depending on the distance and the environment To obtain the highest possible connection speed you can exp...

Page 85: ...ddress make sure that it is using an IP Address within the range 192 168 1 129 to 192 168 1 253 and thus compatible with the Wireless Router s default IP Address of 192 168 1 254 Also the Network Mask should be set to 255 255 255 0 to match the Wireless Router In Windows you can check these settings by using Control Panel Network to check the Properties for the TCP IP protocol 6 Q The WinXP wirele...

Page 86: ...upted FTP downloads A If you are experiencing corrupted files when you download a file with your FTP client try using another FTP program 2 Q Why does the router dial out for PPPoE mode very often A Normally some of game music or anti virus program will send out packets that trigger the router to dial out you can close these programs Or you can set the idle time to 0 then control to dial out manua...

Page 87: ...nux Redhat 9 Fedora 6 7 Ubuntu 7 04 and the following related versions 9 2 Browsers 1 Internet Explorer ver 6 and 7 and the following related versions 2 FireFox ver 2 0 0 11 and the following related versions 3 3 Safari ver 3 04 and the following related versions 9 3 Communications Regulation Information Should any consumers need to learn more information services and supports please contact the s...

Reviews: