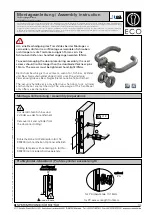
4. Secure wire cover plate to door directly above chassis cover (note orientation) using two
(2) #6 x 1/2” flat head security torx wood screws (Fig. 4A1 and 4A2).
NOTE: Position lower edge of cover
plate against the chassis cover
to ensure no wires are visible.
(2) dia. 3/32” by
1/2” deep holes
Fig. 4A1
Inside of door
Wire
cover
(2) #6 x 1/2”
flat head security
torx wood
screws
This side down
Fig. 4A2
(4) #8-32 x 5/8” oval
head machine
screws
Passport
gasket
Outside
Passport
trim
Outside of door
Fig. 5A
Rim Installation Instructions (Continued)
Fig. 3A
Inside of door
1. Align wire cover plate with chassis side against exit chassis cover and mark hole positions.
2. Drill (2) 3/32” diameter by 1/2” deep holes as shown (Fig. 4A1).
3. Ensure stamped side of plate goes against door.
5A - Installation of Outside Escutcheon with
Weatherseal Gasket (Optional)
Back side of
wire cover plate
Chassis Cover
NOTE: For non-fire rated door applications, an optional gasket
may be used as a weatherseal between the escutcheon
and the outside door surface. Peel off adhesive backing
and attach to (outside) escutcheon (Fig. 5A).
3 - Chassis Cover Instructions
Secure chassis cover to chassis using
(4) #8-32 x 5/16” oval head machine screws.
4 - Wire Cover Instructions
(Wood doors only)
10/31/12
A7809B 10
Copyright © 2012, Sargent Manufacturing Company
, an ASSA ABLOY Group company
. All rights reser
ved.
Reproductions in whole or in part without express written permission of Sargent Manufacturing Company is prohibited.
Passport 1000 PG Exit Device


