background image

79

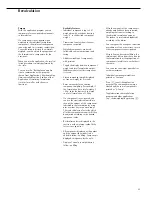
Totalizing 

L

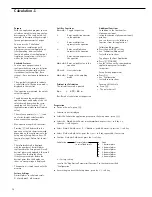
Purpose

This application program acts as a
cumulative memory function.

You can use the “Totalizing” applica-
tion in combination with a program
chosen from Application 1 (e.g., count-
ing, weighing in percent) and one from
Application 2 (checkweighing, time-
controlled functions) as well as with 
the extra functions.

Available Features

– Totalization of weight values and 

calculated values

– Optional configuration in the Setup

menu for simultaneous storage of net
and calculated values

– Optional configuration in the Setup

menu for loading weight values and
calculated values either from Applica-
tion 1 (e.g., counting, weighing in 
percent) or from Application 2 (check-
weighing, time-controlled functions)

– Totalization memory for up to 65535

values

– Simultaneous display in the text line 

of transaction counter and, e.g., the
current total

– Optional configuration in the Setup

menu for having the scale tare auto-
matically after a value is stored in the
totalization memory, if no preset tare
has been entered

– Manual input of the number of 

individual weighing operations (target
no. of operation 

nDef

). Result printed

and memory cleared after printout of

nDef

.

– Optional configuration in the Setup

menu to add the current weight, with
display accuracy, to the current total by
pressing the 

M+

soft key and generate 

a printout of the result

– Optional configuration in the Setup

menu for stability-dependent storage of
the measured value: 

S

tability

range

– Optional automatic storage of meas-

ured values

Storage of measured value is indicated
by 

Uu

.

zz

indicates that you can place a load

on the balance.

– Minimum load threshold for automatic

storage

– Press the 

M-

soft key to delete the last

value added to the totalization memory.
The transaction counter value is
reduced by one and a printout is 
generated.

– Press the 

MR

soft key for information

about number of transactions and the
current total. By configuring the Setup
menu, you can define whether the
information is displayed and printed, 
or only printed, and whether the
information comprises an intermediate
or final evaluation (see the example)

– In the Info window you can choose

which value is displayed in the text line
during weighing

– Printout of the end result independent

of which program is configured for
Application 1 or Application 2. 
Configure the Setup menu to define
which values are included on the print-
out (Printout of individual components)

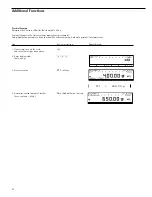
– Press the key identified by 

MR

(soft key

label) for a printout of an intermediate
evaluation after each addition or a final
evaluation 

– If you end the totalization process by

pressing 

c

without having first

pressed the 

MR

soft key for a printout,

a final evaluation is printed when you
press 

c

– Optional configuration in the Setup

menu to clear the totalization memory
and reset the transaction counter by
pressing 

c

or after an evaluation 

is printed out

– Totalization data and transaction

counter data are stored in non-volatile
memory

– Continue totalization after turning the

scale off and back on

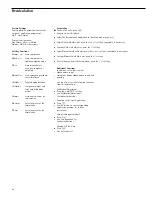
Factory Settings

Automatic storage: 

Off

Minimum load for automatic storage:

20 digits

Source of data for auto storage:

Application 1

Evaluated values: 

Net

Evaluation mode, MR key function:

Intermediate 
evaluation, print

M+/M– function, then tare: 

Off

Printout of individual components: 

On

Scale functions: Stability range:

2 digits

Printout: Application-defined output: 
Print on request, then tare: 

Off

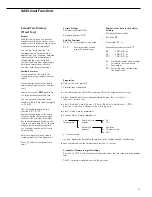
Soft Key Functions

M+

Add weight values or applica-
tion values to the total in the
totalization memory. 
The component or transac-
tion counter value increases
by one each time you press
this key.

M-

Delete the last value added 
to memory. The transaction
counter value decreases by 1.
You cannot delete previous
values by repeatedly pressing
this key.

MR

Print or display an inter-
mediate or final evaluation

nDef

Store the input number of
components

Printout for Totalizing

The transaction or component counter 
is printed in front of each measured value
(weight). When an intermediate or final
evaluation is printed out, all results up to
this point are included.

n

5

Total + 151.67 g

Summary of Contents for Factory Series FC06BBE-S

Page 1: ...Operating Instructions Sartorius Factory Series FC and FCG Models Electronic Precision Scales 98648 006 82...

Page 2: ...put of alphanumeric sample lot and scale IDs Flexible easy to use display and control unit Connectivity for control through an on line computer Hotline For advice on the use of these applications just...

Page 3: ...nd control unit In addition to the choice of power supply via AC adapter or external rechargeable battery pack your scale also has an interface port for connecting a printer computer or universal remo...

Page 4: ...following symbols oo Back to the initial state in the Setup menu exit Setup o Go to the higher selection level O Show sub items under the active item Q Move upward in the input output window q Move do...

Page 5: ...ation second tare memory Application Pictograms The pictograms displayed here indicate the application s selected The pic togram is displayed inversely white on a black background when the corre spond...

Page 6: ...ividual requirements by selecting the corresponding menu code You can have printouts generated automatically or by pressing p dependent on or independent of the stability or time parameters with or wi...

Page 7: ...lumn for display and control unit Retainer Dust cover Shield ring Load plate support Load plate Glass cylinder draft shield Draft shield cover FC6CCE H FC2CCE S Complete scale with data interface port...

Page 8: ...front of the scale on the retainer separately from the scale FC06BBE S FC6CCE H FC2CCE S FC12CCE S FC6CCE S Mounting the Control Unit and Column Fasten the display unit to the retainer using the two...

Page 9: ...with the two Phillips head screws 2 M4 12 to the weighing platform Press the cable into the raceway channel as shown in the diagram on the left Cable length 55 cm 21 7 inches To order a longer cable...

Page 10: ...ess the cable into the raceway channel Replace the cover on the cable raceway 1 Close the 4 bore holes using the caps supplied 2 Remote Operation of the Display and Control Unit Turn the scale over an...

Page 11: ...ely positioned in place Load plate support Load plate Glass cylinder Draft shield cover FC6CCE H FC2CCE S FC12CCE S FC6CCE S Place the following components on the scale in the order given below Dust c...

Page 12: ...tion given below However there is no guarantee that interference will not occur in a particular installation If this equipment does cause harmful interference to radio or television reception which ca...

Page 13: ...S FC6CCE H FC2CCE S FC12CCE S and FC6CCE S Only the 2 front feet are used for leveling Turn the 2 front feet as shown in the illustration until the air bubble is centered within the circle of the lev...

Page 14: ...ctory settings Setting the Language You can choose from 5 languages for the information display German English factory setting English with U S date time format French Italian Spanish Configuring the...

Page 15: ...tput 1 Select Setup menu H 2 Confirm Balance scale functions O soft key 3 Select menu item Adapt filter q then and confirm O soft key 4 Select menu item Extreme vibration q soft key 5 Confirm menu ite...

Page 16: ...evice parameters q soft key and O soft key 2 Select Clock press q repeatedly then press O 3 Enter the time 1 1 1 2 3 0 4 Confirm the time entered when it synchronizes with your local clock l soft key...

Page 17: ...umeric alphabetic keys If the last character of the password is a letter conclude input by pressing a Confirm your password and have the scale functions displayed Press the l soft key Scale functions...

Page 18: ...2 hh mm Time 3 hh mm isoCAL Print GLP GMP Automatic if GLP is selected adjustment record On request from record memory Parameter for Weight set ID W ID Enter 14 characters max external weight Calibra...

Page 19: ...ian carats K Tola tol Baht bat Mesghal MS Zero range 1 percent max capacity 2 percent max capacity Zero range at Factory setting depends on model power on 2 percent max capacity 5 percent max capacity...

Page 20: ...password is a letter conclude input by pressing the a key Press l to confirm the password Device parameters are now displayed To select the next group press the q soft key down arrow To select the pr...

Page 21: ...tion Print the parameter settings If the device parameters are displayed press p Printout example SETUP DEVICE User ID User ID Interfaces Serial communicati SBI Baud rate 1200 baud Number of data b 7...

Page 22: ...stop bits Handshake Software handshake mode Hardware handshake 1 character after CTS xBPI RS232 Network address 0 Enter any number from 0 to 31 YDP01IS YDP02 see YDP03 without 19 200 baud YDP03 Baud...

Page 23: ...size 10mm bar graph text display 13mm bar graph 13mm text display 13mm Application Off symbols On Keys CF function Clear all applications in application Clear only selected applications CF function D...

Page 24: ...the next page Preparation Display available application parameters Select the Setup menu press the H key SETUP is displayed Select parameters repeatedly press the q and O soft keys If you have already...

Page 25: ...Austrian carats K Tola tol Baht bat Mesghal MS Weight unit 2 Grams g Kilograms kg Carat s ct Pounds lb Ounces oz Troy ounces ozt Hong Kong taels tlh Singapore taels tls Taiwanese taels tlt Grains GN...

Page 26: ...g Animal activity Calm averaging Normal Active 0 1 of the animal object 0 2 of the animal object 0 5 of the animal object 1 of the animal object 2 of the animal object 5 of the animal object 10 of the...

Page 27: ...ax in Weight display Absolute value mode Difference from the target Automatic printout Yes of OK values No Time controlled Function after Beep functions time interval Lock in readout Automatic printou...

Page 28: ...mediate evaluation print MR function Final evaluation print Intermediate evaluation display print Final evaluation display print M M function Off then tare On Printout of indi No vidual components Yes...

Page 29: ...nt Intermediate evaluation display print Final evaluation display print M M function Off then tare On Printout of indi No vidual components Yes Extra Functions Off F4 key 2nd tare memory Container tar...

Page 30: ...assword has already been assigned The password prompt is displayed If access is blocked by a password enter the password using the numeric and or alphabetic keys If the last character of the password...

Page 31: ...output interface port PERIPHERALS Automatic output of displayed value Line format For raw data 16 characters For other apps GLP 22 characters ISO GLP GMP Off printout Only for calibration adjustment...

Page 32: ...g Statistics printout or output To generate press the p key when the statistics are displayed Printouts for Differential Weighing These printouts can be generated as standard or configured user define...

Page 33: ...Application defined O soft key output 3 Select and confirm q soft key 3 Configured printout O soft key 4 Confirm Indiv printout O soft key 5 Select Dotted line O q l soft keys 6 Select Date time q sof...

Page 34: ...ation Target value Target x x x Minimum value Minimum x x x Maximum value Maximum x x x With Time controlled Functions application Time interval Time interval x With the Totalizing application No of w...

Page 35: ...ighing cell Model FCGCCE H Serial no 91205355 Return to SETUP overview press the o soft key Exit Setup menu press the oo soft key Original settings are restored Display Flexprint Information Select th...

Page 36: ...rameters in the Setup menu See next page for menu setting options Preparation Activate the MP8 emulation mode Press H Select the factory settings and confirm press the q soft key repeatedly and then t...

Page 37: ...am selection MP8 3 1 1 parameters MP8 3 1 9 MP8 3 2 1 MP8 3 2 9 MP8 3 3 1 MP8 3 3 9 Program index Index Ind 2 1 Ind 2 2 Ind 2 3 Ind 2 4 Interface Baud rate 150 baud 300 baud 600 baud 1 200 baud 2 400...

Page 38: ...on against drafts Important Note Concerning Verified Scales Approved for Use as Legal Measuring Instruments in the EU The under scale weighing port may not be opened or used when an approved scale is...

Page 39: ...alibration Press isoTST See the section on Calibration Adjustment for further instructions Practical Examples Example W1 Simple weighing Step Key or instruction Display Output 1 If necessary tare the...

Page 40: ...s loaded 1 Select alphabetic input a 2 Select the required letter group ABCDEF soft key 3 Enter the letter A A soft key To delete a letter c 4 Select the letter group and ABCDEF soft key enter B B sof...

Page 41: ...Special adapter necessary Order no YCC01 0024M01 PC Keyboard Functions The alphanumeric key codes imple mented are for a German keyboard layout only Z in the first row instead of Y for example Some of...

Page 42: ...nfigure the scale so that when a power supply is connected the scale is off Off on standby or the scale switches on automatically Auto on You can also configure the scale to go into the standby mode O...

Page 43: ...with a user defined weight Ext cal adj user defined wt The adjustment can be performed automatically following calibration Cal then auto adjust or if desired the adjustment operation can be started m...

Page 44: ...Key blocked reproTEST Selection mode Cal adjustment Calibrate then auto adjust sequence Calibrate then manual adjust isoCAL function Off Only adjustment prompt On and reset application On without res...

Page 45: ...st if not already on 2 Select the Setup menu H 3 Select Balance scale functions O soft key 4 Select Calibration adjustment O soft key 5 Select CAL isoTST key function O soft key o last setting selecte...

Page 46: ...onfirm calibration and O soft key adjustment sequence o last setting selected 10 Select other settings if desired q and l soft keys and confirm e g Calibration with manual adjustment 11 Exit Cal adjus...

Page 47: ...rnal calibration routine is now ended without adjusting the scale see Calibration and Adjustment Sequence next column The internal calibration weight is removed ISO GMP printout see page 107 Calibrati...

Page 48: ...s the isoTST soft key again In the selection mode Perform external calibration followed by automatic adjustment with the factory set weight Configuration Factory settings Step Key s or instruction Dis...

Page 49: ...sequence For this example select external calibration adjustment with a user defined weight The scale has a factory set weight value see Specifications To reset a user defined calibration weight to t...

Page 50: ...the Setup under Scale functions Calibration adjustment Start automatic adjustment User def adjustment times you can enter up to three times of day for automatic calibration adjustment When one of thes...

Page 51: ...a printout has been generated If a password has been assigned in the Setup Input menu you must enter either the configured pass word or the General Pass word before you can delete the records For inte...

Page 52: ...ts are displayed with the scale s accuracy Preparation Turn on the scale press e The Sartorius logo is displayed The scale performs a self test Select reproTEST in the Setup menu press H Select the Sc...

Page 53: ...grams are the only weight units available Standard scales The following weight units are available in both ranges Display Line for metro Unit Conversion factor Printout logical data Grams 1 0000000000...

Page 54: ...plication program for further instructions Setup setting parameters Press H See Configuration for further instructions Turning Off the Scale Press e The scale shuts off Practical Example Toggle the Di...

Page 55: ...sample quantity nRef to be loaded when the Count ing program is initialized Setting the accuracy when the reference sample weight wRef is stored for calculating a piece count Automatic output of the q...

Page 56: ...the current piece count is more than 100 the internally calculated piece count e g 17 24 differs from the nearest whole number in this case 17 by less than 0 3 Reference updating can be repeated sever...

Page 57: ...container parts to be counted on the scale 3 Tare the scale t 4 Place the reference sample quantity Place the displayed number on the scale example 10 pcs of parts in the container 5 Determine the ave...

Page 58: ...Ref entered manually Store the current weight as the refer ence percentage weight Wxx for initializing the weighing in percent application program Reference weight Wxx entered manually Storage paramet...

Page 59: ...splay accuracy accuracy 1 decimal place 2 decimal places Decimal places None for readout in pct 1 decimal place 2 decimal places 3 decimal places 4 decimal places 5 decimal places 6 decimal places Dis...

Page 60: ...isplay Output 1 Delete previous setting if necessary c 2 Prepare a container Place the empty container for the parts on the scale 3 Tare the scale t 4 Place the reference weight Place weight equal on...

Page 61: ...layed as a result in the pre set weight unit identified by the a symbol Optional multiplication of the arithmetic average by a user defined factor Mul A circle o is displayed as weight unit and Mul xx...

Page 62: ...y increments 200 display increments 500 display increments 1 000 display increments Decimal places in None calculated result 1 decimal place o 2 decimal places 3 decimal places 4 decimal places 5 deci...

Page 63: ...out Application defined Auto print upon initialization All values Step Key or instruction Display Output 1 Delete previous setting if necessary c 2 Prepare a container cage Place empty cage on the sca...

Page 64: ...c average xNet is display mDef no of subweighs Mul calculation factor xNet arithm average net value xRes calculated value 8 Unload the scale Remove animal from cage 9 If desired weigh next animal Plac...

Page 65: ...a total weight of 100 g enter the divisor 10 to weigh in a total formulation of 1 000 g If a component is over poured you can use the recalculation function to change the amount of this component indi...

Page 66: ...lation application in the Setup menu press H Select Calculation press the Q or q soft key repeatedly if neccessary Confirm Calculation press the O soft key Select Recalculation press the Q or q soft k...

Page 67: ...ed values c if necessary 2 Place container for filling Place empty container components on the scale on the scale 3 Tare t 4 Add the first component Weigh the first component into the container 5 Stor...

Page 68: ...1st component Weigh the first component up to 0 and store Comp 1 soft key Comp1 25 08 g Comp2 10 73 g RekD 1 01226 RCom1 25 39 g The true net value is displayed for 2 seconds 11 Weigh in further compo...

Page 69: ...Comp5 107 50 g Comp6 812 61 g The true net value of the 6th component is displayed for 2 seconds Then the total weight is displayed 15 End the weighing procedure c Comp1 25 08 g Total weight is print...

Page 70: ...n is stored in non volatile memory Factory Settings Decimal places in calculated result 2 decimal places Soft Key Functions Equat Toggle to equation Enter an addition operator in the equation Enter a...

Page 71: ...Application parameters Application 1 Calculation Step Key or instruction Display Output 1 Turn on the scale and configure e the settings as indicated above 2 Delete previous setting if necessary c 3...

Page 72: ...s completed Control range for the scale s data output port lines is 30 to 170 of the target value Optional configuration in the Setup menu for activation of control lines dependent on weight value wei...

Page 73: ...lines to select whether the control lines are activated within the control range always on activated at stability within the control range activated at stability This makes it possible for example to...

Page 74: ...eighing input Min max weight Target min in max in Weight display mode o Absolute value Difference from the target Automatic printout Yes of OK values o No o factory setting see also the Application Pa...

Page 75: ...Checkweighing Automatic printout of OK values Yes Step Key or instruction Display Output 1 Turn on the scale and configure e the settings as indicated above 2 Delete previous setting if necessary c 3...

Page 76: ...sample Place sample in container in this case 169 48 g If the weight value had been too low the display would have shown the following 11 In this case switch to net value Net soft key display here 163...

Page 77: ...ft Key Functions Stop Stop the application Quit Confirm performed function e g Lock in readout or Beep Interv Store input interval for time controlled functions Set Store input time for one time perfo...

Page 78: ...Print in weighing mode Manual auto print mode Manual without stability Step Key or instruction Display Output 1 Turn on the scale and configure e the settings as indicated above 2 Delete stored value...

Page 79: ...ether the information is displayed and printed or only printed and whether the information comprises an intermediate or final evaluation see the example In the Info window you can choose which value i...

Page 80: ...uation print MR function Final evaluation print Intermediate evaluation display print Final evaluation display print M M function Off then tare On Printout of individual No components Yes factory sett...

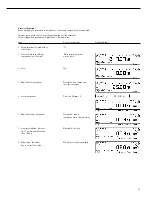
Page 81: ...Display Output 1 Turn on the scale and configure e the settings as indicated above 2 Delete old totalization data c if necessary 3 Tare the scale t 4 Toggle to Application 1 Counting D 5 Place the di...

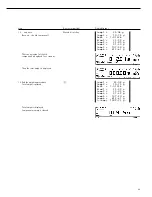
Page 82: ...tal M soft key 13 Repeat steps 10 and 11 as required 14 Display final evaluation Info window MR soft key here 5 weighing operations total weight 8751 67 g total quantity 248 The o indicates which valu...

Page 83: ...nsaction counter value is reduced by one and a printout is generated Printout of an evaluation of results depending on the Application 1 or Application 2 parameters Configure the Setup menu to define...

Page 84: ...s Net Calculated Net calculated Evaluation mode Intermediate evaluation print MR function Final evaluation print Printout of individual No components Yes factory setting see also the Application Param...

Page 85: ...n mode MR function Final evaluation print Step Key or instruction Display Output 1 Turn on the scale and configure e the settings as indicated above 2 Delete old formulation data c if necessary 3 Tare...

Page 86: ...ponents are stored in the totalization memory at stability and printed out Scale is tared automatically 9 Repeat step 7 as required 10 Print final evaluation MR soft key here with total weight of all...

Page 87: ...on is displayed and printed or only printed and whether the infor mation comprises an intermediate or final evaluation see the example In the Info window you can use the q l soft keys to choose which...

Page 88: ...lculated Evaluation mode Intermediate evaluation print MR function Final evaluation print Intermediate evaluation display print Final evaluation display print M M function Off then tare On Printout of...

Page 89: ...ay print Step Key or instruction Display Output 1 Turn on the scale and configure e the settings as indicated above 2 Delete old statistics data c if necessary 3 Tare the scale t 4 Toggle to Applicati...

Page 90: ...t key 13 Repeat steps 11 and 12 as required 14 Display final evaluation Info window MR soft key here 5 weighing operations total quantity 165 The o indicates which value is displayed in the text line...

Page 91: ...when a value is stored or input see Configuration Press c to delete the preset tare value Factory Settings Container tare weight No Automatic printout Off Soft Key Functions PT1 T1 Store weight as ta...

Page 92: ...on parameters Extra function F4 2nd tare memory Automatic printout Tare preset tare Step Key or instruction Display Output 1 If necessary turn on the scale e and enter the settings given above 2 Enter...

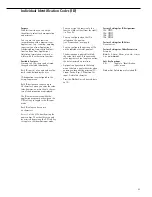
Page 93: ...ch ID value can have up to 20 characters Access 1 of the 4 IDs directly using the numeric keys The other three can only be accessed by pressing the ID soft key to toggle to the identifier input mode Y...

Page 94: ...gured codes Once after pressing print if configured Each time the print key is pressed Once for M function app 3 memory factory setting see also Application Parameters Overview in the chapter entitled...

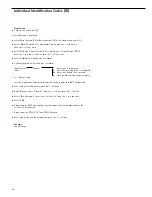
Page 95: ...Input ID4 Lot Step Press key s or follow instructions Display Output 1 If necessary turn on the scale e 2 Select Extra Function F4 H in the Setup menu q soft key 2 then O soft key once q soft key 3 th...

Page 96: ...1 Repeat steps 9 and 10 for LOCATION GOETTINGEN STREET WEENDER LANDSTRASSE LOT 15 12 Place the first sample on the Place load on scale scale here 210 53 g 13 Print weight value if desired p perform fu...

Page 97: ...alizing formulation or statistics must be run ning so you can display and print the result Factory Settings There are no optional parameters Preparation Turn on the scale press e Sartorius logo is dis...

Page 98: ...r messages are displayed in the text line in plain English Press the Delete soft key to delete a data record Data Battery Backed Data Memory When the scale is disconnected from AC power these scale ge...

Page 99: ...2 In the Checkweighing application Param soft key toggle to the input mode for target minimum and maximum values 3 Enter target 170 g see the Practical Example minimum 165 g for Checkweighing maximum...

Page 100: ...gs Info Display Printout for legal metrology Weight blocks special weight value formats that are acceptable in legal metrology are designated by the following line which is printed in both header and...

Page 101: ...g Checkweighing Formulation Counting Checkweighing Statistics Weighing in percent Checkweighing Totalizing Weighing in percent Checkweighing Formulation Weighing in percent Checkweighing Statistics Re...

Page 102: ...ication 3 Statistics Source of data for auto storage Application 2 Setup Application parameters Application 3 Statistics Evaluated value Calculated Setup Application parameters Application 3 Statistic...

Page 103: ...t l soft key 8 Determine first unknown quantity Place uncounted parts on the scale 9 Toggle to Statistics D 10 Initialize automatic storage M soft key 11 Determine further unknown Place parts to be co...

Page 104: ...6 200 g Minimum scale capacity the weight must not go below this limit when the scale is used in legal metrology Verification interval of the scale irrelevant if the scale is not used in legal metrolo...

Page 105: ...on 1 toggling between weight units counting weighing in percent animal weighing calculation Symbol for Application 2 checkweighing time Symbol for Application 3 totalizing formulation statistics Symbo...

Page 106: ...the Setup menu Auto print upon initialization Weights and calculated values can be printed as numeric values either with a preceding data ID code numeric value with 22 characters or without one numer...

Page 107: ...d FC6CCE H Ser no 60419914 Ver no 01 35 18 ID 12345678901234 L ID 12345678901234 nRef 10 pcs wRef 1 35274 g Qnt 235 pcs Qnt 4721 pcs S ID 12345678901234 Qnt 567 pcs 17 01 1997 16 13 Name 17 01 1997 16...

Page 108: ...Type of interface Serial interface Operating mode Full duplex Standard RS 232 Transmission rates 150 300 600 1 200 2 400 4 800 9 600 19 200 baud Parity Space odd even Character format 1 start bit 7 o...

Page 109: ...output as spaces Characters without a decimal point are output without a decimal point The following characters can be output depending on the characters displayed on the scale Normal Operation Posit...

Page 110: ...e L Underload Weight L L Underload H Overload in checkweighing H H Overload in checkweighing C Calibration adjustment Error Codes 1 2 3 4 5 6 7 8 9 10 11 12 13 14 15 16 17 18 19 20 21 22 S t a t E r r...

Page 111: ...ached input received is cut off rather than discarded as with keyboard input Format 1 Meaning I Weighing mode 1 L Weighing mode 2 M Weighing mode 3 N Weighing mode 4 O Block keys P Print R Unblock key...

Page 112: ...mission sequence is as follows Scale byte Computer trans byte receiving mitting byte device byte XOFF byte byte Pause XON byte byte byte byte Transmitting Device Once XOFF has been received it prevent...

Page 113: ...r B 2 Data output TxD RxD TxD N C 3 Data input RxD RxD TxD P D 20 Data Terminal Ready DTR E 7 8 14 Ground internal GND Ground internal GND F 13 25 12 5 V output 5 V output G 16 Ctrl output lighter Ctr...

Page 114: ...nternal ground Pin 9 Reset _ In Pin 10 Not connected Pin 11 12 V output Pin 12 Reset _ Out Pin 13 5 V output Pin 14 Internal ground Pin 15 Pin 16 Pin 17 Pin 18 Pin 19 SET Pin 20 Data terminal ready DT...

Page 115: ...Warning connect only the pins indicated here do not connect any other pins Cable type AWG 24 specification Scale Computer 25 contact 12 pin round female connector TxD B 3 RxD RxD C 2 TxD CTS H 20 DTR...

Page 116: ...nt wt defective is defective Service Center Err 07 Function not allowed in scale Contact your local Sartorius Function blocked verified for use in legal metrology Service Center for information on hav...

Page 117: ...4 1 7 8 F4 a t left Checkerboard pattern displayed H key was pressed when turning on continuously the scale or is stuck Err 320 Operating program memory defective Contact your local Sartorius Service...

Page 118: ...replacing a damaged dust cover FC06BBE S Remove the following parts from the scale Draft shield cover Glass draft shield cylinder Weighing pan Pan support Shield disk turn clockwise and lift off Old d...

Page 119: ...9 LP 0003 7 Leveling foot 69 B20005 8 Metrological ID label only on verified models 9 Tare key 10 Function keys 11 Print key 12 Keys for numeric input No Designation Order no for replacement 13 Toggle...

Page 120: ...oot 69 B20005 5 Shock absorber 69 LP0010 6 Metrological ID label only on verified models 7 Tare key 8 Function keys 9 Print key 10 Keys for numeric input No Designation Order no for replacement 11 Tog...

Page 121: ...Function keys 6 Print key 7 Keys for numeric input 8 Toggle key for alphabetic input 9 On off key Order no No Designation for replacement 10 Weight display 11 Leveling foot 69 LC0093 12 Metrological...

Page 122: ...bits Parity odd even or space Transmission rates 150 to 19 200 baud Handshake Software or hardware Model Specific Specifications Model FC06BBE S FC6CCE H FC2CCE S FC12CCE S FC6CCE S FC06BBE S0UR FC6CC...

Page 123: ...c to EN 60529 IP44 IP65 IP65 Model FCG34EDE P FCG12EDE P FCG64EDE S FCG34EDE P0UR FCG12EDE P0UR FCG64EDE S0UR Readability g 0 1 0 2 0 5 0 1 0 2 1 Weighing capacity kg 8 16 34 6 12 64 Max overload capa...

Page 124: ...0CE FC6CCE S0CE Type isoTEST in conjunction with BD BF Accuracy class K K K K K Scale interval d g 0 001 0 01 0 01 0 1 0 1 Max weighing capacity g 620 6 200 2 200 12 000 6 200 Verification scale inter...

Page 125: ...eighing range Max preload when starting kg ca 21 ca 19 ca 21 ca 10 ca 45 calibration adjustment scale must be zeroed Application range according to CD g 5 34 000 5 16 000 5 34 000 5 12 000 50 64 000 R...

Page 126: ...Dimensions Scale Drawings FC06BBE S 0CE FC6CCE H 0CE FC2CCE S 0CE All dimensions are given in millimeters 126...

Page 127: ...127 FC12CCE S 0CE FC6CCE S 0CE FCG64EDE H FCG34EDE H FCG16EDE H FCG34EDE P FCG12EDE P FCG64EDE S 0CE All dimensions are given in millimeters...

Page 128: ...report printer and 5 pin DIN socket to interface a PC keyboard as a barcode scanner via keyboard interface to be installed exclusively by Sartorius Sartorius serial Profibus interface for RS 232 YSPI...

Page 129: ...to FC scales 9 pin D SUB male 12 pin round male connector Interface cable 5m with open cable ends YCCDI 03M5 Cable for connecting an isi terminal to a FC scale YCC01 04ISM3 12 contact connector to 12...

Page 130: ...erifiable PC data memory RS232 connecting cable YCC01 09ISM5 necessary RS 485 connecting cable on request Configuration software PC for backing up and restoring YAD01IS of settings Customized printout...

Page 131: ...EC Non automatic weighing instruments This Directive regulates the determination of mass in legal metrology For the respective Declaration of Conformity for weighing instruments that have been verifie...

Page 132: ...132...

Page 133: ...133...

Page 134: ...134...

Page 135: ...135...

Page 136: ...line 2 Identifiers 93 Input 6 14 Intended use 2 Installation 7 Interface port 108 Internal calibration 47 ISO GMP printout record 107 isoTST function 43 Keypad 3 42 Language setting 14 Leveling the sc...

Page 137: ...Press the l soft key User data is displayed Select the password setting function Press the q soft key repeatedly until Enter password is displayed together with the current password setting Define a n...

Page 138: ......

Page 139: ......

Page 140: ...ns without the prior written permission of Sartorius AG The status of the information specifications and illustrations in this manual is indicated by the date given below Sartorius AG reserves the rig...

Reviews: