14
Configuring the A/D Converter
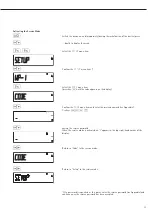
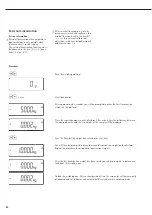
Open the menu access switch
§
Remove the cap that covers the menu access switch on the left-hand side of the back
of the indicator
§
To do this, move the switch to the left (towards the interface connectors).
(“open position”)
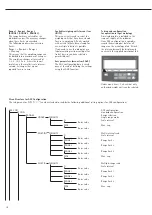
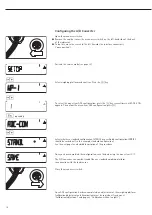
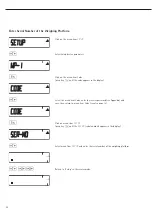
Activate the service mode (see page 13)
)
Select weighing platform and confirm: Press the
)
key
)
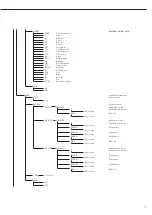
To select the menu item ADC configuration, press the
k
key several times until ADC-CON
appears. To confirm the menu item ADC configuration, press
)
.
k
repeatedly
)
Select whether a standard configuration (STAND) or a verifiable configuration (VERIF.)
should be carried out (in this example, standard configuration).
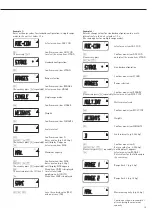
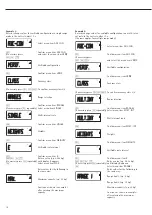
See the next page for a detailed description of the procedure
Once you have completed the configuration, save the data using the menu item
SAVE
.
The A/D converter can now be treated like any standard weighing platform
in connection with the load sensor.
Close the menu access switch
Once ADC configuration has been completed, an adjustment of the weighing platform
(calibration/adjustment and linearization) must be carried out (see page 21
“Calibration/adjustment” and page 23 “Calibration without weights”)
wp-1
ADC-CON
STAND.
SAVE
Summary of Contents for Midrics 1
Page 1: ...Operating Instructions Sartorius Midrics 1 Midrics 2 Models MIS1 MIS2 Indicators 98648 014 89 ...
Page 92: ...92 Dimensions Scale Drawings All dimensions given in millimeters 92 ...
Page 97: ...97 C ...
Page 98: ...98 ...
Page 99: ...99 ...
Page 100: ...100 ...
Page 101: ...101 ...
Page 102: ...102 ...
Page 104: ...104 ...


