background image

5

  For the User

–  Always make sure the equipment is 

disconnected from AC power before per-

forming any installation, cleaning, main-

tenance or repair work on the scale.

–  If you see any indication that the scale 

cannot be operated safely (for example, 

due to damage), turn it off and lock it in 

a secure place or otherwise prevent use of 

the equipment for the time being.

–  Chemicals (e.g., gases or dusts) that can 

corrode and damage the inside or outside 

of the device must be kept away from the 

equipment.


–  Handle the equipment and any accesso-

ries in accordance with the IP rating  

(EN 60529). 

–  The casing on all connecting cables,  

as well as the casing on wires inside the 

equipment housing, is made of PVC or 

rubber. 

–  The allowable operating temperature 

range during operation is 0°C to +40°C 

(32°F to 104°F). Make sure the place of 

installation is adequately ventilated to 

prevent build-up of excessive heat. 

–  Use original Sartorius spare parts only!

–  Never use a hammer to close the lid of a 

paint can while it is still on the weigh-

ing pan. Otherwise, you will damage the 

weighing system!

–   According to Certificate  

No. 4420306 553419 issued by TÜV 

NORD CERT GmbH (German Inspection 

and Safety Authorities), PMA7501-... 

type electronic scales and their respec-

tive power supply, model type YPS04…, 

may be used in areas exposed to the risk 

of fire, provided that the room is not 

exposed to relatively large amounts of 

accumulated dust and fibers, and thus a 

fire risk. Paint-mixing rooms are free of 

such accumulated dust and fibers, and 

the equipment may be operated there.

Summary of Contents for PMA7501-Y00G

Page 1: ...98648 015 13 Installation Instructions Sartorius PMA World PMA Net Models PMA7501 Y00G Y00GL Electronic Paint mixing Scales for Use in Hazardous Areas Zone 2...

Page 2: ...or paint mixing applications 8 c key Clear and REC key for paint mixing applications 9 L key ENTER and MEM key for paint mixing applications 10 Graphic display 11 Weighing pan 12 Interfaces D Sub plug...

Page 3: ...t in a potentially explosive atmosphere Zone 2 make sure you observe the warnings and safety informa tion in their entirety during installation and operation as well as while perform ing maintenance a...

Page 4: ...2 Connect all equipment including peripheral devices to the equipotential bonding conductor Do not expose the scale to extreme tem peratures aggressive chemical vapors moisture shocks and vibrations T...

Page 5: ...ousing is made of PVC or rubber The allowable operating temperature range during operation is 0 C to 40 C 32 F to 104 F Make sure the place of installation is adequately ventilated to prevent build up...

Page 6: ...crew Strain relief for the Ethernet cable PMA7501 Y00GL only 2 protective plugs in the column Setting Up the Scale Choose a suitable place to set up the scale Avoid exposure to drafts heat moisture an...

Page 7: ...r supply the laws valid in your country must be observed If you should have any questions please contact your supplier or Sartorius Customer Service for information on the legal regu lations applicabl...

Page 8: ...til the desired weight of your formula is reached Remove the filled paint can from the weighing pan Never use a hammer to close the lid of a paint can while it is still on the weighing pan Otherwise y...

Page 9: ...mbol appears in this case g Pour in additional components until the desired weight of your formula is reached Remove the filled paint can from the weighing pan Important Note If you zero the display b...

Page 10: ...ant Note The flashing arrow n on the display means that the weight shown is not verified for use in legal metrology not legal for trade Example As you pour in the components of your formula the weight...

Page 11: ...r downwards using the S key 4 When you then press the L key MEM 9 the scale will automatically calculate and display the amounts of paint in g to add for each of the other components that you already...

Page 12: ...he display 9 Press the y key 4 several times to correct the value to 200 0 g 10 Press the L key MEM 9 COR 01 11 1 Add the first component C1 is displayed 1 7 g 12 Pour in paint until 0 0 g is displaye...

Page 13: ...onnection to AC power and before each calibration adjustment allow the scale to warm up for approx 30 min Hold down the U key 5 for 2 sec When 5000 is displayed release the key Center the calibration...

Page 14: ...d Use the RS keys to select the desired menu item here Ambient Conditions Press the L key ENTER to select the fourth level Level 4 Call up the menu item desired in the fourth level Use the RS keys to...

Page 15: ...ss the L key ENTER UNIT RS keys select DECIMALS GRAMS Press the L key ENTER o PT LB RS keys select STANDARD DECIMALS Press the L key ENTER o appears o STANDARD the desired setting is defined POLYRANGE...

Page 16: ...ol will be displayed The scale will automatically be locked preventing other weighing operations Level 1 Level 2 Level 3 Level 4 SETUP Press the L key ENTER EXTRAS Press the RS keys to select EXTRAS P...

Page 17: ...rd PW OLD will be displayed Following the correct input PW NEW will automatically appear You can now enter a new password or confirm each of the six blinking dashes by pressing the L key ENTER Blank s...

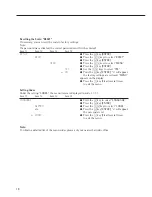
Page 18: ...ss the L key ENTER o will appear the factory settings are restored MENU appears on the display Press the c key Clear several times to exit the menu Setting Codes Under the setting CODES the menu items...

Page 19: ...other area changes constantly Too much vibration or the Access the menu to select scale is exposed to draft the appropriate code to adapt the scale to the particular weighing environment refer to Menu...

Page 20: ...e damage to the AC adapt er power supply or cables The equipment no longer functions properly The equipment has been stored for a relatively long period under unfavorable conditions The equipment has...

Page 21: ...information about disposal and recycling options please contact your local service staff The partners listed on the following website can be used for disposals within the EU 1 Go to http www sartorius...

Page 22: ...e Data Interface PMA Net RJ 45 10Base T 100Base TX Factory setting IP address 192 168 140 016 Gateway 192 168 140 001 Subnet mask 255 255 255 000 Port 21554 Specifications Model PMA7501 Y00G Y00GL Wei...

Page 23: ...ct the data cables YCO12 YCO13 when no power is being supplied to either end of the respective cables Securely fasten the D SUB connector to the PMA7501 Y The data cables YCO12 YCO13 may only be utili...

Page 24: ...24 Documents...

Page 25: ...25...

Page 26: ...26...

Page 27: ...27...

Page 28: ...28...

Page 29: ...29...

Page 30: ...30...

Page 31: ...31...

Page 32: ...32...

Page 33: ...33...

Page 34: ...ents GmbH Co KG Goettingen Germany All rights reserved No part of this publication may be reprinted or translated in any form or by any means without the prior written permission of Sartorius The stat...

Reviews: