13
SARTORIUS QC - Scales
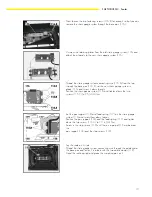
Adjusting the Upper Middle Stop
– Remove the weighing pan.
– There must not be any load on the scale when the upper middle stop is
being adjusted.
– Adjust the upper middle stop so that the gap between the weighing pan
and the stop is 0.6 mm (tolerance range: + 0.1 mm); check the gap size
with a feeler gauge.
– When the gap is correct, place the weighing pan on the scale.
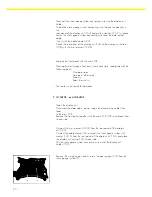
Adjusting the Corner Stops
– Remove the weighing pan and place it upside down on the scale.
– Place a load equal to the maximum capacity in Position 1 on the
weighing pan.
– Use a feeler gauge to check the distance between the corner stop screws
(115) and the weighing pan.
– Proceed as in the following example to adjust the corner stops:
–
The actual value
of the gap (as determined with the feeler gauge) is
1mm.
–
The target value
is 0.25 mm.
–
The deviation
(actual minus target value) is, in this example, 0.75mm.
–
The lead
of the stop screws is 1 mm, i.e.:
1 turn clockwise increases the gap by 1 mm
1 turn counter-clockwise decreases the gap by 1 mm
–
The adjustment step
is calculated from the above values:
1 turn of the stop screw changes the gap size by 1 mm, i.e. in the above
example, you would need to turn the screw ¾ of a turn counter clockwise
to achieve the required adjustment (deviation: 0.75 mm).
– Before adjusting the screws (115), remove the weighing pan from the
scale.
– Proceed in the same manner to adjust the corner stops in positions 2 – 4.
– After completing this adjustment procedure, place the weighing pan right
side up on the scale.
– When you have finished adjusting the corner stops, proceed to the
adjustment/calibration functions.
Summary of Contents for QC34EDE-S
Page 2: ...2...


