background image

CLEANING AND MAINTENANCE 

  
To maintain optimum performance, the appliance should be cleaned 
after each use:

1. Switch the trimmer off and remove the power supply, if 

connected. 

2. Detach the comb guide by gently lifting the front of the comb 

guide from both sides and fl ipping it over to the back of the 
unit, and locking it into position by clicking it securely onto the 
fastener on the back of the handle (refer to ‘Using The Trimmer 
Without The Comb Guide’ for further information).

3. Using the cleaning brush supplied, brush away any hair and 

debris. Do not use a sharp object to clean the trimmer head.

4. To make cleaning even easier, the blades can be removed from 

the trimmer and comb guide. 

  To remove the blades, hold the handle of the trimmer with one 

hand, place your thumb underneath the blades and push the 
blades up and away from the handle. Place the blades in a secure 
place whilst cleaning. 

  Gently blow away any hair that is trapped beneath the blades. 
  The blades can also be rinsed under cool running water. ONLY 

THE BLADES CAN BE RINSED UNDER THE TAP – THE TRIMMER 
SHOULD NEVER BE PLACED UNDER THE TAP OR UNDER RUNNING 
WATER. 

5. Ensure the blades are dry before re-attaching to the trimmer 

body. 

6. To replace the blades, ensure the stubble comb guide is detached 

and then place the back of the blades back into the cavity on the 
top of the trimmer. Press the blades down so that they click into 
place. 

7. When used regularly, the blades will not need to be oiled. 

However, if the blades have been rinsed under the tap or the 
trimmer has not been used for a prolonged period of time, 
then it is advisable to apply a small amount of lubricating oil 
(provided) onto the blades before using. This helps to keep the 
blades as sharp as possible. 

Summary of Contents for VS7890A

Page 1: ...Model VS7890A I TRIM PRECISE STUBBLE TRIMMER...

Page 2: ...water Take care to avoid contact between the moving blades of the unit and the skin paying particular attention to the face neck and hands This appliance is not intended for use by persons including...

Page 3: ...use immediately and contact your dealer for instructions on returning it for examination or exchange If the supply cord is damaged it must be replaced by the manufacturer its service agent or similarl...

Page 4: ...s best cutting performance by combining Hard Like Diamond HLD carbon coated stainless steel blades with titanium and a high performance professional DC motor to provide precision control for exact st...

Page 5: ...2 4 3 5 6 11 12 9 10 1 7 8...

Page 6: ...nce is switched off plug the charging cord directly into the base of the trimmer 3 Switch the adaptor on The LCD display will then illuminate and the charging indicator will appear in the LCD display...

Page 7: ...ded operation NOTE If battery power is weak wait about 2 minutes before pressing the on off button 24 Ultra Precise Cutting Length Settings 0 4mm to 5mm The innovative i trim precise Stubble Trimmer u...

Page 8: ...ted stubble comb guide helps to avoid uneven cuts by providing direction and helping you to hold the trimmer comfortably on the face 5 Move the trimmer upwards through the hair a little at a time with...

Page 9: ...RE turning the trimmer on Always ensure when using the trimmer that the integrated stubble comb guide is correctly positioned in place Check this by pushing the comb guide gently downwards to ensure i...

Page 10: ...ur stubble to ensure it stays shaped stubble is an ongoing process of upkeep so you can t just shape it and leave it NB Use on clean dry hair If possible when using for the first time try and grow you...

Page 11: ...urther information and turn the trimmer over so that the blades are closest to the face Trim around the sideburns cheeks and edge of your stubble taking care around the sideburns and edges of your stu...

Page 12: ...r a little at a time with and against the direction of hair growth whichever is most comfortable as most men have hair growing in various directions 3 For a close finish around the sideburns and cheek...

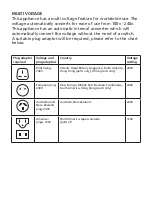
Page 13: ...ble plug adaptor will be required please refer to the chart below Plug adaptor required Voltage and plug adaptors Country Voltage setting British plug 240V Ireland Great Britain Singapore South Americ...

Page 14: ...humb underneath the blades and push the blades up and away from the handle Place the blades in a secure place whilst cleaning Gently blow away any hair that is trapped beneath the blades The blades ca...

Page 15: ...ing machines which can be purchased from your local art and crafts store BATTERY DISPOSAL The appliance contains Nickel Metal Hydrate batteries To protect the environment the appliance must be dispose...

Page 16: ...Limited PO BOX 251159 Pakuranga Auckland 1706 New Zealand Customer Service Hotline New Zealand 0800 266 247 LIMITED THREE YEAR WARRANTY This product is subject to the express warranty given on the wa...

Reviews: