SATEL PRF-LCD-WRL
3
7. Place the enclosure base against the wall and mark location of the mounting holes.
8. Drill the holes in the wall for wall plugs (screw anchors).
9. Using wall plugs (screw anchors) and screws, secure the enclosure base to the wall
Select wall plugs and screws specifically intended for the mounting surface (different for
concrete or brick wall, different for plaster wall, etc.). When installed, the device must
withstand a pull-off force of at least 50 N.
10. Put the cover on the catches and snap the enclosure shut.
11. Lock the cover using screws.
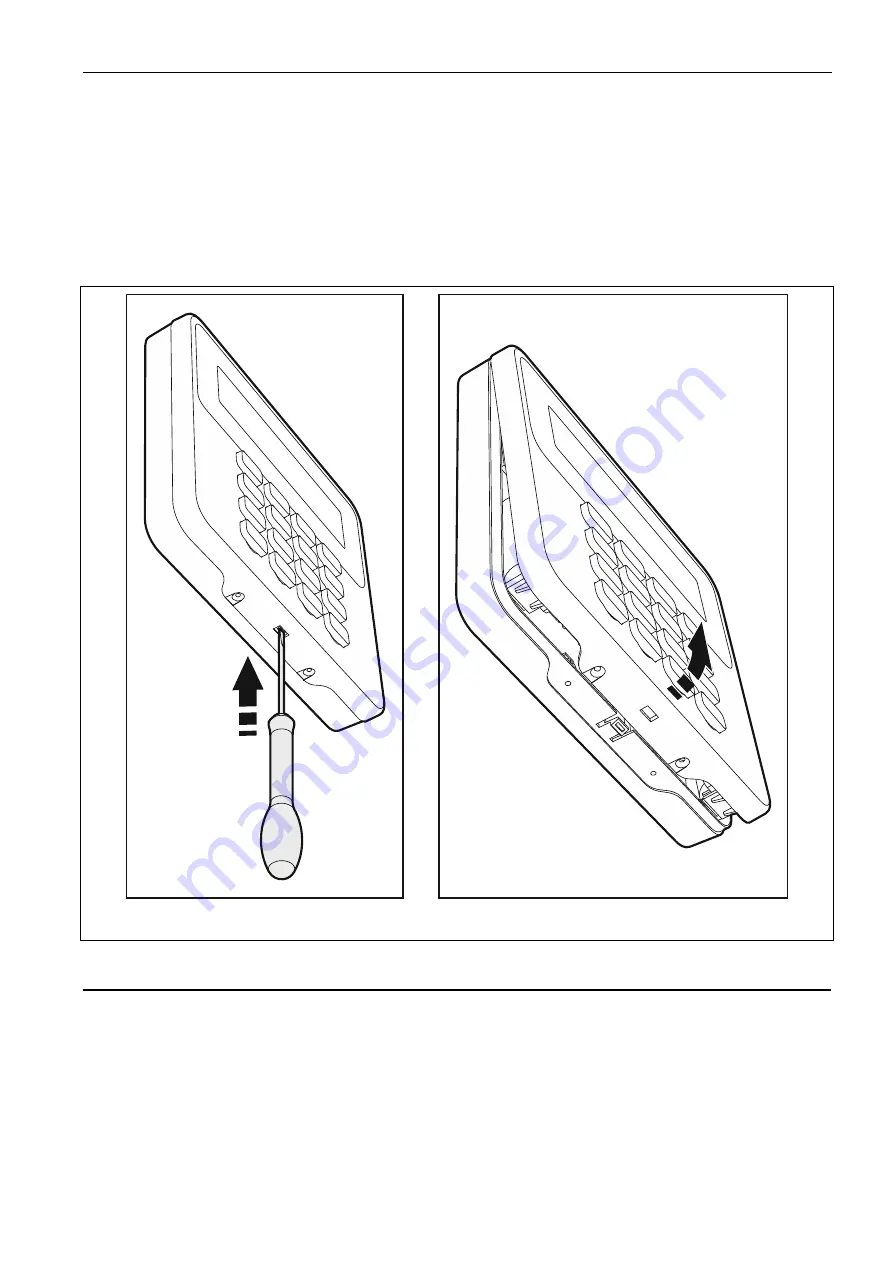
Fig. 2. Opening the enclosure.
3.1 Adding the keypad to the system
You can add the wireless keypad to the system by using either a computer with PERFECTA
S
OFT
program installed, or an LCD keypad. The control panel allows for enrolling of up to 4
PRF-LCD-WRL keypads. If no wired keypad is connected to the control panel, you can only
add the first wireless keypad using the PERFECTA
S
OFT
program.
3.1.1
PERFECTA
S
OFT
program
1. Click on the “Hardware” tab.
2. Click on one of the unused keypads. Address of this keypad will be assigned to the
wireless keypad after the adding procedure is finished.


