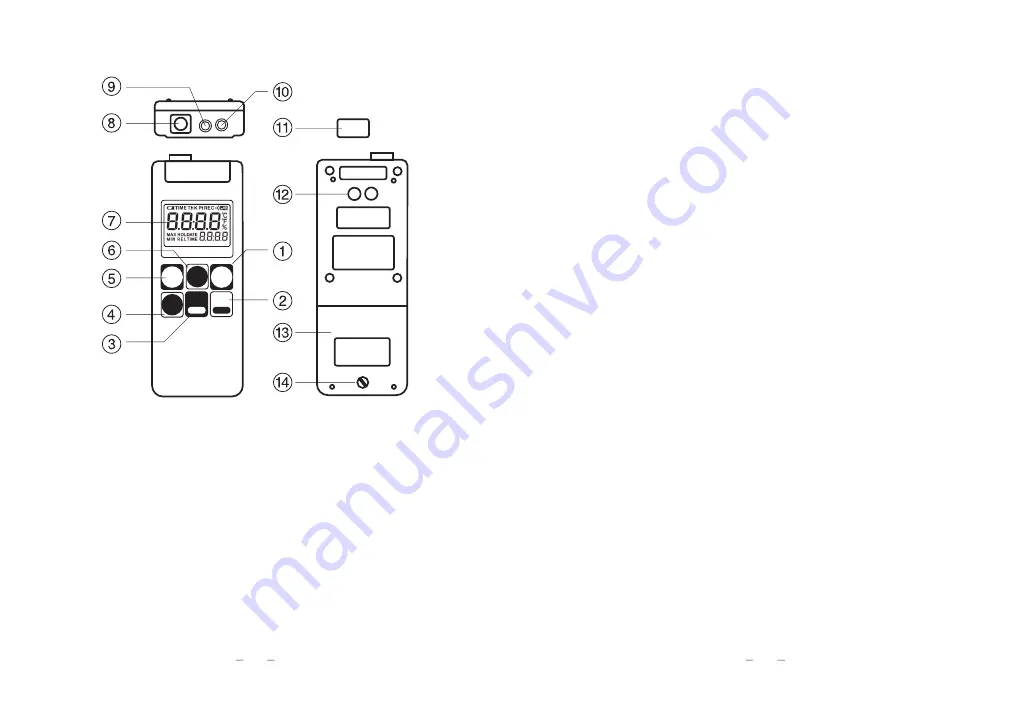
②
HOLD / REL key
・
Press the HOLD / REL key in normal measurement mode to hold
(freeze) temperature readings.
・
Press the HOLD / REL key in hold mode to enter REL (fluctuation)
measurement mode.
・
Press the HOLD / REL key in REL (fluctuation) measurement
mode to return to normal measurement mode.
③
MAX / MIN key
・
Press the MAX / MIN key in normal measurement mode to enter
maximum / minimum storage mode.
・…
Press the MAX / MIN and SET / CLEAR keys simultaneously to
enter the alarm setting mode for upper and lower limits
④
SET / CLEAR key
・…
Mainly use the SET / CLEAR key to determine the various settings.
⑤
TIME key
・…
Press the TIME key in normal measurement mode to display the
set time.
・
While the main unit is on, press the TIME and POWER keys
simultaneously to enter time setting mode.
⑥
REC / PRINT key
・…
Press the REC / PRINT key in normal measurement mode to enter
manual storage mode.
・…
Press the REC / PRINT and MAX / MIN keys simultaneously in
normal measurement mode to start auto storage mode.
・
While the main unit is on, press the REC / PRINT and POWER
keys simultaneously to print the stored data on an optional printer.
⑦
LCD panel
・
The LCD panel displays the temperature reading, the current
state of settings and characters
⑧
Sensor connector
・
Connect the dedicated thermistor sensor probe or dedicated
thermocouple (K) sensor probe.
⑨
Printer connector
・
Connect the cable of the optional printer
①
POWER key
Press this key. The buzzer (beep) sounds and the unit turns on.
Press this key again to turn it off.
While the main unit is on, it can be switched to each mode as
follows :
・
Press the POWER and HOLD / REL keys simultaneously to enter
record interval setting mode.
・
Press the POWER and TIME keys simultaneously to enter time
setting mode.
・
Press the POWER and MAX / MIN keys simultaneously to enter
management number setting mode.
・
Press the POWER and SET / CLEAR keys simultaneously and
then press the SET / CLEAR key alone to clear the stored data.
1. Names and Functions of Components
1
2
Summary of Contents for SK-1260
Page 16: ......


