5
appliance the plug should be removed and the appropriate one fitted.
If you cut off the plug and let go of the cable it will rewind into the machine.
Therefore you must pull out a length of the cable and secure it before cutting off the
plug and refitting a new one.
IMPORTANT: The plug removed from the mains lead. If severed, must be
destroyed as a plug with a bared flexible cord is hazardous if engaged into a live
socket outlet.
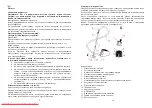
ILLUSTRATION
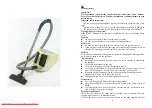
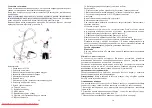
Features
1. On/off switch-button
2. varies power button
3. Cable rewind button
4. Full dust indicator
5. Hose inlet
6. Tube button
7. Plastic tube / metal telescopic tube
8. Airflow regulator
9. Hose handle
10. Hose
11. Dust container
12. Hepa filter
13. Air outlet cover
14. Floor brush storage clip
15. Floor brush
16. Multi purpose nozzles (crevice nozzle /upholstery nozzle)
Quick start
6
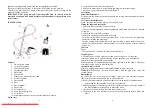
1. Assemble the nozzle, the tube and hose.
A
2. Pull out the mains cable to its full length and plug into the mains supply.
3. Switch on by pressing the On/off switch-button.
2
Accessories
Insert the flexible hose
Fit the hose to the cleaner by inserting the hose end into the hose inlet
4
until it clicks to
the position.
TO remove the flexible hose
When removing, squeeze the clips up side and pull it out.
Fitting the tubes and accessories
1. Attach the tube to the handle end of the hose.
The hose handle features an airflow regulator
10
which allows suction to be reduced
as required.
2. Attach the floor brush
15
to the tube.
3. Attach the multi purpose nozzle
16
to the tube.
Turn the rotating nozzle as the arrowhead show; it can be used as the upholstery
nozzle (for curtains and upholstery).
Turn the rotating nozzle backwards to the home position; it can be used as the crevice
nozzle (for awkward places, behind radiator; or for hard surfaces, pelmets, delicate
objects etc).
Controls
Power
The on/off control is operated by On/off switch-button.
2
Variable power
A Variable power switch
2
varies the suction power as required .For example,
maximum suction can be used for cleaning carpets, hard floors etc, and reduced
suction for cleaning upholstery and curtains.
Suction can also be controlled using the airflow regulator
7
on the handle .Closed for
maximum suction, open for reduced suction.
Automatic cable rewind
After use, unplug and press the cable rewind button
2
to retract the cable.
WARNING
: When using the cable rewind, always hold the plug as the cable will
rewind quickly.
Dust disposal
To obtain the best result from your cleaner, empty the dust container regularly,
otherwise the airflow and cleaning power will be reduced.
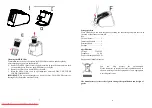
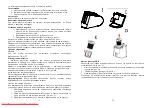
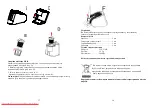
1. Remove the dust container from the product by pressing the dust container button.
And pulling the dust container away from the product. B
2. Holding the dust over a dustbin press the dust release button as shown, the button of
the dust container will drop down to release the dirt. C
3. Close Push the dust container back into the product to refit.
4. The button of the dust container by pressing the base upwards until it clicks into
place.
Summary of Contents for ST-VC 1298
Page 1: ...ST VC 1298 VACUUM CLEANER Downloaded From Vacuum Manual com Manuals...
Page 6: ...11 16 1 2 3 ON OFF 1 2 3 ON OFF 1 2 3 12 B C 1 D 2 3 Downloaded From Vacuum Manual com Manuals...
Page 7: ...13 220 230 50 2000 1 1 1 1 14 UA Saturn Downloaded From Vacuum Manual com Manuals...
Page 9: ...17 B C D 1 D 2 18 1 1 1 1 220 230 50 2000 Downloaded From Vacuum Manual com Manuals...

