8
that is sucked up would force its way in-
to the device and damage the motor.
Clean dust / dirt in the dust container by
an entirely new method - it’s simple, clean
and so easy.
Emptying dust container
You can easily see with the transparent
dust container when it must be emptied.
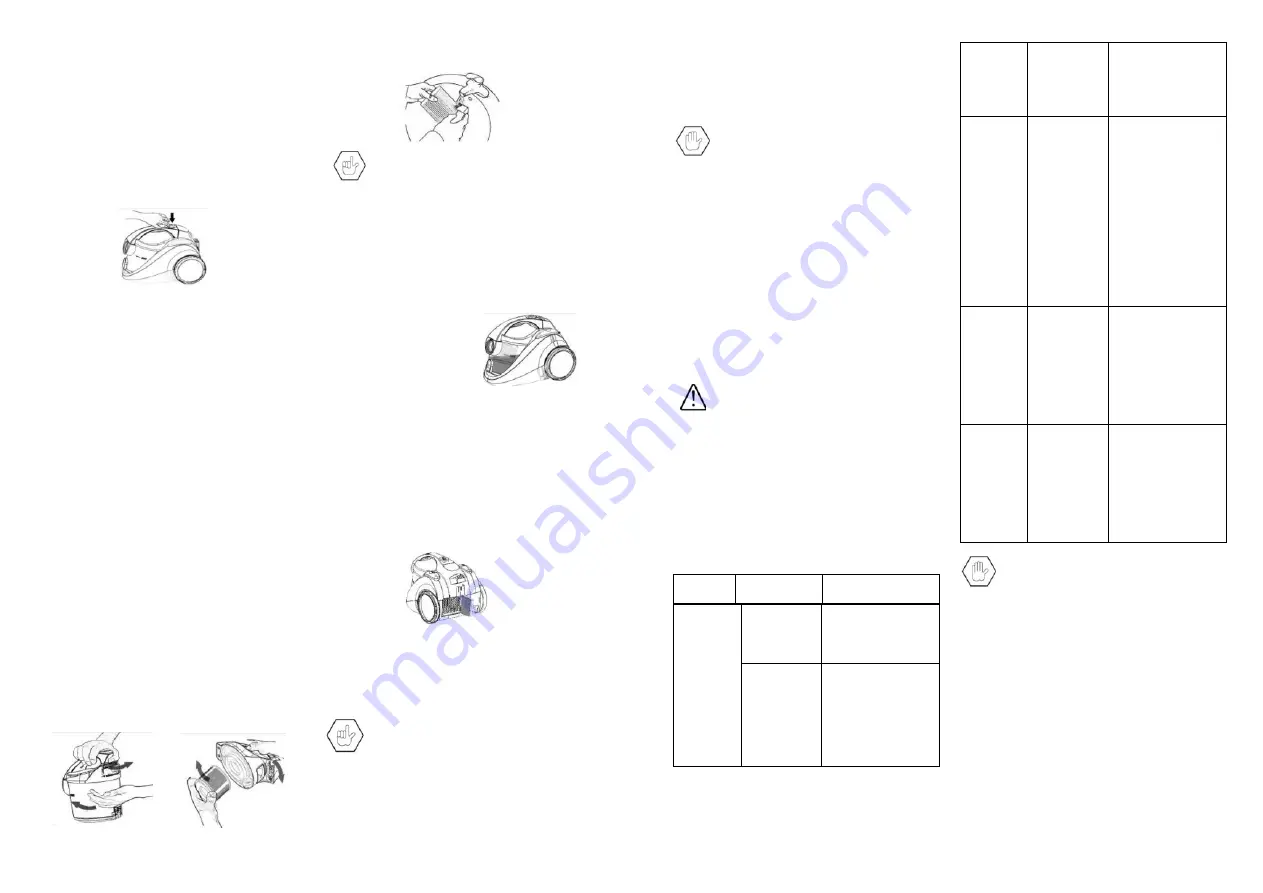
1. Switch off the vacuum cleaner and
disconnect the plug from the mains. To do
this always pull on the plug and not on the
cable.
You can press the lock button of the dust
container together with the out of their
anchoring with the aid of the carrier
handle on the dust container. Now lift out
the dust container and carry it to the
waste bin.
2 A push button is located on the dust
container that you can
use to open and empty it automatically
(bottom-down technology).
To do this hold the dust container over
your dustbin and press on the empty
button.
3. After emptying it clean the HEPA filter
again if necessary (see also Cleaning the
HEPA filter below). After this rinse out the
dust container and wipe it dry.
4. After this push the HEPA filter cleaning
system back into position in the cyclone
vacuum cleaner until it snaps into place.
Your cyclone vacuum cleaner is now ready
for use again.
Cleaning the HEPA filter
The HEPA filter and the HEPA cover should
be cleaned regularly. Cleaning is best
done when emptying the dust container.
To do this follow the instructions in the
Emptying dust container section.
1. Switch off the vacuum cleaner and
disconnect the plug from the mains. To
do this always pull on the plug and not
on the cable.
2. Turn the dust container cover carefully
until it is released and the HEPA filter
will come away easily.
3. Now rinse the HEPA filter under running
water and allow it to dry.
Caution!
Only ever clean the filter with clean water
and do not use soap or detergent. These
would destroy the filter.
Place the HEPA filter back in the HEPA
cover (or replace with a new one) and fit it
into the dust container. Then fit the dust
container back into position in the cyclone
dust container until it snaps into place.
Your cyclone vacuum cleaner is now ready
for use again.
Motor protection
valve
The unit has the
protection valve, when
the dust cup is full of
dust, HEPA filter is
blocked or the air path
is blocked, the protection valve will turn
on automatically avoiding motor over-heat
in order to prolong the life of motor.
Cleaning the exhaust air filter
The exhaust air filter cleans the air a final
time before it leaves the vacuum cleaner.
You can clean the exhaust air filter as
follows:
1. Switch off the vacuum cleaner and
disconnect the plug from the mains. To
do this always pull on the plug and not
on the cable.
2. Open the exhaust air grill (this is at the
rear of the cyclone vacuum cleaner.)
3. The exhaust air filter is visible when
the grill has been opened.
4. Rinse the filter under cold run-
ning water and allow dry.
Caution!
Only ever clean the filter with clean
water and do not use soap or detergent.
These would destroy the filter.
5. Put the exhaust air filter back into place
(or replace with a new one) and place
in the grill.
6. Close the exhaust air filter grill.
9
CARE AND MAINTENANCE
Cleaning the vacuum cleaner
To clean the device casing switch off and
disconnect the plug from the mains
socket.
Danger!
Never expose the vacuum cleaner
to the effects of the weather (rain, etc.).
No parts may be washed in a dish washer.
The casing, dust collecting chamber and
filter chambers of the vacuum cleaner can
be wiped with a damp cloth if required. No
liquid must enter the vacuum cleaner in
the process. Never use strong cleaning
substance (scouring liquids, thinners),
since these will corrode the plastic
surface. Only place the plug back in the
mains socket when you have made sure
that all the parts are thoroughly dry.
Hair and fluff may gather on the running
wheels and on the floor nozzle of the
vacuum cleaner in time. You should
remove these to ensure that handling of
the vacuum cleaner is always easy.
Note!
Lubricating or oiling of the roller
bearing is not recommended, because this
will cause dirt and fluff to stick even
better.
IN THE EVENT OF PROBLEM
Trouble-shooting
Faults can occur on all electrical
equipment. This m ust not necessarily be
due to a defect in the device itself. So
check first with table if the fault can be
dealt with.
PROB-
LEM
POSSIBLE
CAUSES
SOLUTIONS/
TIPS
The
secondary
valve is
open.
Close the
secondary valve
Weak
suction
An object
is blocking
the
suction
pipe
Check the
suction tube,
the handle area,
suction pipe and
the nozzle in
use for
blockages.
Filters are
not fitted
properly
or are
blocked
Fit a new filter
Device
does
not
work.
Device is
not
properly
plugged
into the
mains
Check that the
mains plug has
been inserted
properly. Also
check whether
the power
socket is in
order (e.g. use
an electric
torch). Check
the fuses!
Automatic fuses
in the fuse box
Whist
ling
sound
during
The first
hours of
operatio
n
This is not
a fault
The noise will
die away by
itself after a
time
The
device
cover
does
not
close
properly
.
Dust
container
is not set
properly
Check the dust
container fit.
Danger!
Never try to repair a defective
device, or a device you believe to be
defective, by yourself. You can put both
yourself and future users in danger.
Repairs may only be carried out by
authorized specialists.
Specifications
• Power:
1600 W
• Rated Voltage:
220-230 V
• Rated Frequency:
50 Hz
• Rated Current:
7.3 A
• Volume of Dust Container: 2 l
• Noise Level:
≤78 dB
• Cord Length:
5 m
Summary of Contents for ST-VC7279
Page 1: ...Saturn ST VC7279 Black ST VC7279 Red...
Page 2: ...1 ST VC7279 VACUUM CLEANER...
Page 8: ...12 230 50 29 30 13 3600 PVC 1 2...
Page 9: ...14 3 4 2 15 HEPA HEPA 1 2 3 HEPA...
Page 12: ...20 230 50 29 30 21 360 PVC 1 2 3...
Page 13: ...22 4 2 4 23 HEPA HEPA 1 2 3 HEPA HEPA 4 HEPA HEPA HEPA 1 2 4 HEPA...
Page 14: ...24 HEPA HEPA 1 2 3 4 25 1600 220 230 50 7 3 2 78 5 1 1 1...
Page 24: ...44...
Page 25: ......


