18
221657C
5 Boiler Installation
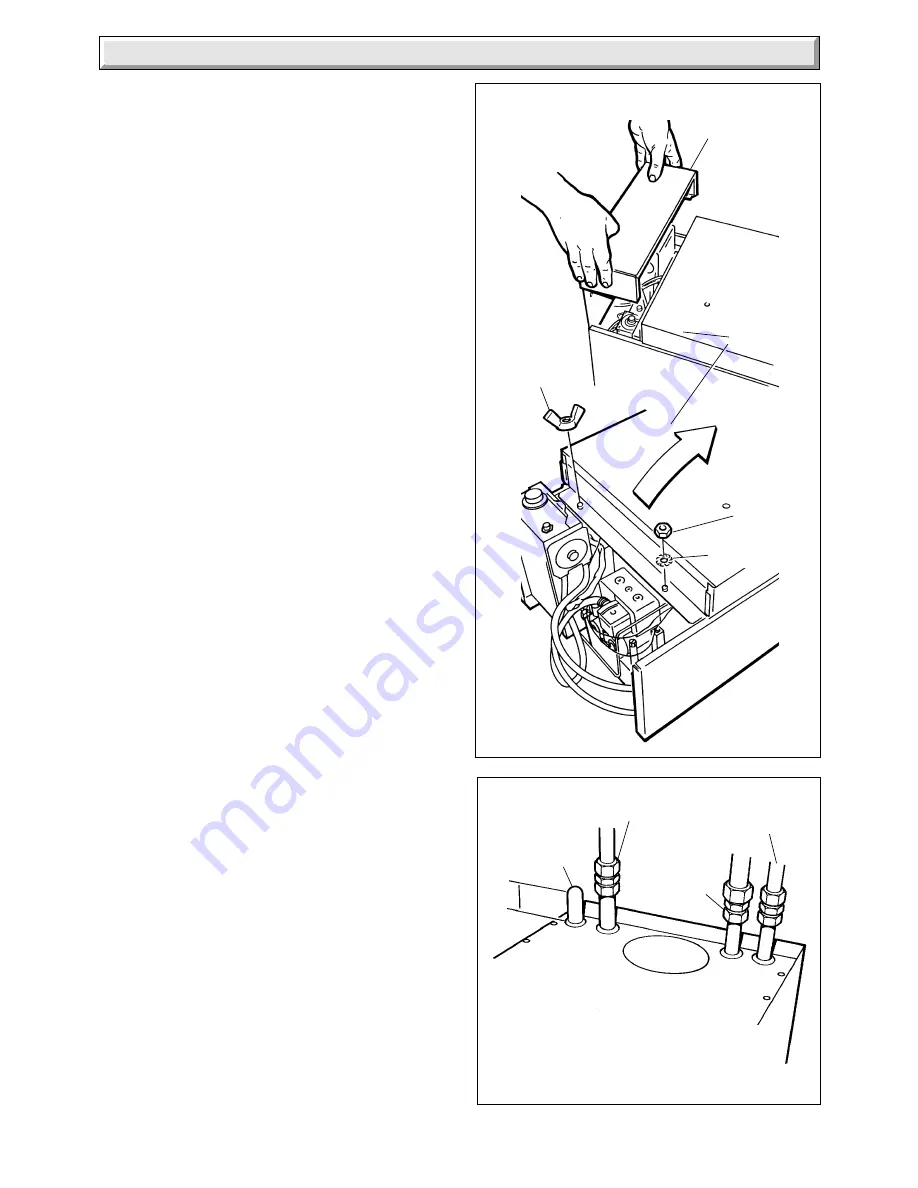
Diagram 5.2
Diagram 5.1
CONTROLS
COVER
WING
NUT
FRONT
COVER
SHAKEPROOF
WASHER
22mm HEATING
RETURN
22x28 GRAVITY
DOMESTIC
CONNECTION
✽
22mm GRAVITY
DOMESTIC HOT
WATER STUB
22mm HEATING
FLOW
✽
NOTE: When cutting leave
sufficient length for fittings
4115
4133
SECURING
NUT
5.1 Boiler Preparation
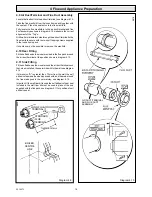
With the boiler still in the bottom tray, slide the controls cover
upward and remove it as shown in diagram 5.1.
Remove the front cover by undoing the wing nut, nut and
washer, lift the front cover off, see diagram 5.1.
Place front cover on one side until required.
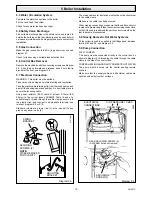
Fit suitable compression fittings to the required tappings on the
boiler.
Note. For gravity domestic hot water use 22x28mm connections
on the stubs, see diagram 5.2.
5.2 Mounting the Boiler
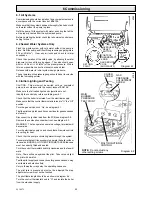
As necessary, fit the blanking plate, see diagram 5.5.
Now make sure that the top, swing brackets are UPRIGHT.
Lift the boiler into position, hooking over the mounting bracket.
Swing the brackets over the two screws at the top. Hold the
swing bracket(s) in place whilst tightening the screw(s) onto it,
see diagram 5.3.
Remove the blue and red electrical connections from the fan,
see diagram 5.4.
Break the air pressure switch tube connections, see diagram
5.4.
Remove the fan assembly by removing the screws at the front,
slackening the screws at the rear and sliding it out, see diagram
5.4.
Secure the flue assembly to the boiler using the previously fitted
dogpoint screws noting that these are keyhole fixings, see
diagram 5.5.
Make sure of the correct fitting of the flue to the boiler.
For a side outlet cut the fan duct extension to the length
required, see diagram 5.6.
Remove any burrs and fit as diagram 5.6.
Fit the fan duct extension to the elbow and assemble to the fan
as shown in diagram 5.6.
Do not secure at this point with the screw.
Position the fan assembly and engage the fan duct extension
over the flue manifold. Make sure, by pushing the flue duct
extension that a secure seal is made.
Mark the final position of the fan duct extension through the
screw hole on the elbow, remove the assembly and secure with
the screw as diagram 5.6.
Secure the elbow to the fan outlet with the Jubilee clip.
For rear outlet cut and fit the fan duct extension, as diagram 5.6.
Secure with the Jubilee clip.
Fit fan assembly by engaging the fan duct extension over the
flue manifold spigot, see diagram 5.7.
Secure the fan assembly with the screws previously slackened
and removed.
Reconnect the blue and red electrical connections to the fan,
the polarity of the connections is not important.
Reconnect the air pressure switch tubes as shown in diagram
5.4.


