15
221659B
4 Flue and Appliance Preparation
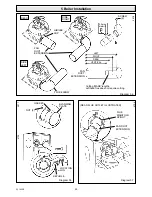
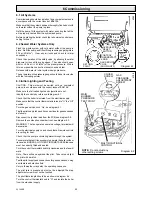
Diagram 4.6
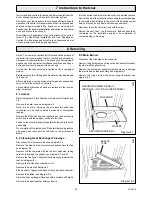
Diagram 4.7
FLUE
DUCT
BOILER
CENTRE
LINE
T MINUS 188mm
6833
6831
Q
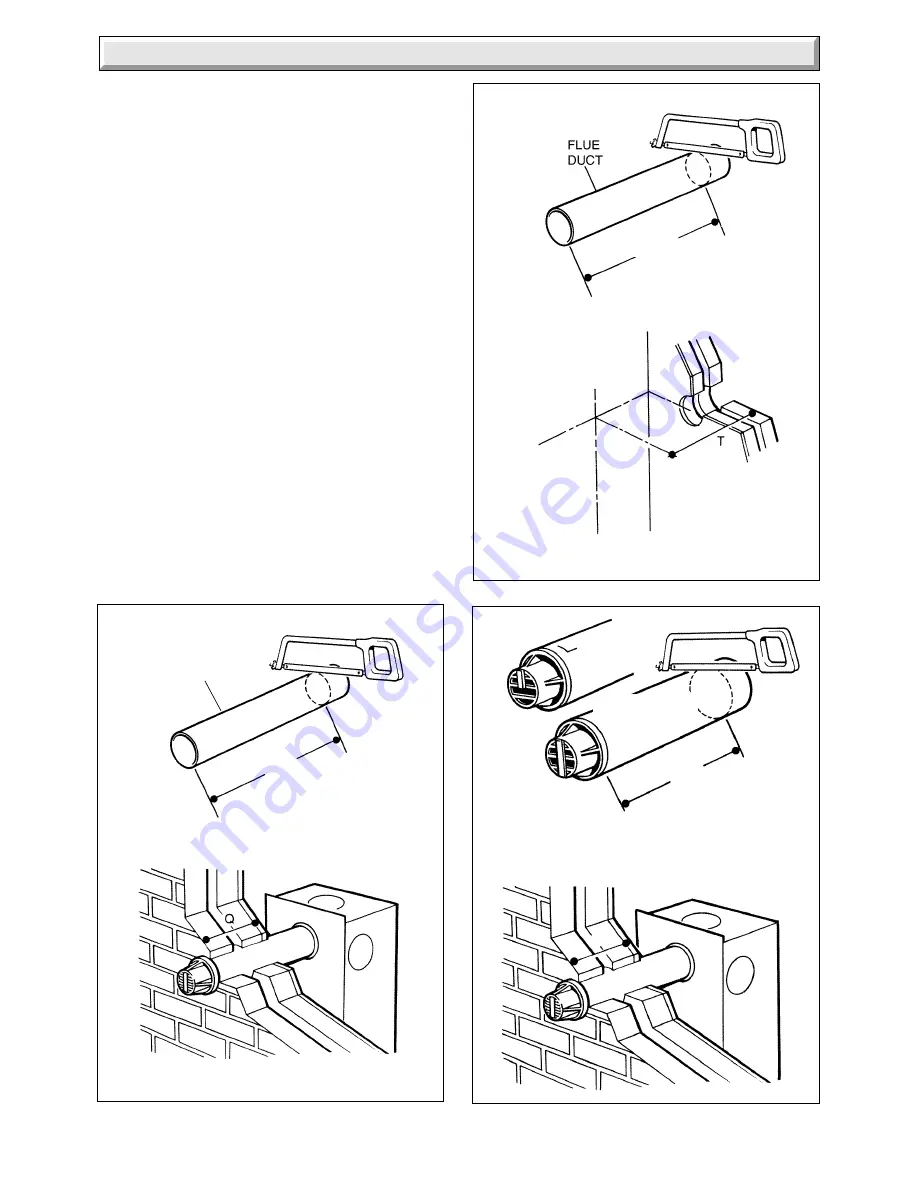
Diagram 4.8
LONG FLUE
TERMINAL
STANDARD FLUE
TERMINAL
Q PLUS 5mm
Q
6829
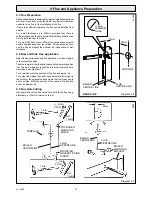
4.6 Wall Mounting Bracket
Reposition the template, making sure of dimensional alignment
with the flue hole.
Mark the boiler fixing points and mounting bracket position, see
diagram 4.5.
Drill holes and plug, to suit No.12x2in wood screws, fit the
screws allowing sufficient clearance, about 5mm, to accept the
swing brackets, see diagram 4.5.
Secure the mounting bracket to the wall with No.12x2in wood
screws and plugs, see diagram 4.5.
4.7 Flue Duct
Mark the duct to the length required, this length allows for
expansion, see diagram 4.6 for rear flue and diagram 4.7 for
side flue, then cut square and remove any burrs.
4.8 Air Duct/Terminal
Mark the duct length, see diagram 4.8 for rear flue and diagram
4.9 for side flue, then cut square and remove any burrs.


