background image

Savant Power System Deployment Guide - Sol-Ark

Copyright 2022 Savant Systems, Inc

009-2222-01 |  121222

- 11 -

5.5.  Battery Wiring (DC Power)

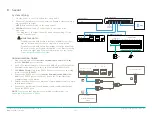
Wire the Sol-Ark inverter(s) to the battery bank by following the steps below. 

 IMPORTANT!:


Ensure the built-in battery disconnect is OFF while connecting batteries.


For HomeGrid batteries, complete 

section 6 Homegrid

 before connecting battery cables or providing power to the BMS. 

1. 

Install included toroids on battery input cables. 

2.  Wire all batteries through a DC combiner bus bar.
3.   Wire the combiner into the battery terminals on the Sol-Ark inverter. 
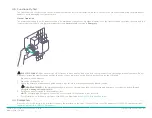
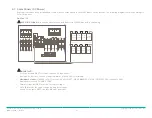
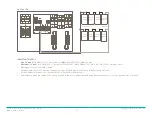
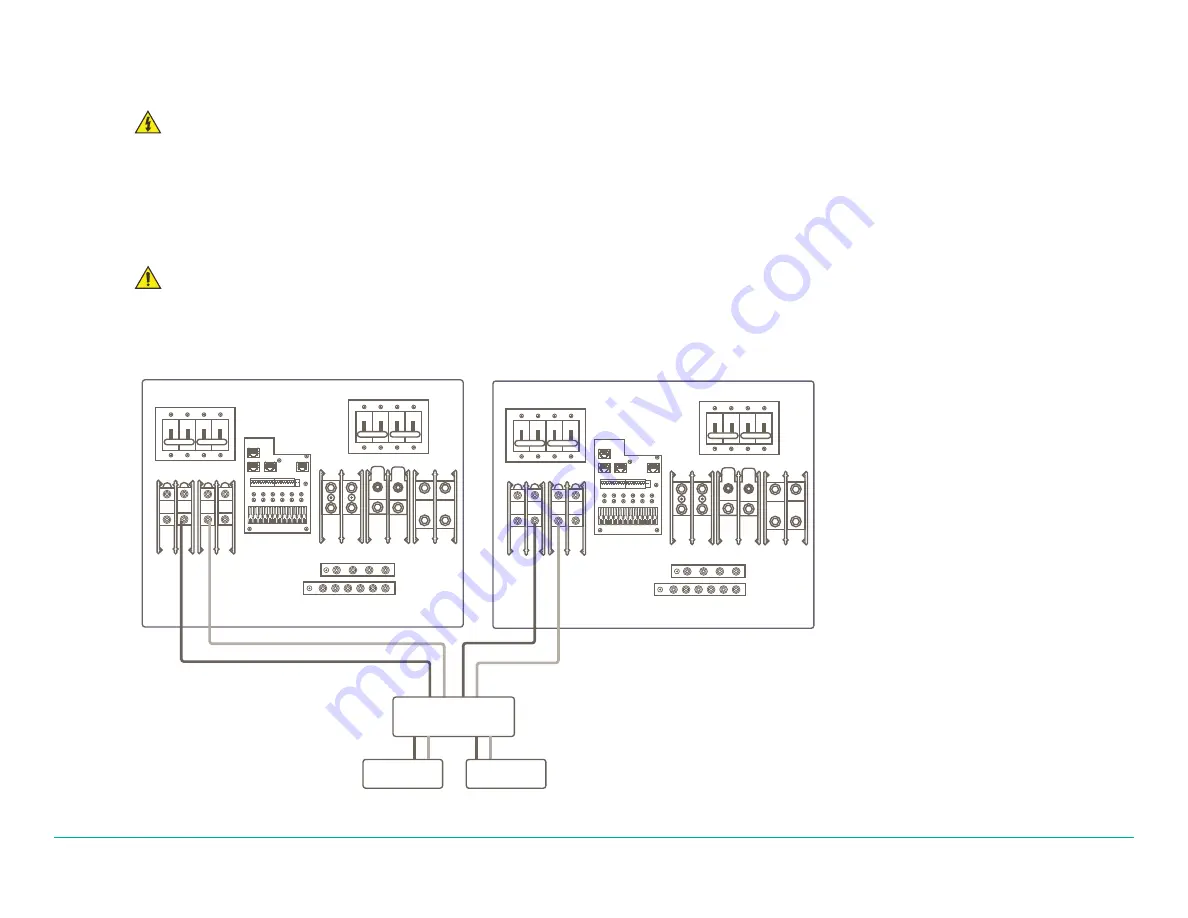
The image below uses the Sol-Ark 15k as an example, but the wiring is the same on the 12k, but with different battery terminal locations.

 IMPORTANT NOTES!: 


ALL paralleled systems

 MUST be connected and tap into to the same large battery bank

, each with its own cables attached. Taps in the diagram 

below are represented as as circles.


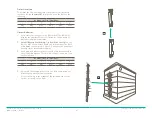
The 15K reaches a max of 275A of battery charge/discharge if using both sets of battery terminals. If using one set of terminals, the max battery 
charge/discharge is 160A.

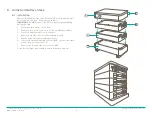
Batteries

DC 

Combiner

Batteries

Summary of Contents for PKG-ESS200A-SOLARK12-HG19-01

Page 1: ... Document Date December 2022 Document Supports da Vinci 10 1 or higher This document guides the installer through the process of wiring and configuring Savant Power System and supports the following products PKG ESS600A SOLARK36 HG76 PKG ESS400A SOLARK24 HG38 PKG ESS200A SOLARK12 HG19 NA PKG ESS200A SOLARK12 HG19 01 PKG ESS200A SOLARK12 HG19 INT PKG ESS800A SOLARK48 HG76 ...

Page 2: ...ATS Wiring 7 4 4 ATS Functionality Test 9 5 Sol Ark Inverter 10 5 1 15k Overview 10 5 2 12k Overview 11 5 3 Mounting 12 5 4 Wire Grid Load AC Power 12 5 5 Battery Wiring DC Power 13 5 6 Battery Sensor Placement 14 5 8 Solar Panels DC Power 15 5 9 Communication 17 6 HomeGrid Battery Stack 16 6 1 Installation 19 6 2 Configuration 20 7 HomeGrid Skybox Optional 16 7 1 Installation 16 7 2 Configuration...

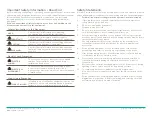
Page 3: ... device 9 If the provided plug does not fit the desired outlet contact a licensed electrician to replace the obsolete outlet 10 Protect any power cord from being walked on pinched strained or otherwise potentially damaged especially at the outlet or device connections 11 Disconnect any outlet powered apparatus from its power source during lightning storms or when unused for long periods of time 12...

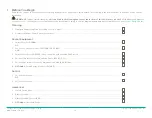
Page 4: ... installed according to the line diagram drawn and approved within the Savant Power Design Guide Planning 1 Stamped Engineering Plan According to Local Codes 2 Completed Savant Power System Worksheet Savant Equipment 1 Smart Host SHR 2000 OR 2 Pro Host or Super Pro Host SVR 5100 SVR 7000S AND 3 Smart Controller SSC 02485 or any controller with available R485 ports 4 Sol Ark Main Inverter Communica...

Page 5: ...kybox Optional 5 Wire Savant Equipment See Savant 6 Complete Configuration See Complete Configuration 3 Third Party Documentation IMPORTANT This document assumes the installer has read all relevant 3rd party documentation Read all manufacturer documentation for all 3rd party products in use which may include but are not limited to ASCO ATS PN 381333 402B ASCO ATS Installation Manual PN 381333 400H...

Page 6: ...Level all mounting points by using flat washers behind the holes to avoid distortion of the transfer switch Power Cables Test the conductivity of the power cables before installation Then connect them to the appropriate terminal lugs on the transfer switch as shown on the wiring diagram provided with the transfer switch Make sure that the lugs provided are suitable for use with the cables being in...

Page 7: ...al operation Do not manually operate the transfer switch until both power sources are disconnected Once disconnected do the following 1 Open both circuit breakers 2 Open the enclosure door 3 Grasp the attached maintenance handle and turn it as shown to manually operate the transfer switch IMPORTANT NOTE If the maintenance handle does not operate smoothly check for shipping damage or construction d...

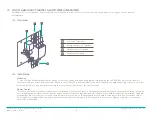
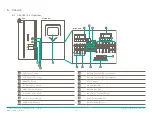
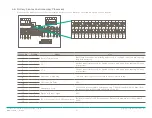
Page 8: ...View E F G H I K J L M N O P A LCD Touch Screen I Battery Terminal Blocks Positive B Wifi Dongle Enclosure J Battery Terminal Blocks Negative C ON OFF Button K MPPT Inputs D PV Disconnect Switch L Neutral Bus Bar E 200A Battery Breaker M Ground Bus Bar F Communication Ports N Generator Terminal Blocks G Battery Sensor Inputs O Load Terminal Blocks H 200A Load Breaker P Grid Terminal Blocks ...

Page 9: ...View Front View C A D Inside View B E F G H I J K L M A LCD Touch Screen H MPPT Inputs B Power ON OFF and Controls I Neutral Bus Bar C WiFi Dongle Enclosure J Ground D PV Disconnect Switch K Grid L1 L2 Terminals E Battery Terminals L Generator L1 L2 Terminals F Communication Ports M Load L1 L2 Terminals G Battery Temp CT and Generator Control Inputs ...

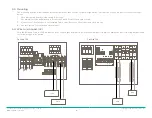
Page 10: ...studs using 6 8 screws 2 Use multiple screws and washers to mount the French Cleat to the board or wall 3 Mount the Sol Ark inverter on the installed french cleat Ensure Sol Ark is level and sits properly 4 Use two screws to attach the bottom mount 5 4 Wire Grid Load AC Wire the Grid and Load to the Grid input and the Load output terminals Sites with multiple inverters must combine the inverters u...

Page 11: ...les 2 Wire all batteries through a DC combiner bus bar 3 Wire the combiner into the battery terminals on the Sol Ark inverter The image below uses the Sol Ark 15k as an example but the wiring is the same on the 12k but with different battery terminal locations IMPORTANT NOTES ALL paralleled systems MUST be connected and tap into to the same large battery bank each with its own cables attached Taps...

Page 12: ...acid batteries 2 3 CT 1 Current transformers used for limited to home mode and peak shaving Polarity is important 4 5 CT 2 Current transformers used for limited to home mode and peak shaving Polarity is important 6 7 Generator Start Relay Two wire start for generators simple open or closed relay 8 9 Generator On Relay N A 10 11 Emergency Stop Short these pins to initiate emergency stop This will s...

Page 13: ...before continuing Solar Panel Y Connector Y Connector Solar Panel Solar Panel Solar Panel Solar Panel Solar Panel Solar Panel Solar Panel IMPORTANT Sol Ark has triple MPPTs for three separate PV input pairs If using Y Connectors run two strings in parallel totaling 26A self limiting Maximum PV input is 19 5kW 5 system 6 5kW MPPT MAX 500VOC PV MAX ISC MPPT 26A limiting to 26A Damage will occur if P...

Page 14: ...per system 6 500W per MPPT PV 500 Vdc Max Maximum PV input is 19 5kW 5 system 6 5kW MPPT MAX 500Vdc PV MAX ISC MPPT 26A limiting to 26A Damage will occur if PV VOC 550V Parallel strings per MPPT must be the same voltage PV1A B must be the same voltage if both are used It is OK if panels for panels on the same MPPT to face different directions Panel frame grounding can be done to any ground in the ...

Page 15: ...t containing the last five digits of the dongle serial number 7 Register the dongle via the Pro PV app or www mysol ark com PV Pro App The PV Pro App provides realtime data and troubleshooting tools Savant recommends creating both a company installer account and a customer viewer When registering the ethernet dongle and creating a plant it is important to be aware of the visibility of the plant If...

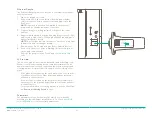
Page 16: ...e BMS to any energized cabling during this step 1 Place the Stack d base on the floor 2 Remove black sticker on bottom of the first Battery Module 3 Stack the battery module onto the base 4 Remove both side covers for the installed module 5 Repeat steps 2 4 with remaining modules 6 Place the Battery Monitoring System BMS ontop of the stack with no power connected to it 7 Remove the top and side co...

Page 17: ...multiple battery stacks see the HomeGrid Manual Addr SET ON 1 2 3 4 5 6 3 1 4 2 BMS Base Address 1 2 3 4 BMS ON OFF OFF OFF 1 ON OFF OFF OFF 2 OFF ON OFF OFF 3 ON ON OFF OFF 4 OFF OFF ON OFF 5 ON OFF ON OFF 6 OFF ON ON OFF 7 ON ON ON OFF 8 OFF OFF OFF ON EMS LAN Link B Link A CAN RS485 COM RS232 Dry Contact Invert COMM Half Current Invert SET Addr SET Imped SET ON 1 2 3 4 5 6 ON 1 2 3 4 5 6 ON 1 2...

Page 18: ... of batteries installed will display 2 Parallel Battery Stacks Only Flip Dial Code Switch 1 on the BMS to OFF with all other Dial Code switches ON The BMS will display the number 62 After 2 3 minutes the quantity of battery stacks installed will display 3 Configure all battery stacks for specific inverter outlined in the HomeGrid manual The switch positions shown are for a SolArk inverter Inverter...

Page 19: ...ompleted follow the steps below 7 1 Overview Front View WiFi Power USB Disk 12VIN 12VIN A 12V Power Supply Status LEDs B USB Port Red Solid Red Power is ON OFF Power is OFF C Status LEDs D WiFi Antenna Green Solid Green No Wifi connection Flashing 1s on 1s off Connected to Wifi no connection to HomeGrid server E Button F RS232 Port Blue OFF Normal behavior Fast Blink 0 2s on 0 2 off Upgrading firm...

Page 20: ...auxilliary power cable to connect it to the auxilliary power port of the BMS 3 Confirm the red status led is ON 4 Onced the device is Skybox is powered up remove the cap from the wifi antenna 5 Tighten the bolt around the base of the antenna and rest the antenna in a location with wireless reception IMPORTANT For information on upgrading the firmware of the Skybox see the Skybox Firmware Upgrade G...

Page 21: ...Ark into the CANBUS port of inverter 2 Use CAT5 ethernet cable to connect the CANBUS port of the Inverter Communication Cable Sol Ark to the HomeGrid Battery Stack 3 SSC 002485 Only Plug in the RS232 Phoenix connector to the relay ports of the SSC 002485 4 Connect the RS232 port of the Inverter Communication Cable Sol Ark to the RS232 port of the Savant Controller To the right is an example wiring...

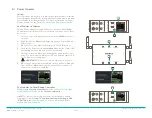
Page 22: ...the Status LED alternating between red and green continuously 5 Pairing is complete when all Savant Power Modules have the gear icon replaced with a Bluetooth icon and the status LCD of the Director is solid green IMPORTANT This process takes between 2 5 minutes 6 Once the Power Modules are paired switch all Power Modules from AUTO to ON mode using the Circuit Power switch All connected circuits w...

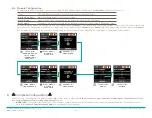
Page 23: ...installed into Dual relay Power Modules have Channel A and Channel B while single relay modules have only Channel A The image below shows the process of configuring the Room Name Circuit Name and Slot Numbers of dual relay Power Module CHANNEL B IS CONFIGURED 2 3 4 5 6 7 8 TAP PAIR TO BEGIN ON DEVICE SETUP SELECT THE ROOM FOR CHANNEL A SELECT CIRCUIT NAME FOR CHANNEL A SELECT CIRCUIT NAME FOR CHAN...

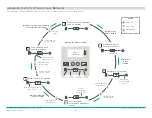
Page 24: ...LIGHT ON LIGHT OFF TIME DELAY Normal source unacceptable Emergency source starting Feature 2B time delay if used Feature 31F time delay if used Load on emergency light comes on Waiting for Normal source to return Feature 31M time delay if used Normal source accepted light come on Feature 3A time delay if used Feature 31G time delay if used Load on Normal light comes on Generator Source runs unload...

Page 25: ...ge and Frequency Settings Description Settings Savant Setting of Nominal Adjustment Range increments of 1 Display Screen Normal Source Voltage Dropout 94 70 to 98 N Volt DO Pickup 96 85 to 100 N Volt PU Other Voltage Trip off off 102 to 116 N Volt OV Unbalance Dropout 20 5 to 20 N VUnb DO Unbalance Pickup 10 3 to 18 N VUNB PU Emergency Source Voltage Dropout 75 70 to 98 E Volt DO Pickup 85 85 to 1...

Page 26: ... engine cooldown 5 minutes 0 to 60 min 59 sec Cool Down 2E 3A Retransfer to Normal if Normal fails 30 minutes 0 to 60 min 59 sec E to N N Fail 3A Retransfer to Normal if just a test 30 seconds 0 to 9 hours 59 min 59 sec E to N Test 3A 31F Normal to Emergency pre transfer signal 0 0 to 5 min 59 sec N to E PreX 31F 31G Emergency to Normal pre transfer signa 0 0 to 5 min 59 sec E to N PreX 31G 31M No...

Page 27: ... Parameter Sub Level Savant Settings Date Time Time hh mm ss Date day mm dd yy Format US Daylight Savings Time Off Communication RS485 Port optional Accessory 11BE Baud Rate 9600 Device Adress Dev Addr 1 Protocol Modbus Emulate Grp1 no Display Language English Contrast 15 Baclight ON Volt Label Vab bc ca Source 1 2 no ...

Page 28: ...nphase On Load Shed Inphase enable no Load Shed Inphase Fail Accept Timer no Fail Accept Timer External Feature 6B no Ext Feature 6B External Feature 17 no Ext Feature 17 Feature 6DL enable no Feature 6DL Serial Feature 17 enable no Serial Feature 17 Normal Voltage Unbalance enable no Volt Unbalance Emergency Voltage Unbalance enable no Volt Unbalance Phase Rotation disabled Phase Rotation Control...

Page 29: ...UPS Time Factory Reset Lockout All Changes System Self Check Test Mode Parallel Master Slave Modbus SN Phase A B C Start V Start Gen Grid Charge A Float V Gen Excersise Cycle Absorption V Equalization V Equalization Days Equalization Duration Gen Force Shutdown V Low Battery V Restart V Battery Resistance Battery Empty Use Gen Input as Smart Load Use Gen Input for AC Coupling AC Couple on Load Sit...

Page 30: ...ENA Gen Force DIS Equalization Days 0 90 NA Equalization Hours 0 10 NA Absorption V 40 63V NA Equalization V 40 63V NA TEMPCO mV Cell NA Battery Setting Battery Capacity 0 9999Ah 400 Max A Charge 0 185A 125 Max A Discharge 0 185A 150 Batt Empty V 41 63V 48 Batt Resistance 0 6000mΩ 8 Batt charging efficiency 0 100 99 Batt Shutdown 0 100 8 Batt Low 0 100 25 Batt Restart 0 100 45 Batt Shutdown V 40 0...

Page 31: ...etting Grid Mode UL1741SA PF 1 Reconnection Time 1 600S 30 Grid Frequency 60 Grid Type 120 240 Split phase Grid Vol High 180 0 270 0V 265 Grid Vol Low 180 0 270 0V 185 Grid HZ High 45 00 65 00Hz 62 Grid Hz Low 45 00 65 00Hz 57 Inverter output voltage V 120 240V Zero export power 0 500W 20 GEN connect to Grid input DIS L HVRT DIS L HFRT ENA HF2 45 65HZ 62 HF1 45 65HZ 60 5 LF1 45 65HZ 58 5 LF2 45 65...

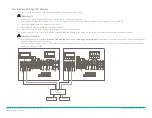
Page 32: ... it is possible to create a custom Y Cable using standard CAT5 cabling Use the Parent diagram for the Parent Sol Ark inverter and the Child Diagram for any additional Sol Ark inverters Sol Ark Inverter CANBUS Port 1 2 3 4 5 6 7 8 Smart Controller RS485 Port 1 HomeGrid CANBUS Port 1 2 3 4 5 6 7 8 4 5 6 3 2 1 G NC Term A B Additional Sol Ark CANBUS Ports 1 2 3 4 5 6 7 8 4 5 6 3 2 1 G NC Term A B Add...

Page 33: ...ts reserved Savant Savant app TrueImage Savant Host Now You Can RacePoint Blueprint Single app Home TrueCommand TrueControl and the Savant logo are trademarks of Savant Systems Inc AirPlay apple AirPort Express AirPort Extreme apple TV apple Remote Desktop FireWire iMac iTunes iPad iPad mini iPad Air iPhone MacBook Mac and OS X are trademarks or trade names of apple Inc iOS is a trademark of Cisco...

Reviews: