background image

Savant Lamp Control Deployment Guide 


Copyright © 2016 Savant Systems, LLC 

009-1388-01  |  160810 

15 

of 

38 


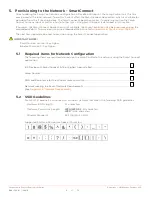
7.5


Lighting/Keypad Manager – Load Scenes (Optional) 

When a Lamp Control is added to the Lighting/Keypad Manager, a load scene for that device is 
automatically generated. The load scene created is by default associated with the Lamp Control added. 
If modifications to the parameters of the load scene are required, they are modified from within the 
Lighting Scenes tab described in sections 7.5.1 and 7.5.2 below.  

If the load scene is not being modified, skip sections 7.5.1 and 7.5.2 and proceed to section 7.6 below.  

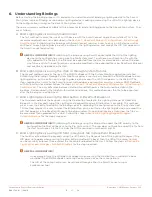
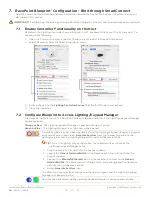
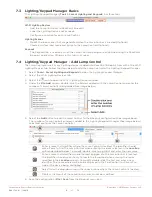
7.5.1


Modify a Load Scene 

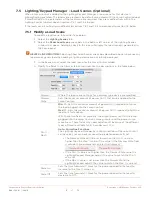
To modify a load scene, follow the steps below. 

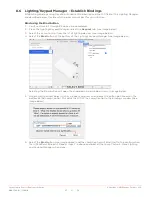
1.


Select the 

Lighting Scenes

 tab. 

2.


Select the 

Show Load Scene

 check box in the bottom left corner of the Lighting Scenes 

window that opens. Adding a check to this box will display the load scene(s) generated in 
the Scene panel. 

 HELPFUL INFORMATION!

 Selecting Show Load Scenes check box described above is because any 

load scenes generated when adding a lighting device are not initially displayed. 

3.


In the Scene panel, select the load scene for the Lamp Control added. 

4.


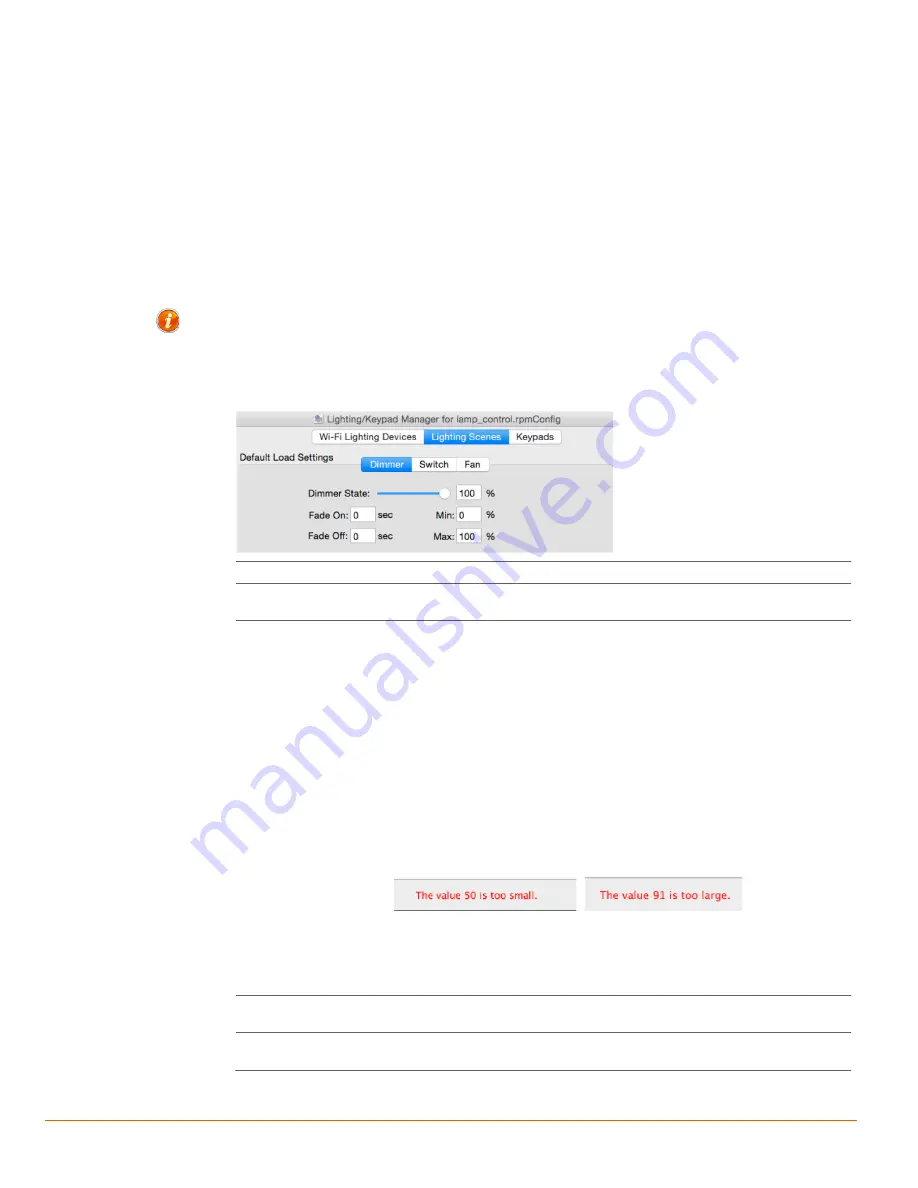
Modify the fields in the Dimmer tab as required. Use the descriptions in the table below. 


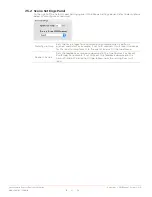
Dimmer 

Where the load scene settings for a dimmer type device are modified.  

Dimmer 
State 

Sets the maximum amount of power (in %) that can be applied to the 
Lamp Control. 

Min % / 
Max% 

Min: %

 - Sets the minimum amount of power (in %) required to turn on 

the load plugged into the Lamp Control. 

Max: %

 - Sets the maximum amount of power (in %) required to light the 

load to its full capacity. 

With these two fields set correctly, the output power sent to the lamp 
plugged into the Lamp Control is more granular and the power curve 
more linear. These fields may need adjustments because of the different 
types of lamps available (LED, Incandescent, CFL). 

Auto- Correction Functions

The Lighting/Keypad Manager has auto correction software built into it 
so the values set can never exceed the predetermined limits set. 


The Dimmer State can't be set lower than the Min: % value or 
higher than the Max: % value. If the value in the Dimmer State field 
is outside these parameters, an alert is displayed. 


If the Min: % value is set higher than the Dimmer State value the 

Lighting/Keypad Manager adjusts the value to match the Min: % 
value set. 


If the Max: % value is set lower than the Dimmer State, the 
Lighting/Keypad adjusts the value to match the Max: % value set. 

Fade On  

Sets the time (seconds) it takes for the power applied to the load to 
increase to the Max: % value set. 

Fade Off 

Sets the time (seconds) it takes for the power applied to the load to 
decrease to Off. 


Summary of Contents for SAV-LMP-0300

Page 1: ...ay Hyannis MA 02601 Copyright 2016 Savant Systems LLC Savant com 508 683 2500 Savant Pro Lamp Control SAV LMP 0300 Deployment Guide Document Number 009 1388 01 Document Date August 2016 Document Suppo...

Page 2: ...an electrical hazard or malfunction Weight Injury Prevention WEIGHT INJURY Installing some of the Savant equipment requires two installers to ensure safe handling during installation Failure to use tw...

Page 3: ...amp Control 14 7 5 Lighting Keypad Manager Load Scenes Optional 15 7 6 Populate Update the Lighting Data Table 17 7 7 Upload Configuration 18 7 8 Bind Lamp Control Using SmartConnect 19 7 9 Unbind Pro...

Page 4: ...s entirety and ensure that the following required items are available Savant Lamp Control SAV LMP 0300 Savant Smart or Pro Host licensed in Savant Control system running da Vinci 8 0 or higher Savant...

Page 5: ...ord which steps have been completed Review the Lamp Control connections and controls See Lamp Control Overview Connect hardware See Connections Provision Lamp Control onto network using SmartConnect S...

Page 6: ...its output receptacle The Lamp Control supports the following bulb types Incandescent Halogen 250W max 5W min Dimmable CFL 100W max 5W min Dimmable LED 100W max 5W min Do not use with Electronic Low...

Page 7: ...witch to the On position 3 Verify the LED on the side of the Lamp control is blinking yellow factory default setting See Blinks Once Yellow in the LED Status section below Blinking yellow indicates th...

Page 8: ...Provisioning Mode and ready to be provisioned to the local network Blinks Once Green Provisioned and communicating with the local network Not currently communicating with the Savant Control System Ho...

Page 9: ...ng the embedded Web UI refer to Appendix B Provisioning Web UI The next few steps describe how to provision using the Smart Connect application IMPORTANT NOTES SmartConnect version 1 5 or higher Bluet...

Page 10: ...rk Refer to the LED Status section for LED state info 3 On the iOS device iPad iPhone etc open the SmartConnect Application 4 Locate the Lamp Control in the Devices on Bluetooth section of SmartConnec...

Page 11: ...the local network The LED on the side of the Lamp Control will now blink green indicating it is connected to the network but has not established a binding to the Savant Pro System Refer to the LED St...

Page 12: ...lkier SDE MacBook with System Monitor loaded Follow the steps in Section 7 RacePoint Blueprint Configuration Bind through SmartConnect The only difference between Method A and Method B is the tool use...

Page 13: ...oint Blueprint toolbar indicates if the Lighting Keypad Manager can be accessed Orange or Red The Lighting Keypad Manager is grayed out and not active Green or Blue The Lighting Manager is active and...

Page 14: ...he icon to open the Wi Fi Lighting Devices window 4 Under the to Add column double click the field associated with the Lamp Control and enter the number of Lamp Control s being added see image below 5...

Page 15: ...in the table below Dimmer Where the load scene settings for a dimmer type device are modified Dimmer State Sets the maximum amount of power in that can be applied to the Lamp Control Min Max Min Sets...

Page 16: ...Hold Cycle Time Sets the time it takes for a command to complete when a button is pressed and held For example if set to 10 seconds it will take 10 seconds for the load to ramp from 0 to the preset le...

Page 17: ...check to the Load Scenes and Buttons boxes are typically used when troubleshooting Checked Any user modifications made are discarded Any boxes checked Loads Scenes Load Scenes Buttons will cause the e...

Page 18: ...e configuration to the Host 2 In the Configuration must be saved dialog window that opens read the dialog and select Save and Upload 3 The System Monitor application will automatically open as display...

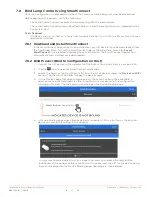
Page 19: ...oad to your iOS device The SmartConnect Application automatically gets installed once downloaded 7 8 2 Bind Process Bind to Configuration on Host 1 Connect the iOS device to the network that the Savan...

Page 20: ...ected to the network and bound to the configuration running on the Host 7 Verify the device is bound by tapping the Flash Last icon The lamp plugged into the Lamp Control will flash three times and th...

Page 21: ...avant Control system is utilizing 2 Open the SmartConnect application 3 Locate the Smart or Pro Host Savant ID from the list of devices under the Devices on WiFi section Tap the Host Controller to ope...

Page 22: ...dings the configuration with its bindings needs to be exported from the Host 1 On the SDE MacBook open the System Monitor application 2 Within System Monitor select and highlight the Host from the lis...

Page 23: ...can be accessed Orange or Red The Lighting Keypad Manager is grayed out and not active Green or Blue The Lighting Manager is active and can be opened No Lighting Services have been generated and the...

Page 24: ...con to open the Wi Fi Lighting Devices window 4 Under the to Add column double click the field associated with the Lamp Control and enter the number of Lamp Control s being added see image below 5 Sel...

Page 25: ...e settings for a dimmer type device is modified Dimmer State Sets the maximum amount of power in that can be applied to the Lamp Control Min Max Min Sets the minimum amount of power in required to tur...

Page 26: ...Hold Cycle Time Sets the time it takes for a command to complete when a button is pressed and held For example if set to 10 seconds it will take 10 seconds for the load to ramp from 0 to the preset le...

Page 27: ...3 Select the Lamp Control from the list of lighting devices see image below 4 Select the Bind button at the bottom of the Lighting Keypad Manager see image below Selecting the Bind button will open th...

Page 28: ...application must be used Open the SmartConnect application and copy the UID of the Lamp Control Refer to Provisioning Steps SmartConnect for information on getting the UID 1 Verify sections 8 1 throu...

Page 29: ...Adding a check to the Load Scenes and Buttons boxes are typically used when troubleshooting Checked Any user modifications made are discarded Any boxes checked Loads Scenes Load Scenes Buttons will c...

Page 30: ...ration to the Host 2 In the Configuration must be saved dialog window that opens read the dialog and select Save and Upload 3 The System Monitor application will automatically open as displayed below...

Page 31: ...n Additional documentation is available on the Savant Community Metropolitan Wireless Lighting Deployment Guide 009 1342 xx Savant University Course Catalog Lighting Lighting Tutorial Videos Lighting...

Page 32: ...eservation should be configured Savant recommends using DHCP reservation within the router By using this method static IP Addresses for all devices can be managed from a single UI avoiding the need to...

Page 33: ...d the reset button for five seconds until LED blinks red then release After the reset the LED will switch to solid yellow while the Lamp Control boots After approximately 5 10 seconds the LED on the s...

Page 34: ...ured to a network by selecting Other SSID at the bottom of the list of available networks screen and follow the prompts 9 The Lamp Control is now provisioned to the local network The LED on the side o...

Page 35: ...ans the network and compares the firmware version loaded in the Lamp Control with the firmware in the updated da Vinci software If an update is available the update process will begin automatically at...

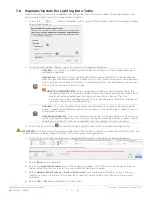
Page 36: ...ne is associated with the Lamp Control 6 Modify the Min and Max values of this load scene to 100 7 Select the Sync button and follow the prompts to update the lighting data table with the changes made...

Page 37: ...of this document is prohibited without the permission of Savant Systems Trademarks 2016 Savant Systems LLC All rights reserved Savant Savant App Savant Host Now You Can RacePoint Blueprint Single App...

Page 38: ...C 009 1388 01 160810 38 of 38 FCC Regulatory This device complies with Part 15 of the FCC Rules and Regulations For complete information refer to the Savant Important Information document supplied wit...

Reviews: