Savant Lamp Control Deployment Guide
Copyright © 2016 Savant Systems, LLC
009-1388-01 | 160810
12
of
38
6.
Understanding Bindings
Before starting the binding process, it is important to understand what binding a lighting device to the Savant
Pro System involves. Binding or unbinding a lighting device is adding or removing the UID of the lighting device
to the configuration running on the Savant Pro System Host.
There are numerous methods available to the integrator to bind a lighting device to the Savant Pro System. They
are as follows:
A.
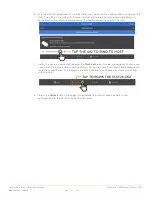
Bind Lighting Device using SmartConnect
The first method involves the use of an iOS device with the SmartConnect application installed. This is the
recommended method and is described in the
Section 7: RacePoint Blueprint Configuration – Bind through
. Establishing the bindings with SmartConnect requires a user to carry an iOS device such as
an iPhone® to each lighting device, push a button on the lighting device, and accept the UID that appears in
the SmartConnect application.
HELPFUL INFORMATION!!
Establishing the bindings using SmartConnect adds the UID of the lighting
device to the configuration running on the Pro System Host. To retrieve a configuration file with the
UIDs added to the file itself, the file must be exported from the Host as described in section 10 below.
Any future edits to the configuration can now be modified in the exported file using RacePoint Blueprint
and eventually uploaded to the Host.
B.
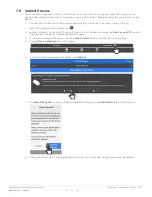
Bind Lighting Device using the Web UI through System Monitor
The second method involves the use of the SDE/MacBook with the System Monitor application installed.
Establishing the bindings through System Monitor requires a user to carry around the SDE/MacBook to each
lighting device, push a button on the lighting device, and accept the UID that appears in the Web UI. The
steps required are similar to the SmartConnect method above but requires carrying a bulkier SDE/MacBook
with System Monitor loaded. Follow the steps in
Section 7: RacePoint Blueprint Configuration – Bind through
. The only difference between Method A and Method B is the tool used to establish the
bindings. As described in the Helpful Information note above, this method requires the file to be exported
after the bindings are established.
C.
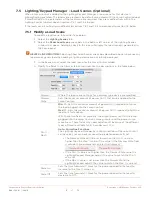
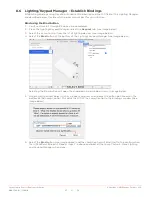
Bind Lighting Device using the Bind button in RacePoint Blueprint
The third method binds the keypads using the Bind button located in the Lighting Manager of RacePoint
Blueprint. In the Keypads tab of the Lighting and Keypad Manager a Bind button is available. This method
gives a user the ability to establish the bindings prior to uploading the configuration to the Pro System Host.
This method requires the user to select the Bind button, push a button on the lighting device, and accept the
UID that appears in the RacePoint Blueprint binding window. Once all bindings are established, the file can
be saved and then uploaded to the Host. Follow the steps in
Section 8.6 Lighting/Keypad Manager –
for the steps required.
HELPFUL INFORMATION!!
Establishing the bindings using the Bind button adds the UID directly to the
configuration file that will be sent to the Pro System Host. The user does not have to export the file from
the Host to retrieve a file that includes the UID as required in methods A and B.
D.
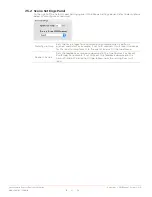
Bind Lighting Device using UID field in Keypads tab in RacePoint Blueprint
The fourth method binds the keypads using the UID field in the Keypads tab of the Lighting Manager. If the
UID does not appear when pressing the Bind button (method C above) then the UID of the Lamp Control
can be manually entered. Once entered the file can be uploaded to the Host. Follow the steps in
Lighting/Keypad Manager – Establish Bindings
for the steps required.
HELPFUL INFORMATION!!
−
An example of why the UID does not appear when pressing the Bind button in method C above
would be if the SDE/MacBook and Lamp Control were not on the same network.
−
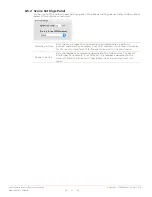
The UID of the Lamp Control can be retrieved through either the SmartConnect or rpm
EmbScanner tool.


