background image

Installing the Printer Driver and Software

28

3

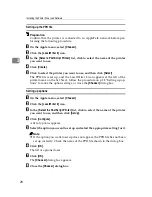
Setting up the PPD file

Preparation

Confirm that the printer is connected to an AppleTalk network before per-
forming the following procedure.

A

On the Apple menu, select 

[

Chooser

]

.

B

Click the 

[

LaserWriter 8

]

 icon.

C

In the 

[

Select a PostScript Printer

]

 list, click to select the name of the printer

you want to use.

D

Click 

[

Create

]

.

E

Click to select the printer you want to use, and then click 

[

Select

]

.

The PPD file is set up, and the LaserWriter 8 icon appears at the left of the
printer name on the list. Next, follow the procedure on p.28 “Setting up op-
tions” to make the option settings, or close the 

[

Chooser

]

 dialog box.

Setting up options

A

On the Apple menu, select 

[

Chooser

]

.

B

Click the 

[

LaserWriter 8

]

 icon.

C

In the 

[

Select the PostScript Printer

]

 list, click to select the name of the printer

you want to use, and then click 

[

Setup

]

.

D

Click 

[

Configure

]

.

A list of options appears.

E

Select the option you want to set up and select the appropriate setting for it.

Note

If the option you want to set up does not appear, the PPD file has not been
set up correctly. Check the name of the PPD file shown in the dialog box.

F

Click 

[

OK

]

.

The list of options closes.

G

Click 

[

OK

]

.

The 

[

Chooser

]

 dialog box appears.

H

Close the 

[

Chooser

]

 dialog box.

Summary of Contents for 1302

Page 1: ...ating Instructions Printer Reference 1 option Read this manual carefully before you use this product and keep it handy for future reference For safety please follow the instructions in this manual Printer Reference 2 option Part G1620 ...

Page 2: ...tial damages as a result of handling or operating the machine Trademarks Microsoft and Windows are registered trademarks of Microsoft Corporation in the United States and or other countries Ethernet is a registered trademark of Xerox Corporation Adobe PostScript Acrobat and PageMaker are registered trademarks of Adobe System Incorporated PCL is a registered trademark of Hewlett Packard Company Oth...

Page 3: ...rmation about using this machine as a printer This manual is provided as a PDF file on the CD ROM labeled Operating Instructions for Printer Network Interface Board Quick Configuration Guide Describes the procedures and provides necessary information about setting up and using the printer under the network environment This manual is provided as a PDF file on the CD ROM labeled Operating Instructio...

Page 4: ...ode see 6 Auto Off Timer in the System Settings Auto Off mode Copier only To conserve energy this product automatically turns off 30 minutes after the last copying or printing job has completed If you wish to make copies when the machine is in Auto Off mode press the operation switch first For details about how to change the default interval that the machine waits before entering Auto Off mode see...

Page 5: ...or recommended paper Copier only Fax or printer installed Low Power mode Power consumption 50 Wh 60 Wh Default interval 15 minutes 15 minutes Recovery time Less than 10 seconds Less than 10 seconds Sleep mode Power consumption 20 Wh Default interval 30 minutes Recovery time 20 seconds Auto Off mode Power consumption less than 2 Wh Default interval 30 minutes Recovery time 20 seconds ...

Page 6: ... is not followed paper might be misfed originals might be damaged or data might be lost Be sure to read this Preparation This symbol indicates the prior knowledge or preparations required before op erating Note This symbol indicates precautions for operation or actions to take after misop eration Limitation This symbol indicates numerical limits functions that cannot be used together or conditions...

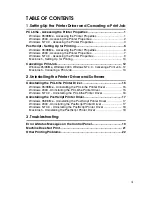
Page 7: ... Control Panel 13 3 Installing the Printer Driver and Software Installation Method 15 Quick Install 16 Installing the PCL 6 5e Printer Driver 18 Installing the PCL 6 5e Printer Driver 18 Installing the PostScript Printer Driver 20 Windows 95 98 Me Installing the PostScript Printer Driver 20 Windows 2000 Installing the PostScript Printer Driver 21 Windows NT 4 0 Installing the PostScript Printer Dr...

Page 8: ...vi ...

Page 9: ...ody requires minimum space to place it on your desk side Network Connectivity This printer is network ready with optional Network Interface Board Type 1018 Major Specifications Printing Speed Printing speed depends on the machine Confirm which type of machine you have See the Copy Reference Maximum Print Quality True 600 600 dpi resolutions PCL 6 5e PS2 option Printer Language PCL 6 PCL 5e PS2 opt...

Page 10: ...river that comes with the Macintosh operating system you are us ing See the documentation that comes with the Macintosh for more information about the LaserWriter functions PCL printer drivers Printer drivers allow the computer to communicate with the printer via a printer language Two kinds of PCL printer drivers PCL 6 and PCL 5e are provided with this printer We recommend PCL 6 as your first cho...

Page 11: ...r the printers in a network It can monitor multiple net work printers having IP addresses We recommend network administrators to use this software Reference For more information about SmartNetMonitor for Admin see the Smart NetMonitor for Admin online Help file SmartNetMonitor for Client SmartNetMonitor for Client is software equipped with the following func tions We recommend all users of this pr...

Page 12: ... UNIX Install Shell The installation shell script helps with the setup process The installation shell script automates some of the tasks in configuring etc hosts etc printcap and in creating the spool directory for BSD UNIX and in running lpadmin command for System V UNIX Reference For more information about UNIX Install Shell see the UNIX Supple ment Important If you upgrade to Windows 2000 from ...

Page 13: ...tion about solv ing above error see Troubleshoot ing in the Copy Reference 4 Cancel key Press to cancel an operation or return to the previous display 5 Display panel Shows operation status error messages and function menus 6 01 keys Press to select an item on the panel display 7 OK key 8 User Tools Counter key Press to change the default settings and conditions to meet your requirements 9 Data In...

Page 14: ...about 3kgf to the panel display or it may be damaged Online and Offline Press Printer Mode on the control panel Ready appears on the panel display Online When the machine is online it can receive data from the computer 1 Online Offline key Press this key to switch the printer online Ready appears on the panel display 2 Data In Online indicator Is on while the printer is online 1 2 ...

Page 15: ...en the machine is offline it cannot receive data from the computer 1 Online Offline key Press this key to switch the printer of fline Offline appears on the panel display 2 Data In Online indicator Is off while the printer is offline 1 2 ...

Page 16: ...uter using the par allel port optional Network Interface Board Type 1018 or both Confirm that all the cables connectors and electrical outlets necessary to attach the machine to the computer or network Important The interface cable is not supplied in the box It is your responsibility to pro vide the interface cable appropriate for the computer that you are using Reference For more information abou...

Page 17: ...Network Note Consult your network administrator before connecting the machine to a net work Be sure to use the interface cable with ferrite core for the connection to the computer and or HUB in order to meet FCC and EMC Directive 89 336 EEC emission guidelines Parallel cable requirements The machine s parallel interface is a standard bidirectional interface It requires a standard 36 pin parallel c...

Page 18: ...ne is turned off C Loop the network cable The loop should be about 15cm 6 from the end of the cable on the end closest to the printer D Attach the ferrite core to the loop E Attach the network cable to the 10BASE T 100BASE TX port on the ma chine Reference See p 8 Connecting the Machine to confirm the position of the 10BASE T 100BASE TX port Note Confirm that the cable is connected to the 10BASE T...

Page 19: ...int jobs have been sent to the controller Status page The status page of Network Interface Board will be automatically printed in the following cases when the printer is turned on when Network Interface Board is reset This feature can be disabled with NIB Setup Tool which is included in the Smart NetMonitor for Admin program folder To disable this feature check Property Sheet in the NIB Setup Tool...

Page 20: ... the correct cable B Confirm that both the machine and a computer are turned off C Plug the 36 pin end of the parallel cable into the parallel port at the right side of the back cover of the machine Reference See p 8 Connecting the Machine to confirm the position of the parallel port D Squeeze the wire clips on each side of the connector together until they snap into place The clips hold the cable...

Page 21: ...face Board If the 2 Network Setup in the following step 4 is shaded wait for a few minutes Reference For more information about using this machine as a network printer see the Quick Configuration Guide which is provided as a PDF file on the CD ROM labeled Op erating Instructions for Printer A Press User Tools Counter B Press the 0 or 1key until the fol lowing message appears on the panel display C...

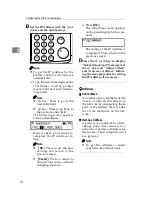
Page 22: ...menu without changing any data B Press OK The following screen appears on the panel display for two sec onds The setting of the IP Address is completed Then return to the previous screen H Press the 0 or 1key to display Subnet Mask and Gateway Ad dress then set Subnet Mask and Gateway Address follow ing the same procedure for setting the IP Address if necessary Address Subnet Mask A number used to...

Page 23: ...ies see p 3 Software and Utilities provided on the CD ROM Important Before starting this installation close all documents and applications In a net work environment confirm that users who are logged on are disconnected Be sure to do this when it will create the least interference with other users After installing a printer driver you must restart the computer Note If the plug and play function is ...

Page 24: ...se launch Setup exe located on the CD ROM root directory If you want to cancel Auto Run hold down the SHIFT key when your system is Windows 2000 hold down the left SHIFT key while inserting the CD ROM Keep the SHIFT key held down until the computer has finished accessing the CD ROM A Close all applications that are running B Insert the CD ROM into the CD ROM drive Auto Run will start the installer...

Page 25: ...ect To For parallel connection select the printer whose printer port is displayed in Connect To G Click Install H Follow the instructions on the screen Note During installation in Windows 2000 the Digital Signature Not Found dialog box may appear In this case click Yes to continue the installation A message prompting you to restart your computer may appear To complete the installation restart your...

Page 26: ...CD ROM into the CD ROM drive Auto Run will starts the installer C Select a language to change the interface language and then click OK The following languages are available Cestina Czech Dansk Danish Deutsh German English English Espanol Spanish Francais French Italiano Italian Magyer Hungarian Nederlands Dutch Norsk Norwe gian Polski Polish Portugues Portuguese Suomi Finnish Svenska Swedish Defau...

Page 27: ...ires Full Control access permission Members of the Administrators Server Operators Print Operators and Power Users groups have Full Control permission by default When you set up options log on using an account that has Full Control per mission Note When setting up options you should access the Printer Properties dialog box from Windows You cannot set up options by accessing the Printer Properties ...

Page 28: ...ver A Close all applications that are running B Insert the CD ROM into the CD ROM drive Auto Run will start the installer C Select a language to change the interface language and then click OK The following languages are available Cestina Czech Dansk Danish Deutsh German English English Espanol Spanish Francais French Italiano Italian Magyer Hungarian Nederlands Dutch Norsk Norwe gian Polski Polis...

Page 29: ... Printer Driver Installing the printer driver Limitation Installing a printer driver requires Administrators permission When you in stall a printer driver log on using an account that has Administrators permis sion A Close all applications that are running B Insert the CD ROM into the CD ROM drive Auto Run will start the installer C Select a language to change the interface language and then click...

Page 30: ...tion Setting up options Important If the printer is equipped with certain options e g the Paper Feed Unit or the Memory Unit you should set up the options with the printer driver Limitation Changing the printer settings requires Manage Printers permission Members of the Administrators and Power Users groups have Manage Printers permis sion by default When you set up options log on using an account...

Page 31: ...ll applications that are running B Insert the CD ROM into the CD ROM drive Auto Run will start the installer C Select a language to change the interface language and then click OK The following languages are available Cestina Czech Dansk Danish Deutsh German English English Espanol Spanish Francais French Italiano Italian Magyer Hungarian Nederlands Dutch Norsk Norwe gian Polski Polish Portugues P...

Page 32: ...ions you have installed from the Options group F Click OK Using Adobe PageMaker Version 6 0 or 6 5 If you use the printer under Windows 95 98 Me Windows 2000 Windows NT 4 0 with Adobe PageMaker you need to copy the PPD file to the PageMaker folder The PPD file is the file with extension ppd It is in the folder DRIV ERS PS WIN9X_ME Language DISK1 on the CD ROM The WIN9X_ME folder inside the PS fold...

Page 33: ...e language and then click OK The following languages are available Cestina Czech Dansk Danish Deutsh German English English Espanol Spanish Francais French Italiano Italian Magyer Hungarian Nederlands Dutch Norsk Norwe gian Polski Polish Portugues Portuguese Suomi Finnish Svenska Swedish Default interface language is English D Select SmartNetMonitor for Client Admin E The software license agreemen...

Page 34: ...tions that are running B Insert the CD ROM into the CD ROM drive Auto Run will start the installer C Select a language to change the interface language and then click OK The following languages are available Cestina Czech Dansk Danish Deutsh German English English Espanol Spanish Francais French Italiano Italian Magyer Hungarian Nederlands Dutch Norsk Norwe gian Polski Polish Portugues Portuguese ...

Page 35: ...ut the functions of the LaserWriter 8 printer driver Installing the PPD File A Start the Macintosh B Double click the icon of the hard disk to open it C Open the Extensions folder inside the System Folder by double clicking it D Insert the CD ROM into the CD ROM drive The icon of the CD ROM appears E Double click the CD ROM icon The contents of the CD ROM are displayed F Double click the Printer D...

Page 36: ...ame on the list Next follow the procedure on p 28 Setting up op tions to make the option settings or close the Chooser dialog box Setting up options A On the Apple menu select Chooser B Click the LaserWriter 8 icon C In the Select the PostScript Printer list click to select the name of the printer you want to use and then click Setup D Click Configure A list of options appears E Select the option ...

Page 37: ...dows NT 4 0 24 P PageMaker 6 0 or 6 5 24 Panel Display 6 Parallel Cable 9 12 Parallel Port 8 PCL 5e 2 PCL 6 2 PostScript 2 3 Macintosh installing 27 Windows 2000 installing 21 Windows 95 98 Me installing 20 Windows NT 4 0 installing 23 PostScript printer driver installing 20 PPD 27 28 printer driver 2 Printer Mode key 5 Q Quick Install 16 S SmartNetMonitor for Admin 3 SmartNetMonitor for Client 3 ...

Page 38: ...30 UE USA B441 MEMO ...

Page 39: ...t using this machine as a printer This manual is provided as a PDF file on the CD ROM labeled Operating Instructions for Printer this manual Network Interface Board Quick Configuration Guide Describes the procedures and provides necessary information about setting up and using the printer under the network environment This manual is provided as a PDF file on the CD ROM labeled Operating Instructio...

Page 40: ... is not followed paper might be misfed originals might be damaged or data might be lost Be sure to read this Preparation This symbol indicates the prior knowledge or preparations required before op erating Note This symbol indicates precautions for operation or actions to take after misop eration Limitation This symbol indicates numerical limits functions that cannot be used together or conditions...

Page 41: ...2000 Windows NT 4 0 Canceling a Print Job 12 Macintosh Canceling a Print Job 13 2 Uninstalling the Printer Driver and Software Uninstalling the PCL 6 5e Printer Driver 15 Windows 95 98 Me Uninstalling the PCL 6 5e Printer Driver 15 Windows 2000 Uninstalling the PCL 6 5e Printer Driver 15 Windows NT 4 0 Uninstalling the PCL 6 5e Printer Driver 16 Uninstalling the PostScript Printer Driver 17 Window...

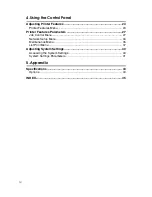
Page 42: ...Features Menu 24 Printer Features Parameters 27 Job Control Menu 27 Network Setup Menu 34 Maintenance Menu 35 List Print Menu 37 Adjusting System Settings 40 Accessing the System Settings 40 System Settings Parameters 41 5 Appendix Specifications 43 Options 44 INDEX 45 ...

Page 43: ...r s settings are not used and the application s own default settings are applied E Click OK Making printer settings from an application To make the printer settings for a specific application open the Printer Proper ties dialog box from that application The following example describes how to make settings for the WordPad application that comes with Windows 95 98 Me Note The actual procedure you sh...

Page 44: ... Click Start on the taskbar point to Settings and then click Printers The Printers window appears B Click to select the icon of the printer whose default settings you want to change C On the File menu click Properties The Printer Properties appear D Make any settings you require and click Apply Note Settings you make here are used as the default settings for all applications E Click OK Changing th...

Page 45: ...on open the Print dialog box from that application The following example describes how to make settings for the WordPad application that comes with Windows 2000 Note The actual procedures you should follow to open the Print dialog box may differ depending on the application For more information see the documen tation that comes with the application you are using Any settings you make in the follow...

Page 46: ...erties appear D Make any settings you require and click OK Note Settings you make here are used as the default settings for all applications Changing the default printer settings Default Document Properties Limitation Changing the setting of the printer requires Full Control access permission Members of the Administrators Server Operators Print Operators and Pow er Users groups have Full Control p...

Page 47: ...rocedure you should follow to open the Printer Properties dialog box may differ depending on the application For more information see the documentation that comes with the application you are using Any settings you make in the following procedure are valid for the current application only A On the File menu click Print The Print dialog box appears B Select the printer you want to use in the Name l...

Page 48: ...ter Properties appear D Make any settings you require and click Apply E Click OK Making printer settings from an application To make the printer settings for a specific application open the Printer Proper ties dialog box from that application The following example describes how to make settings for the WordPad application that comes with Windows 95 98 Me Note The actual procedure you should follow...

Page 49: ...rt on the taskbar point to Settings and then click Printers The Printers window appears B Click to select the icon of the printer whose default settings you want to change C On the File menu click Properties The Printer Properties appear D Make any settings you require and click Apply Note Settings you make here are used as the default settings for all applications E Click OK Changing the default ...

Page 50: ...pplication open the Print dialog box from that application The following example describes how to make settings for the WordPad application that comes with Windows 2000 Note The actual procedures you should follow to open the Print dialog box may differ depending on the application For more information see the documen tation that comes with the application you are using Any settings you make in th...

Page 51: ...operties appear D Make any settings you require and click OK Note Settings you make here are used as the default settings for all applications Changing the default printer settings Default Document Properties Limitation Changing the setting of the printer requires Full Control access permission Members of the Administrators Server Operators Print Operators and Pow er Users groups have Full Control...

Page 52: ...t The Print dialog box appears B Select the printer you want to use in the Name list box and then click Prop erties The Printer Properties appear C Make any settings you require and click OK D Click OK to start printing Macintosh Setting Up for Printing Making paper settings from an application A Open the file you want to print B On the File menu click Page Setup The LaserWriter 8 Page Setup dialo...

Page 53: ...rinting from an application A Open the file you want to print B On the File menu click Print The Printer dialog box appears C Confirm that the printer is selected in the Printer box and make the print er settings D After configuring the settings click Print ...

Page 54: ...he control panel The message appears on the panel display indicating that the print job is be ing canceled Important This procedure cancels the print job that is being processed by the printer In some cases the printer may already be processing data for the next print job following the one currently being output In this case the next print job is also canceled when you press Job Reset When the pri...

Page 55: ...ing canceled Important This procedure cancels the print job that is being processed by the printer In some case the printer may already be processing data for the next print job following the one currently being output In this case the next print job is also canceled when you press Job Reset When the printer is being shared by multiple computers be careful not to accidentally cancel someone else s...

Page 56: ...Setting Up the Printer Driver and Canceling a Print Job 14 1 ...

Page 57: ...ile menu click Delete A confirmation dialog box appears E Click Yes to uninstall the printer driver Windows 2000 Uninstalling the PCL 6 5e Printer Driver Limitation Uninstalling a printer driver requires Manage Printers permission Members of the Administrators and Power Users groups have Manage Printers permis sion by default When you uninstall a printer driver log on using an account that has Man...

Page 58: ... ers groups have Full Control Permission by default When you install a printer driver log on using an account that has Full Control permission A Close all applications that are currently running B Click Start on the taskbar point to Settings and then click Printers The Printers window appears C Click to select the icon of the printer you want to remove D On the File menu click Delete A confirmatio...

Page 59: ...the File menu click Delete A confirmation dialog box appears E Click Yes to uninstall the printer driver Windows 2000 Uninstalling the PostScript Printer Driver Limitation Uninstalling a printer driver requires Manage Printers permission Members of the Administrators and Power Users groups have Manage Printers permis sion by default When you uninstall a printer driver log on using an account that ...

Page 60: ...ter driver log on using an account that has Full Control permission A Close all applications that are currently running B Click Start on the taskbar point to Settings and then click Printers The Printers window appears C Click to select the icon of the printer you want to remove D On the File menu click Delete A confirmation dialog box appears E Click Yes to uninstall the printer driver Macintosh ...

Page 61: ...l not automatically resume if the paper size and orienta tion settings are incorrect Load Tray Paper Size There is no paper left in this tray Load paper into the tray indi cated Memory Overflow Job Incomplete A memory overflow has oc curred Add memory to the printer Memory Full Job Incomplete A memory full has occurred Add memory to the printer Printing The printer is printing Wait for a while Pri...

Page 62: ...setting Job The print job is being reset Wait for a while Toner is Almost Empty Toner is almost running out Replace the toner early to pre vent poor print quality Waiting The printer is waiting for the next print job Wait for a while Warming Up The printer is warming up or toner is being supplied Wait until the panel display changes to Ready Messages Second messages Description Solution ...

Page 63: ...ne by touching the Online key Is the specified paper set Set the specified paper in any of the input trays Are there any error messages on the panel dis play Check the error message and take the required action Does the indicator above the Printer Mode key stay red Check the error message and take the required action Is the Data in Indicator blinking or lit If not the data does not reach the machi...

Page 64: ...inter to start printing The machine might be in Energy Saver mode or Low Power mode which requires more time for warming up and resuming the print job It takes too much time to complete the print job The data is so large or complex that it takes time to process it If the Data In indicator is blinking the data processing is being done Just wait until it is finished Windows 95 98 Me 2000 NT 4 0 The ...

Page 65: ...ations Printer Features settings you make are retained even when you turn off the printer Reference For more information about the copy features and their system settings see the Copy Reference and the System Settings manuals Note Some of the settings accessed by the printer driver can be accessed by the Printer Features Settings made by the printer driver take priority over set tings by the Print...

Page 66: ...ct functions in the following table Category Function menu Job Control p 27 Paper Input Tray Priority Tray Locking Bypass Paper Size Standard Size Custom Size Print Quality Edge Smoothing Resolution PCL PS Toner Saving System Print PS Errors I O Timeout I O Buffer Page Protect Auto Continue Sub Paper Size PCL Menu Orientation Form Lines Font Source Font Number Point Size Font Pitch Symbol Set ...

Page 67: ...5 Printer Features then press OK The following screen appears on the panel display Press the 0 or 1key to display the following four items one by one Job Control Network Setup Maintenance List Print Network Setup 1 p 34 IP Address Subnet Mask Gateway Address Maintenance p 35 Restart Printer Menu Reset Hex Dump List Print p 37 Configuration Page Menu List PCL Font List PS Font List 2 Category Funct...

Page 68: ...he previous menu After making the printer settings be sure to return to the previous menu by pressing Cancel After making the printer settings press User Tools Counter to return to the initial display The revised settings are not canceled even if the power switch is turned off ABC DEF JKL MNO GHI ...

Page 69: ...oad paper having the size and di rection you frequently use in the tray selected with Tray Pri ority Tray Locking If you use different kinds of paper you can lock a tray to prevent printing on wrong paper such as letterhead or colored paper When Auto Select is selected in the Paper Source selections from the printer driver the locked tray will not be used Tray 1 Tray 2 None Note Default None This ...

Page 70: ... paper of either the short edge feed size or the long edge feed size use the short edge feed size Note Specifications of bypass tray depends on the machine Con firm which type of machine you have See the Copy Reference Menu Description Edge Smoothing You can set whether to enable Edge Smoothing On Off Note Default On If Toner Saving is On EdgeSmoothing is ignored even if it is On The setting in th...

Page 71: ...ds 30 seconds 60 seconds 180 seconds 300 seconds Note Default 30 seconds I O Buffer You can set the size of the I O Buffer Normally it is not necessary to change this setting 16 KB 32 KB 64 KB 128 KB 256 KB 512 KB Note Default 32 KB Print PS Errors You can set whether the PS error sheet should be printed out Off On Note Default Off Page Protect When the Print Overrun Job Incomplete message appears...

Page 72: ...efault Off Sub Paper Size You can enable the Auto Substitute Paper Size feature between A4 and letter size When you select On the printer substitutes A4 letter size if the paper currently specified is not loaded Off On Note Default Off Menu Description Orientation You can set the page orientation Portrait Landscape Note Default Portrait Form Lines You can set the number of lines per page 5 128 Not...

Page 73: ...font Font Pitch You can set the number of characters per inch you want to use for the default font 0 44 to 99 99 by 0 01 Note Default 10 00 This setting is effective only for a fixed space font Symbol Set You can specify the set of print characters for the default font The available options are as follows Roman 8 ISO L1 ISO L2 ISO L5 PC 8 PC 8 D N PC 850 PC 852 PC8 TK Win L1 Win L2 Win L5 Desktop ...

Page 74: ... in the Paper Input menu A Press User Tools Counter B Press the 0 or 1key until the following message appears on the panel dis play C Press OK The following screen appears on the panel display D Press OK The following screen appears on the panel display E Press OK The following screen appears on the panel display ABC DEF JKL MNO GHI ...

Page 75: ...ears on the panel display G Press the 0 or 1key to select the tray type you want to use H Press OK Programmed is displayed for two seconds I The following screen appears on the panel display J Press User Tools Counter to return to the initial display ABC DEF JKL MNO GHI ...

Page 76: ...You can set the IP Address Note Default All zero Reference See Configuring the Printer for the Network with the Control Pan el in Printer Reference 1 Subnet Mask You can set the Subnet Mask Note Default 255 000 000 000 Reference See Configuring the Printer for the Network with the Control Pan el in Printer Reference 1 Gateway Address You can set the Gateway Address Note Default All zero Reference ...

Page 77: ...e Maintenance menu A Press User Tools Counter Menu Description Restart Printer You can restart the printer p 35 Restarting a Printer Menu Reset You can reset the menu settings to the factory defaults except the optional Network Interface Board settings Hex Dump You can set to isolate the source of a print job problem With this function On all data sent to the printer is printed in hexadeci mal cha...

Page 78: ... C Press OK The following screen appears on the panel display D Press the 0 or 1key until the following message appears on the panel dis play E Press OK The following screen appears on the panel display F Press OK The following screen appears on the panel display G Press OK Ready appeares on the panel display ...

Page 79: ...List Print menu Reference For more information see p 39 Interpreting the Configuration Page A Press User Tools Counter B Press the 0 or 1key until the following message appears on the panel dis play Menu Description Configuration Page You can print a Configuration Page p 37 Printing a Configu ration Page Menu List You can print the Menu List which shows the function menus of this machine PCL Font ...

Page 80: ...el display F Press OK The following screen appears on the panel display G Press OK The following screen appears on the panel display In a short time the printing of the configuration page will start Important If you cannot complete printing a configuration page correctly make sure an error message appears on the panel display For more information about error messages see p 19 Error Status Messages...

Page 81: ... Show the options that you installed Job Control Shows the settings made under the Job Control menu Reference For more information see p 27 Job Control Menu Network Setup Shows the settings you made under the Network Setup menu When DHCP is active on the network the actual IP Address Subnet Mask and Gateway Address appear in parentheses on the configuration page Reference For more information see ...

Page 82: ...C Press OK The following screen appears on the panel display Select the desired menu you want to change D Change the settings by following the instructions on the panel display then press OK p 41 System Settings Parameters Note Press the Language key to switch the display language Exiting from the User Tools Counter A Press User Tools Counter ABC DEF JKL MNO GHI ...

Page 83: ...m Reset The time can be set from 10 to 999 seconds or no system reset Note Default On 60 seconds You can specify the prioritized mode with the user tools See 1 Function Priority 6 Auto Off Timer The machine turns itself off automatically to conserve energy after your job is finished after the selected time This function is called Auto Off The time can be set from 1 to 240 minutes Note Default 60 m...

Page 84: ...Using the Control Panel 42 4 ...

Page 85: ...ith Mac OS X the machine operates in only Classic mode Component Specification Resolution 300 300 dpi PCL5e 1 PS2 2 600 600 dpi PCL5e 1 PCL6 PS2 Printing Speed Printing Speed depends on the machine Confirm which type of machine you have Parallel Interface Standard 36 pin printer cable and a parallel port on the host com puter IEEE1284 Note Do not use a parallel cable that is longer than 3 meters 1...

Page 86: ...tor RJ45 Required Cable Interface cable with ferrite core Interface cable is not provided with this option Memory Unit Module Type SO DIMM Small Outline Dual in line Memory Module Memory Type SDRAM Synchronous Dynamic RAM Number of Pins 144 pins Compatible PC100 compatible Type 1018 PostScript level2 Compatible Kit PostScript level2 compatible ...

Page 87: ... PCL 5e 1 Windows 2000 uninstalling 15 Windows 95 98 Me uninstalling 15 Windows NT 4 0 uninstalling 16 PCL 6 1 Windows 2000 uninstalling 15 Windows 95 98 Me uninstalling 15 Windows NT 4 0 uninstalling 16 PCL Font List 37 PCL Menu 27 PostScript Windows 2000 uninstalling 17 Windows 95 98 Me uninstalling 17 Windows NT 4 0 uninstalling 18 PostScript Printer Driver Macintosh uninstalling 18 Printer Fea...

Page 88: ...e uninstalling 15 PCL 6 uninstalling 15 PostScript uninstalling 17 printer properties PCL 1 printer properties PostScript 6 Windows 95 98 Me Windows 2000 Windows NT canceling a job 12 Windows NT 4 0 document defaults PCL 4 document defaults PostScript 9 PCL 5e uninstalling 16 PCL 6 uninstalling 16 PostScript uninstalling 18 printer properties PCL 4 printer properties PostScript 9 ...

Page 89: ...ferent from that to which the receiver is connected Consult the dealer or an experienced radio TV technician for help Warning Changes or modifications not expressly approved by the party responsible for compliance could void the user s authority to operate the equipment Caution in case of IEEE1284 environment Properly shielded and grounded cables and connectors must be used for connections to host...

Page 90: ...PRINTER Controller Type 1013 Operating Instructions Printer Reference 1 option Printed in China UE USA B441 8607 ...

Reviews: