background image

Install Waterfall Weir

10

Attach discharge plumbing kit to pump 

5

S T E P   5   –   W AT E R FA L L   W E L L   A N D   P U M P

Use keyhole saw or matte knife to remove 
2” knockout on one side of Waterfall Well.

 Place the Waterfall Well on a flat surface. The two 
open sides should face each other with the locking 
tabs aligned. Press locking tab and insert into slot. 
Continue to assemble the locking tabs from the 
bottom of the Waterfall to the top ensuring each 
tab is locked securely into place.

1

2

Place Waterfall Well into the basin 
with the lid on. 

3

4

Attach elbow adapter to pump outlet. 
Screw the adapter into the pump in a 
clockwise direction.

Waterfall Well

S

AV

i

O

 Black Foam

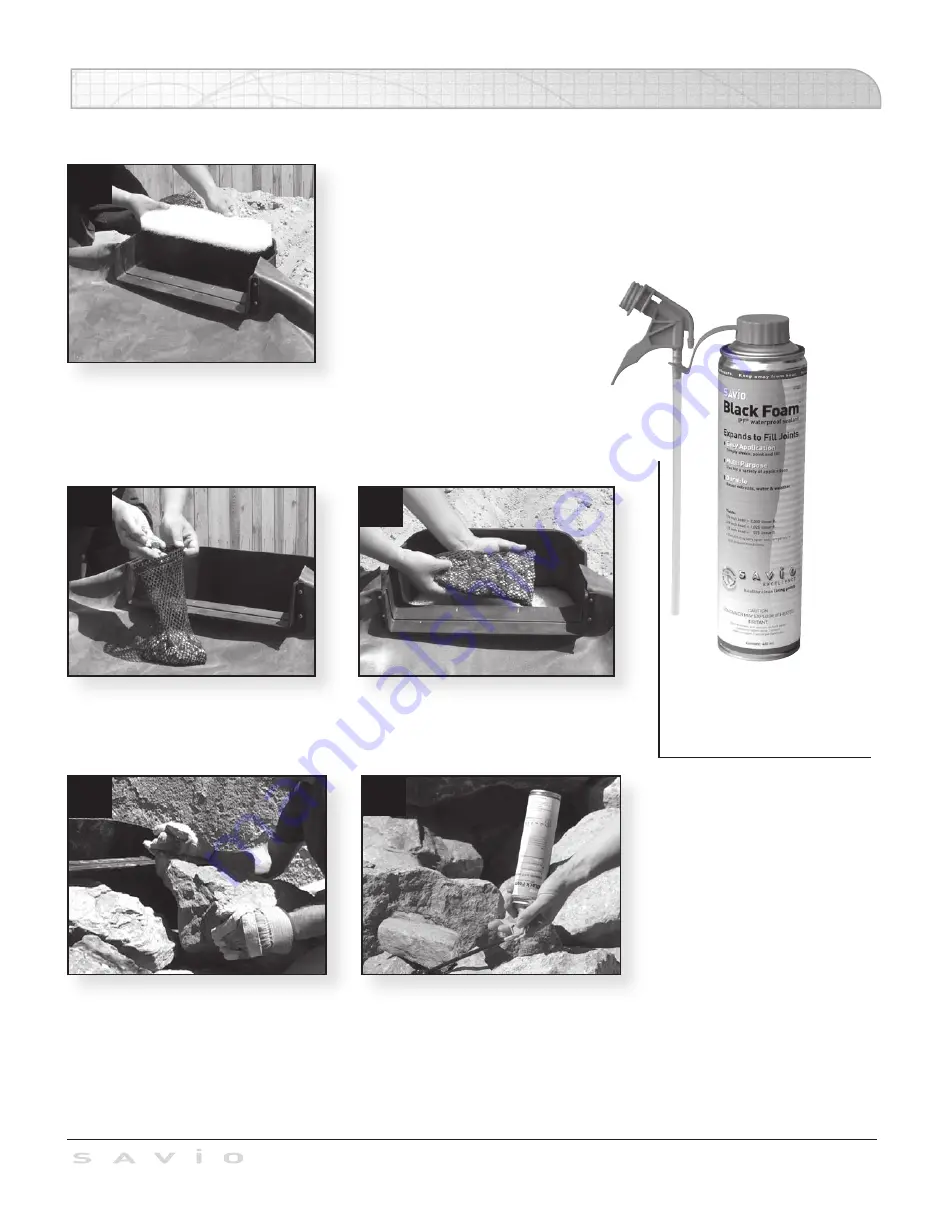
Expanding waterfall foam is 
perfect for putting the finishing 
touches on a water feature. 
Use it to direct water flow over 
rocks for a fuller waterfall 
effect and to prevent water 
from disappearing beneath and 
between boulders. Additional 
cans are available singly or by 
the case.

Install Waterfall Weir

15

Use rock work and backfill to hide the 
Waterfall Weir and blend the new water 
feature into surrounding landscape.

Use S

AV

i

O

 Black Foam to fill gaps in 

waterfall rocks. 

S T E P   7   –   I N S TA L L   W AT E R FA L L   W E I R

11

12

Fill the mesh bag with rocks for 
ballast. Use large gravel, lava rock  
or small stones.

Place mesh bag on top of media. 

9

10

Place filter media pad into the 
waterfall weir. 

8

Summary of Contents for Pond Free PF0500

Page 1: ...EASY STEPS EASY STEPS To Create a Superior Easy to Maintain Water Feature...

Page 2: ...ned with a philosophy that emphasizes low maintenance combined with natural beauty In no time you will have a backyard or front yard oasis to enjoy for years to come TA B L E O F C O N T E N T S Welco...

Page 3: ...sty of a full size water garden with the simplicity of a recycling fountain Since there s no standing surface water and no pond to maintain there s no real maintenance to speak of They can be turned o...

Page 4: ...reservoir is always placed at the lowest point in the system P O N D F R E E W AT E R FA L L 6 Waterfall or stream Reservoir 3 x 3 The top of the waterfall or stream can be up to 6 feet away from the...

Page 5: ...all ages P O N D F R E E S T R E A M Materials Needed 3 4 Rounded Gravel PF46 yard PF88 1 yard Boulders 40 200 lbs PF46 2 tons PF88 3 tons optional Decorative Gravel PF46 2 large sacks 75 100 lbs PF88...

Page 6: ...PF88 up to 11 Waterfall or Stream Outline Shape TIP When choosing a location select an area which provides the best viewing angle For example the ideal position may allow you to view the water featur...

Page 7: ...m of the waterfall well as shown Create Catchment Basin 6 18 2 3 Ground Level Decorative Stone level This middle level is called the charge It s where water is stored when the water feature is turned...

Page 8: ...soil use concrete blocks to stabilize the slope Use a hand tamper to compact the soil and prevent settling Water Course 8 For Pond Free Waterfall Use excess soil from the excavation of the basin to bu...

Page 9: ...ion Inspect your shoes before entering the basin Rocks wedged in shoe treads can damage liner Install EPDM Liner Install Liner a Place liner into the basin and run liner over the entire waterfall cour...

Page 10: ...a flat surface The two open sides should face each other with the locking tabs aligned Press locking tab and insert into slot Continue to assemble the locking tabs from the bottom of the Waterfall to...

Page 11: ...hose through hole in the side of Waterfall Well Fill the basin part way with 3 4 round gravel or small cobble by hand Washing rocks and gravel prior to installation will reduce dust and debris that c...

Page 12: ...gaps between larger boulders Build Waterfall S T E P 6 a C O N S T RU C T W AT E R FA L L TIP Contain Splashing A pond can lose a surprising amount of water due to splashing To minimize this water lo...

Page 13: ...into the system Construct Stream 13 6 ground liner underlay S T E P 6 b C O N S T RU C T S T R E A M Build a Stream TIP Keep the water in your system When a waterfall or streambed becomes clogged wit...

Page 14: ...remaining screws Tighten all screws evenly by hand until flush with the faceplate Attach liner bracket and liner to waterfall weir by installing 4 screws into each corner Front of seal has recessed sc...

Page 15: ...cans are available singly or by the case Install Waterfall Weir 15 Use rock work and backfill to hide the Waterfall Weir and blend the new water feature into surrounding landscape Use SAViO Black Foam...

Page 16: ...rectly into the gravel bed Create Plant Pockets Bog plants grow on the outer edges of ponds and thrive in moist soil or shallow water A contained area for bog plants provides stable areas for healthy...

Page 17: ...ith water Stop when you see water just below the top of the stones in the basin Plug the pump cord into a protected outlet The pump will deliver water to the top of the waterfall and your water featur...

Page 18: ...n the you are satisfied with your water feature s appearance trim liner with scissors Roll and hide liner edges in the backfill S T E P 8 F I N I S H I N G U P Add topsoil and plants to surrounding ar...

Page 19: ...mp to run dry If the water level in the basin becomes too low you will begin to hear the noise of the pump If this occurs place additional water into the basin An optional autofill accessory is availa...

Page 20: ...ral appearance Fiberglass and acrylic bonded construction is UV fade resistant part K5003 Autofill Valve for Waterfall Well Maintains water level in Pond Free basin Includes mini float for Waterfall W...

Reviews: