38 SawStop 10” Contractor Saw
Preparing Your Saw for Use
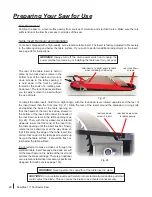
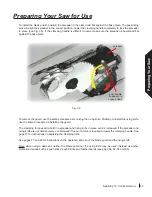
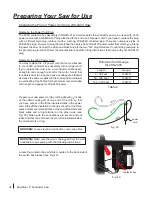
Prepare your new power cord by cutting about 6
1
⁄
2
inches
of the cable housing off of one end of the cord so that
you have access to the three insulated wires in the power
cord. Strip off the insulation at the tips of each of the three
wires and secure terminal forks at the end of the white and
black wires and a ring terminal on the green wire (see
Fig. 39). Make sure the connections are secure and not
loose and that none of the wires are left uninsulated below
the terminal fork or ring.
Changing the Plug or Power Cord on a 208-240V Saw
Replacing the Power Cord Plug
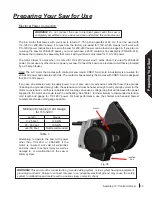
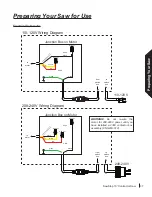
The
230V contactor box assembly (
CNS-WA-014) which enables the contractor saw to be used with 230V
power comes with a NEMA 6-15P plug attached to the end of a 9 ft power cord. If you need to replace the plug
with a different style plug, replace it with a 3-prong, 208-240V, UL-listed plug. There are numerous styles of
208-240V plugs, so select a plug that matches the single phase 208-240V power outlet from which you intend
to power the saw. Connect the white and black wires to the two “hot” plug terminals. Connect the green wire to
the ground plug terminal. Follow the manufacturer’s specific wiring instructions that come with your 208-240V
plug.
Table 2
Minimum Cord Gauge
for 208-240V
Length
Gauge
0 - 50 Feet
16 AWG
50 - 100 Feet
14 AWG
100 - 200 Feet
12 AWG
WARNING!
Loose electrical connections can cause fires.
Replacing the 230V Power Cord
You may replace the 9 ft power cord that came attached
to your 230V contactor box assembly with a longer cord.
If you replace the cord, use a 3-conductor cable heavy
enough to carry enough current for the motor. A cord that
is undersized or too long can cause a voltage drop that will
decrease the power supplied to the motor and could result
in overheating. See Table 2 for the minimum recommended
cord length and gauge for 208-240V power.
WARNING!
Make sure the saw is unplugged from the wall
outlet before proceeding with the following instructions.
contactor box
white
green
black
power
cord
Fig. 39
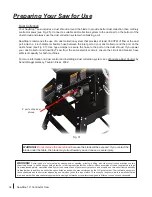
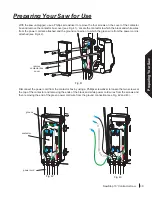
Fig. 40
Locate the contactor box which is mounted to the back side of
the switch box bracket (see Fig. 40).


