54 SawStop
®
10” Industrial Cabinet Saw
Making Adjustments to Your Saw
The geometry involved in this alignment procedure is tricky. That is because there is no way to easily measure
the parallelism between the blade and the tilt axis. Instead, you must measure the alignment between the
blade and the table at both 0° tilt and 45° tilt. The difference in those measurements is proportional to the non-
parallelism between the blade and the tilt axis. To ensure accurate alignment, follow the procedure described
below exactly.
To align the blade to the tilt axis, you will need a dial test indicator with a resolution and accuracy of at least
0.0005 inches, and a mount for the indicator that will slide smoothly in the miter slots. An example of a suitable
mount is shown in Fig. 53. You will also need a 6 mm hex L-wrench (a “stubby” hex L-wrench works best).
First, align the table as described on page 47, using the precision alignment procedure. Make sure the non-
parallelism between the miter slot and the blade is as close to zero as possible. If the final parallelism is not
zero, write down the misalignment, including whether it is positive or negative. This is the first measurement
for this procedure.
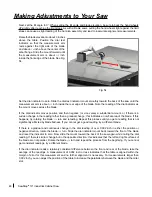
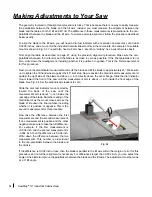
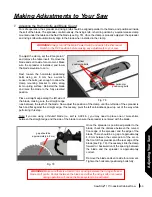
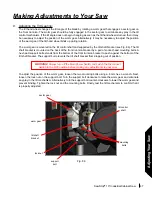
Next, move the dial indicator measurement arm off the blade and tilt the blade to approximately 45°. Make sure
not to tighten the tilt hand wheel against the 45° limit stop. Now reposition the dial indicator measurement arm
against the right side of the blade and about
1
/
4
inch directly above the arbor flange. Slide the dial indicator
mount toward the front of the saw until the measurement arm is about
1
/
2
inch inside the front edge of the
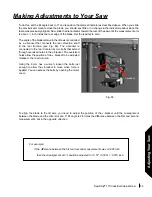
blade. See Fig. 64. Set the dial indicator readout to zero.
Slide the dial test indicator mount smoothly
toward the back of the saw until the
measurement arm is about
1
/
2
inch inside the
rear edge of the blade. Note the reading of the
dial indicator as the mount moves across the
blade. Write down the final number, including
whether it is positive or negative. This is the
second measurement for this procedure.
Now take the difference between the first
measurement and the second measurement.
If one measurement is positive and the other
negative, make sure to take the full difference.
For example, if the first measurement is
+0.002 inch and the second measurement is
-0.004 inch, then the difference is 0.006 inch.
Write down the difference between the two
measurements. This number is proportional
to the non-parallelism between the blade and
the tilt axis.
If the difference is 0.002 inch or less, then the blade is parallel to the tilt axis within the margin of error for this
procedure and no further alignment is necessary. For differences larger than 0.002 inch, you can adjust the
angle of the blade to improve the parallelism between the blade and the tilt axis. The adjustment must be made
at a 0° tilt angle.
Fig. 64


