12
RT-FS/RT-PHFS OWNER’S MANUAL
5
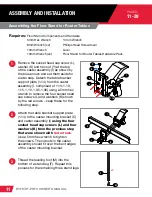
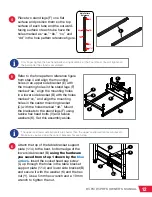
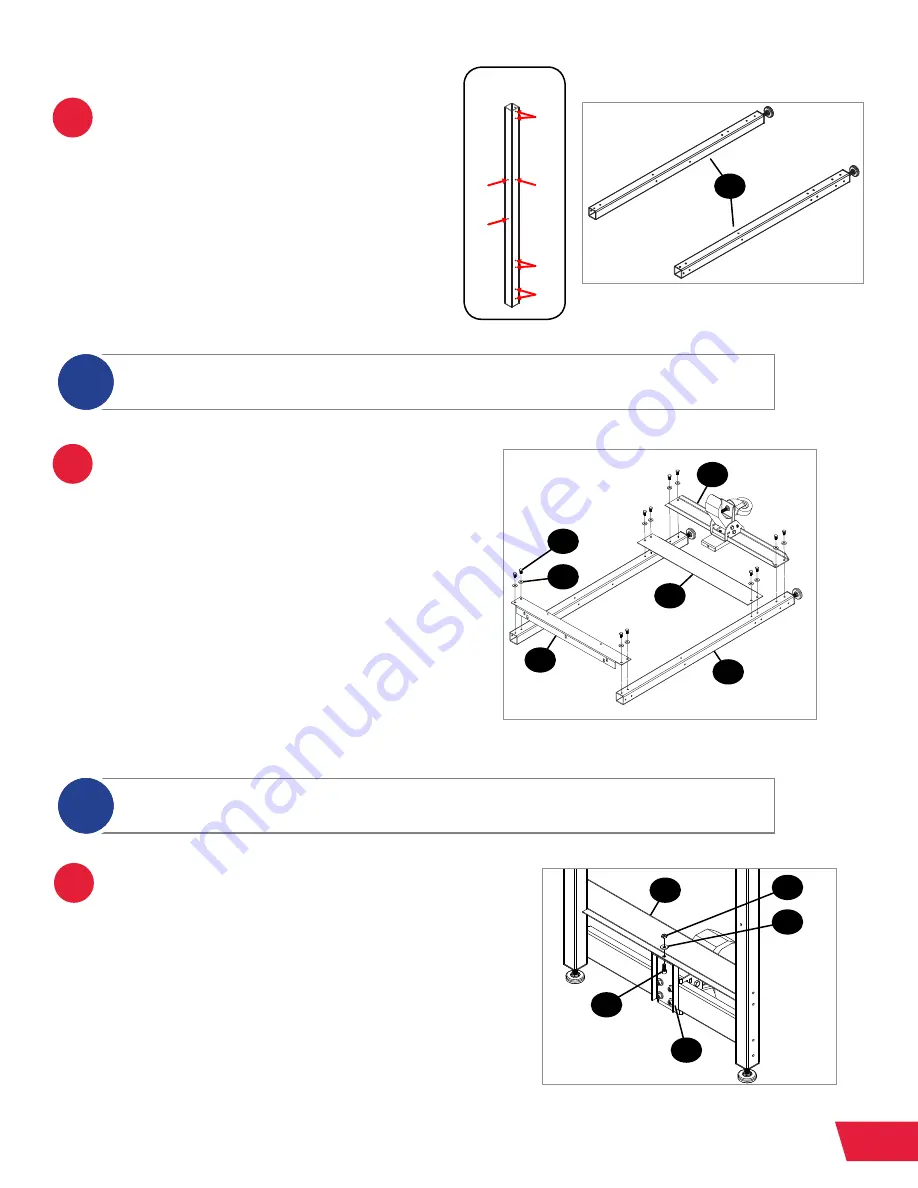
Refer to the hole pattern reference figure
from step 4 and align the mounting
holes in an upper side bracket (E) with
the mounting holes in the stand legs (F)
marked “aa,” align the mounting holes
in a lower side bracket (B) with the holes
marked “cc,” and align the mounting
holes in the caster mounting bracket
(C) with the holes marked “dd.” Mount
the brackets to the stand legs (F) using
twelve hex head bolts (V) and twelve
washers (K). Set this assembly aside.
4
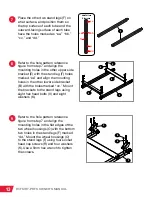
Place two stand legs (F) on a flat
surface and position them so the top
surface of each tube and the outward-
facing surface of each tube have the
holes marked as “aa,” “bb,” “cc,” and
“dd” in the hole pattern reference figure.
Only finger tighten the hex head bolts during assembly of the floor stand. You will tighten all
the bolts after the stand is assembled.
i
The upper and lower side brackets are shorter than the upper and lower front/rear brackets.
Make sure you are using the correct brackets for each step.
i
6
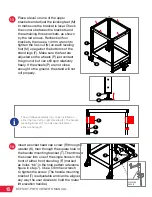
Attach the top of the table bracket support
plate (1.14) to the bent, bottom edge of the
lower side bracket (B)
using the hardware
you saved from step 1 shown by the
blue
arrows
. Insert the socket head cap screw
(L) up through the holes in the table bracket
support plate (1.14) and lower side bracket (B)
and secure it with the washer (K) and the hex
nut (Y). Use a 5mm hex wrench and a 10 mm
wrench to tighten the nut.
aa
bb
cc
dd
ee
ff
Hole Pattern
Reference
1.14
L
K
Y
B
E
B
C
F
V
K
F


