4
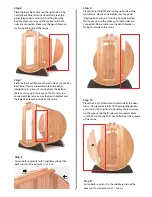
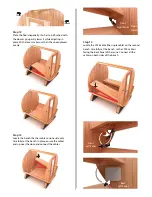
Step 6
Place the Back Right Panel on the right side of the
Central Back Panel. Slowly and carefully, lean the
panel (diagonally) and insert it starting from the
bottom. Work your way up the groove until both
sides are connected. Make sure the bench brackets
are facing the inside of the sauna.
Step 7
Place the Back Left Panel on the left side of the Central
Back Panel. Slowly and carefully, lean the panel
(diagonally) and insert it starting from the bottom.
Work your way up the groove until both sides are
connected. Please make sure the bench bracket and
the Relay Box face the inside of the sauna.
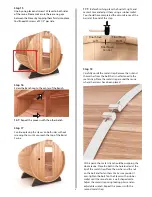
Step 8
Fasten both segments to the middle section of the
back wall. You'll need two 2 ½" screws.
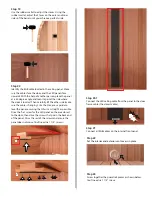
Step 11
Fasten both segments to the middle section of the
back wall. You'll need two 2 ½" screws.
Step 10
Place the Front Left Panel on the left side of the door
frame. Slowly and carefully, tilt the panel (diagonally)
and insert it starting from the bottom. Work your way
up the groove until both sides are connected. Make
sure the Smart Sauna Wi-Fi Controller faces the outside
of the sauna.
Step 9
Place the Front Right Panel on the right side of the
Door Frame. Slowly and carefully, lean the panel
(diagonally) and insert it starting from the bottom.
Work your way up the groove until both sides are
connected. Please make sure the bench bracket is
facing the inside of the sauna.

