ISD8001: Industrial ScentDirect
Diffusion System
Wall Mount Instructions
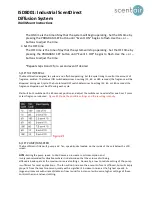
The ON time is the time of day that the system will begin operating. Set the ON time by
pressing the PROGRAM
SET button until “Event 1 ON” begins to flash. Use the + or –
buttons to adjust the time.
C. Set the OFF time
The OFF time is the time of day that the system will stop operating. Set the OFF time by
pressing the PROGRAM SET
button until “Event 1 OFF” begins to flash. Use the + or –
buttons to adjust the time.
*Repeat steps B and C for a second event if desired
5) SET THE INTERVAL
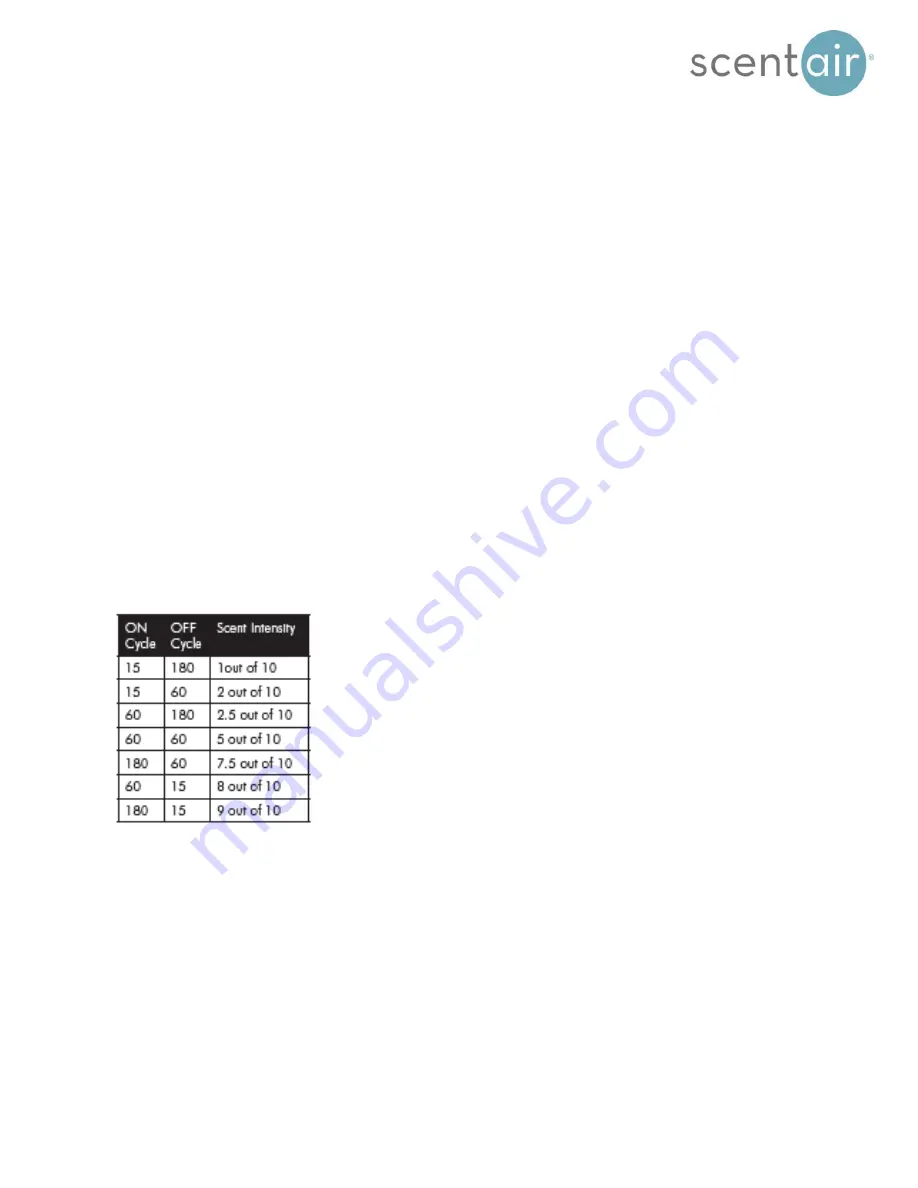
The ScentDirect is designed to cycle on and off while operating. Set the cycle timing to control the amount of
fragrance emitted. The Interval ON switch determines how long (15, 60 or 180 seconds) the fragrance will be
dispersed during each cycle. The Auto Interval OFF switch determines how long (15, 60 or 180 seconds) the
fragrance dispersion will be off during each cycle.
Start with both switches in the 60 seconds position and adjust the switches as needed after one hour if more
or less fragrance is desired.
Figure #1 shows the possible settings and the resulting intensity.
Figure #1
6) SET PUMP/FAN SPEED
The ScentDirect is fitted with pump a n d f a n speed knobs located on the inside of the unit below the LCD
screen.
NOTE:
Setting the pump speed to HI will cause an increase in oil consumption and
is only recommended for situations where it is determined that the volume of oil being
diffused is inadequate at the maximum interval settings. Generally, a low to middle setting of the pump
is sufficient for most applications. The fan will not increase the amount of scent diffused, but will simply
propel it from the machine more quickly with a significant increase in noise at the highest speeds. A
large environment with unpredictable air flow ( wind for instance ) will require higher settings of these
controls than an enclosed setting.


