72
GB
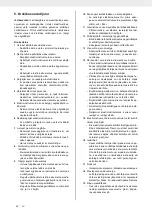
9. Electrical connection
The electrical motor installed is connected and
ready for operation. The connection complies
with the applicable VDE and DIN provisions. The
customer‘s mains connection as well as the ex-
tension cable used must also comply with these
regulations.
Damaged electrical connection cable
The insulation on electrical connection cables is of-
ten damaged.
This may have the following causes:
•
Passage points, where connection cables are
passed through windows or doors.
•
Kinks where the connection cable has been im-
properly fastened or routed.
•
Places where the connection cables have been cut
due to being driven over.
•
Insulation damage due to being ripped out of the
wall outlet.
•
Cracks due to the insulation ageing.
Such damaged electrical connection cables must not
be used and are life-threatening due to the insula-
tion damage.
Check the electrical connection cables for damage
regularly. Make sure that the connection cable does
not hang on the power network during the inspection.
Electrical connection cables must comply with the
applicable VDE and DIN provisions. Only use con
-
nection cables with the marking „H05VV-F“.
The printing of the type designation on the connec
-
tion cable is mandatory.
AC motor
•
The mains voltage must be 230 V~
•
Extension cables up to 25 m long must have a
cross-section of 1.5 mm
²
.
Connections and repairs of electrical equipment
may only be carried out by an electrician.
Please provide the following information in the event
of any enquiries:
•
Type of current for the motor
•
Machine data - type plate
•
Machine data - type plate
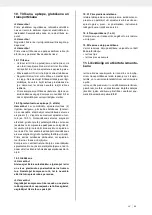
10. Cleaning, maintenance, storage
and transport
m
Important!
Pull out the power plug before doing any cleaning
and maintenance work on the equipment. Risk of
injury from electric shock!
m
Important!
Wait until the equipment has cooled down com-
pletely! Risk of burns!
m
Important!
Always depressurize the equipment before car-
rying out any cleaning and maintenance work!
Risk of injury!
•
The compressor is designed to be used in dry
rooms. It is prohibited to use the compressor in
areas where work is conducted with sprayed water.
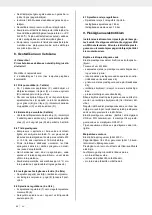
8. Attachment and operation
m
Important!
You must fully assemble the appliance before
using it for the first time!
You will require the following tools for assembly
and installation:
2 x open-ended wrench size 14 mm (not included)
8.1 Fitting the wheels (fig. 6,7)
•
Screw on each wheel (3) one washer (C) and one
nut (B) on to the threads of the wheels.
•
Then mount the wheels (3) on the wheel holders,
at the bottom of the pressure vessel (2), by using
a wrench to fix the nut (B), washer (C) and flange
nuts (D) on the other side of the thread.
8.2 Fitting the supporting foot (fig. 5
)
•
Mount the enclosed supporting foot (4) with the
two hex bolts (A), the two washers (C) and two
flange nuts (D), as shown in Figure 5.
8.4 Mains connection
•
The compressor is equipped with a mains cable
with shock-proof plug. This can be connected to
any 230V~ / 50 Hz shock-proof socket which is
protected by a 16 A fuse.
•
Before you use the machine, make sure that the
mains voltage is the same as the operating voltage
(see the rating plate).
•
Long supply cables, extensions, cable reels etc.
cause a drop in voltage and can impede motor
start-up.
•
At low temperatures below +5 °C, sluggishness
may make starting difficult or impossible.
8.5 ON/OFF switch (fig. 2)
•
To switch on the compressor, press the button (8)
on position I.
•
To switch off the compressor, press the button (8)
on position 0.
8.6 Setting the pressure (fig. 2)
•
You can adjust the pressure on the pressure gauge
(6) using the pressure regulator (7).
•
The set pressure can be taken from the quick lock
coupling (5).
8.7 Setting the pressure switch
•
The pressure switch is set at the factory.
Cut-in pressure approx. 8 bar.
Cut-out pressure approx. 10 bar.
Summary of Contents for 5906125901
Page 2: ...3 1 4 2 1 5 3 9 1 8 6 5 9 2 7 2...
Page 3: ...4 3 3 B B D A 4 D 5 4 C A D 4 D 6 3 B C D 7 C C 3 D C 2 B...
Page 99: ...99...
Page 100: ...100...
Page 102: ...102...

