17
1.
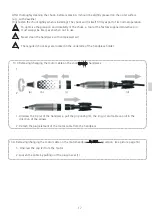
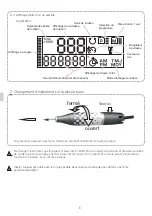
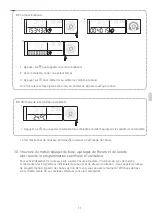
1. Unscrew the tip (a) of the handpiece, pull the grip casing (b), the ring (c) and cable cap (d) in the
direction of the arrows
2. Detach the plug element of the motor cable from the handpiece
2.
13.3 Removing/changing the motor cable
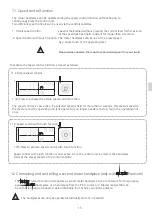
To optimise the precision and durability of the chuck, a tool or the factory supplied protective pin
must always be fixed, even when not in use.
Never clean the handpiece with compressed air!
The required chuck keys are located in the underside of the handpiece holder.
After thoroughly cleaning the chuck, before replacing, it should be slightly greased on the outer surface
(e.g., with Vaseline).
Only fasten the chuck lightly when reinstalling! The chuck will fix itself firmly as part of its normal operation.
on the short
handpiece
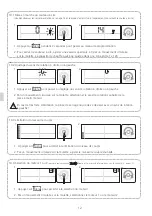
13.4. Removing/changing the motor cable on the motorhandpiece
long version (see picture page 16)
1. Unscrew the cap (2) from the motor
2. Loosen the cable by pulling out the plug-in seal (1)
(a)
(b)
(c)
(d)

