Schick WiFi Battery Replacement
B1051085 Rev. - (10/1/11)
1
Schick WiFi Battery Replacement
IMPORTANT!
Be sure to follow the steps for proper battery replacement. Do not short-circuit,
disassemble, or modify the battery. Do not place it near high-temperature locations. Do not place
in fire or apply heat to it. Do not subject the battery to strong impacts or shocks. Do not expose
the battery to water or allow it to get wet.
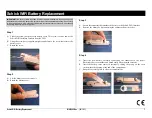
Step 1
A.
Locate the screw that secures the battery cover. This screw is at one end of the
Schick WiFi Interface, farthest from the LED.
B.
Using the screwdriver supplied, untighten and remove the screw that secures the
battery cover.
C.
Retain the screw.
Step 2
A.
Lift the battery cover to remove it.
B.
Retain the battery cover.
Step 3
A.
Locate the connector that attaches the battery to the Schick WiFi Interface.
B.
Remove the battery by disconnecting the connector from its socket.
Step 4
A.
Insert the new battery, carefully connecting the connector to the socket.
Both items key to each other and attach easily when inserted correctly.
B.
Insert the battery cover removed previously, sliding the prong on the cover
(circled) into the opening at the end of the compartment.
C.
Snap the cover into place to close the compartment.


