9
TRUCKLOADER
SET UP INSTRUCTIONS
6
LITTLE WONDER
TRUCKLOADER
SET-UP
DEBRIS RECEPTACLE
The Shredding Truckloader is intended to be used
in conjunction with a truck or trailer mounted debris
receptacle to load landscape debris for removal from a
work site to storage, dump or processing site. These
receptacles or debris bodies or boxes are provided
by the user and are the responsibility of the user.
Following are some considerations to keep in mind
when designing / building, or buying a debris receptacle
on a vehicle.
1. It must be road worthy.
2. It must be constructed sturdily enough to contain the
high velocity and force of entering debris to prevent
injury to bystanders and damage to property.
3. Sufficient screen area must be provided to allow
the air produced by the truckloader to escape while
containing the lighter debris. A bigger screen area
reduces the speed of the air through the screen and
helps reduce the amount of debris that will be held
to the screen. The screen area should be in the
last area to be fill so it stays clean. If the air cannot
escape, the truckloader will not be able to generate a
vacuum to pick up debris.
4. It should prevent the debris from blowing out during
transport to an unloading site.
5. Unloading: Provision must be made for unloading.
ASSEMBLY AND SET-UP
1. Remove unit from crate.
2. Your Little Wonder Truckloader can be mounted in
(4) four ways. The frame mounting will be covered
below. Refer to the instruction sheet supplied
with each kit for Swing Away, Tailgate, or Hitch
mounting.
3. Fill the engine with oil. Fill the fuel tank with clean
fresh gasoline.
4. Assemble the discharge chute. Slide flange clamp
plate over discharge chute. Position the discharge
flange over the fan housing flange. Position the
flange clamp plate over the fan housing studs and
secure with (2) two 3/8-16 nylon insert flange nuts
and 2 (two) locking knobs. Back the nuts off from
tight just enough that the
chute may be turned for
positioning. Lock the chute in the desired position
by tightening the knobs.
UNIT MOUNTING AND MOUNTING KITS.
Most Truckloader installations are customized and
somewhat unique. It is the responsibility of the
installer to ensure the installation is sufficient to carry
the truckloader or truckloader mounting kit.
Your Little Wonder 14HP Truckloader can be
mounted in four different ways. Brief instructions for
each are listed below. Refer to the specific mounting
kit for detailed instructions.
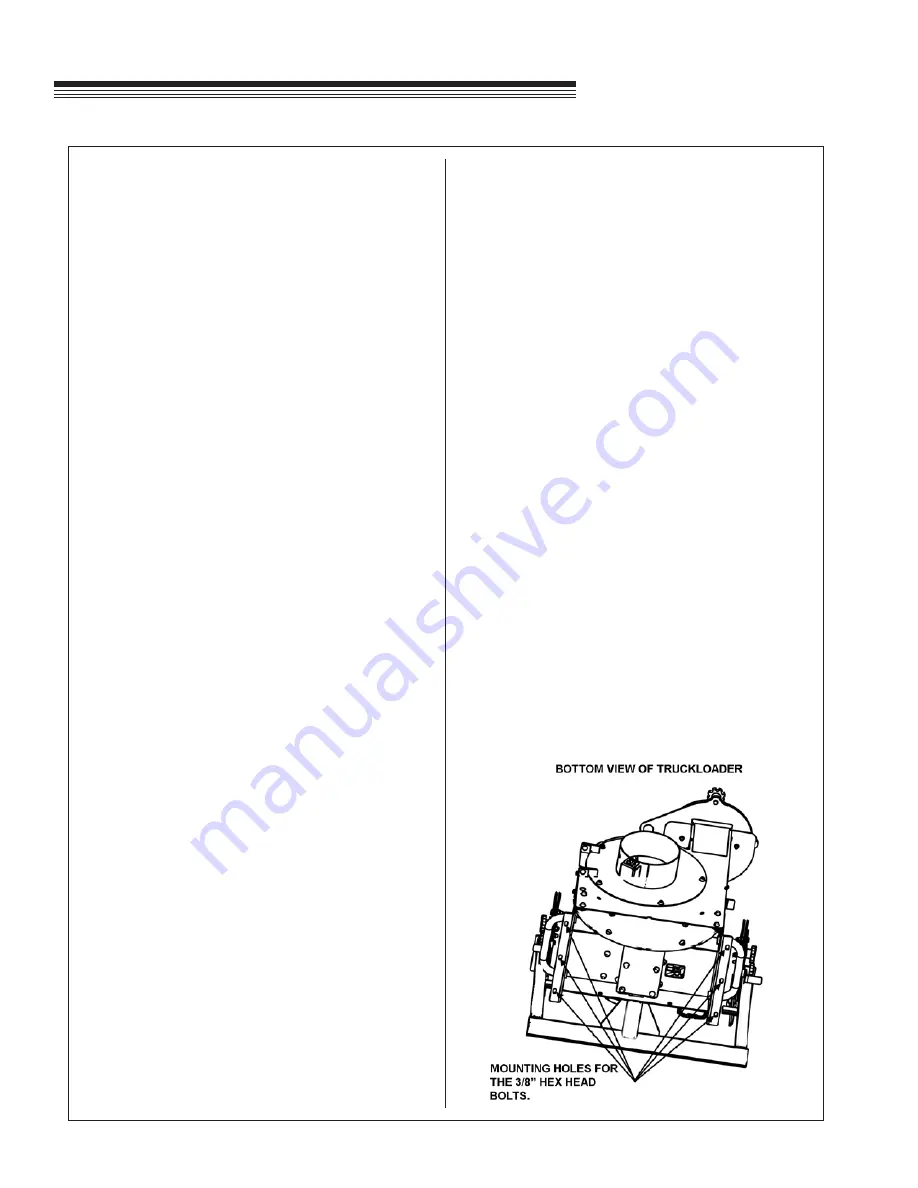
MOUNT SHREDDING TRUCKLOADER FRAME
1. Mount the Shredding truckloader frame to the
frame or swing away, and secure frame with (6)
six 3/8" hex head bolts (Grade 5 or better), 3/8"
flat washers, and 3'8" lock nuts.
5. Assemble the boom assembly in the receiver tube
on top of the fan housing. Connect the hose to the
inlet flange. Insert the adaptor, turn to lock and
secure in place with the locking knobs.
6. Read the Operator's manual before operating the
machine.
DEBRIS RECEPTACLE
The Truckloader is intended to be used
in conjunction with a truck or trailer mounted debris
receptacle to load landscape debris for removal from
a work site to storage, dump or processing site. These
receptacles or debris bodies or boxes are provided
by the user and are the responsibility of the user.
Following are some considerations to keep in
mind when designing / building, or buying a debris
receptacle on a vehicle.
1. It must be road worthy.
2. It must be constructed sturdily enough to contain the
high velocity and force of entering debris to prevent
injury to bystanders and damage to property.
3. Sufficient screen area must be provided to allow
the air produced by the truckloader to escape while
containing the lighter debris. A bigger screen area
reduces the speed of the air through the screen and
helps reduce the amount of debris that will be held
to the screen. The screen area should be in the last
area to be filled so it stays clean. If the air cannot
escape, the truckloader will not be able to generate
a vacuum to pick up debris.
4. It should prevent the debris from blowing out during
transport to an unloading site.
5. Unloading: Provision must be made for unloading.
ASSEMBLY AND SET-UP
1. Remove unit from crate.
2. Your Little Wonder Truckloader can be mounted in (4)
four ways. The frame mounting will be covered below.
Refer to the instruction sheet supplied with each kit for
Swing Away, Tailgate, or Hitch mounting.
3. Fill the engine with oil. Fill the fuel tank with clean fresh
gasoline.
4. Assemble the discharge chute. Slide flange clamp
plate over discharge chute. Position the discharge
flange over the fan housing flange. Position the flange
clamp plate over the fan housing studs and secure
with (2) two 3/8-16 nylon insert flange nuts and 2 (two)
locking knobs. Back the nuts off from tight just enough
that the chute may be turned for positioning. Lock the
chute in the desired position by tightening the knobs.
5. Assemble the boom assembly in the receiver tube on
top of the fan housing. Connect the hose to the inlet
flange. Insert the adaptor, turn to lock and secure in
place with the locking knobs.
6. Read the Operator’s manual before operating the
machine.
UNIT MOUNTING AND MOUNTING KITS.
Most Truckloader installations are customized and
somewhat unique. It is the responsibility of the installer to
ensure the installation is sufficient to carry the truckloader
or truckloader mounting kit.
Your Little Wonder 14HP Truckloader can be mounted in
four different ways. Brief instructions for each are listed
below. Refer to the specific mounting kit for detailed
instructions.
MOUNT SHREDDING TRUCKLOADER
FRAME
1. Mount the Shredding truckloader frame to the frame
or swing away, and secure frame with (6) six 3/8” hex
head bolts (Grade 5 or better), 3/8” flat washers, and
3/8” lock nuts.


