MVPHD-24 Operations Manual Version 0.9.0 page 63 of 74
October 26, 2020
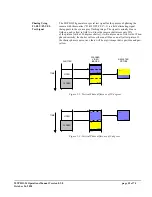
Updating the Sizing Charts uses the Batch Load process. To begin the update process, first turn the MVPHD’s power
switch off. A SD/MMC Card must be installed on the front panel which contains both the Custom Key and the
“CUSTOM” folder (both located in the root directory). Press the TSG button while turning the power switch on, and
continue pressing the TSG button until the message “Loading *.TSn…” appears on the front panel display. The
MVPHD-24 will then proceed to load all the image files in the CUSTOM folder, before the unit completes booting.
To restore the Sizing Charts back to default, remove (or rename) the CUSTOM folder from the SD card. Place the
most recent update folder “MVP-###.cme” on the root directory of the SD/MMC Card. Turn the MVPHD’s power
switch off. The SD/MMC Card must be installed on the front panel which contains both the Custom Key and the
“MVP-###.cme” folder (both located in the root directory). Press the TSG button while turning the power switch on,
and continue pressing the TSG button until the message “Loading *.TSA…” appears on the front panel display. The
MVPHD-24 will then proceed to load the default Sizing Charts, before the unit completes booting.


