KC9116/KC9116-2 & KC9326/KC9326-2 INSTALLATION
Installing the KC9116/KC9116-2 or KC9326/KC9326-2
57044-C Page 6 04-2007
Installing the KC9116/KC9116-2 or KC9326/KC9326-2
Installing the KC9116/KC9116-2 or KC9326/KC9326-2
If your trim has a key cylinder already installed, skip to
Determine Hand: on page 12
. Other-
wise, continue with
Loosen the Baseplate Screws: on this page.
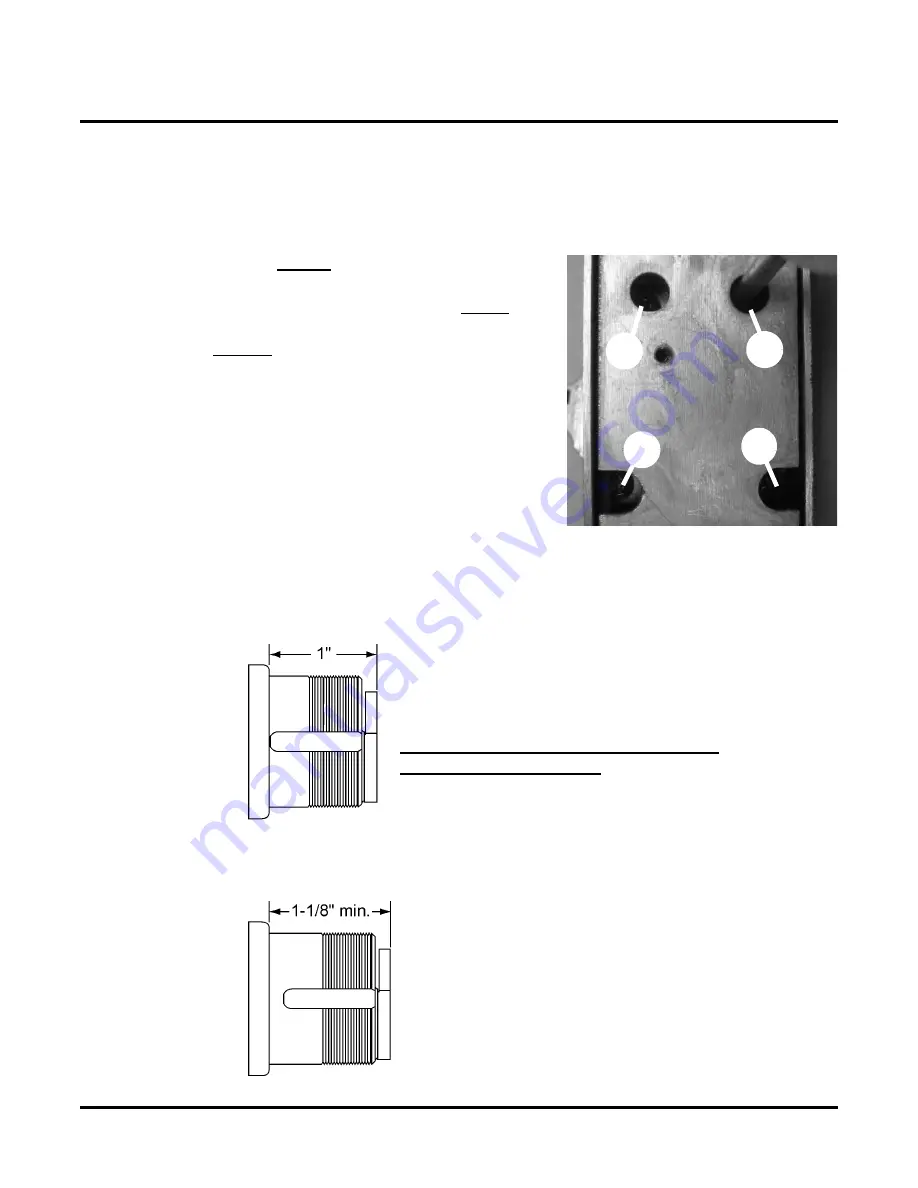
1) Loosen the Baseplate Screws:
2) A Key Cylinder That Is At Least 1-1/8” Long Must Be Installed:
IMPORTANT: Do not remove any of the screws in the fol-
lowing step or it will be difficult to reinstall them.
•
Using a small Philips head screwdriver,
loosen
screws
a
&
b
in baseplate, around key cylinder
hole, one turn.
NOTE: Screws a, b, c & d are set at the factory.
Screws a & b are tightened and screws c & d are left loose.
b
d
a
c
> The key cylinder that you install must be 1-1/8” long or longer.
>>>> Do not attempt to install a key cylinder that is shorter than 1-1/8”
> The two photos below illustrate the difference between a 1” and a 1-1/8” key cylinder.
1” long key cylinder.
DO NOT ATTEMPT TO INSTALL A 1”
LONG KEY CYLINDER.
1-1/8” long key cylinder
ONLY INSTALL A KEY CYLINDER
THAT IS AT LEAST 1-1/8” LONG.


