7 Maintenance
Operating Instructions | Version 1.0 (05-2018) | Uni-M Ferrule
26 | 32
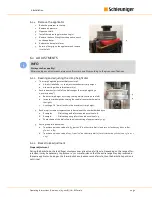
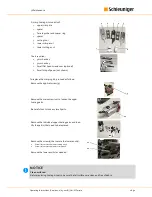
A crimp tooling kits consists of:
1.
upper crimp die
2.
spacer
3.
ferrule pusher and spacer ring
4.
spacer
5.
cutting tool
6.
lower crimp anvil
7.
lower cutting anvil
Tools required:
a.
3mm hex key
b.
5mm hex key
c.
Small flat head screwdriver (optional)
d.
Small strip of paper (not shown)
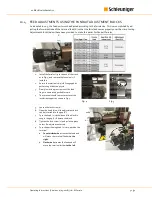
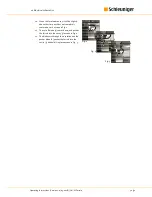
To replace the crimping kit, proceed as follows:
Remove the applicator ram (9).
Remove the main screw (10) to loosen the upper
tooling parts.
Be careful not to lose any small parts.
Remove the individual upper tooling parts and iden-
tify the part(s) that need to be replaced.
Remove the screw(s) that secure the lower anvil(s).
•
Screw (11) secures the lower cutting anvil.
•
Screw (12) secures the lower crimp anvil.
Remove the lower anvil(s) as needed.
NOTICE
Clean surfaces!
Before replacing tooling kit parts, be sure that all surfaces are clean and free of debris.
9
10
1
3
2
4
6
5
7
11
12


