Installation
66 / 96
EN
· 30.30.01.02851 · 01 · 03/22
9.7
Mounting the Valve Assembly
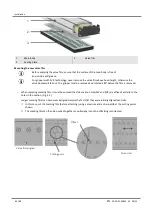
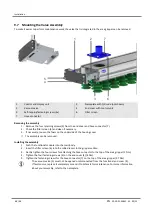
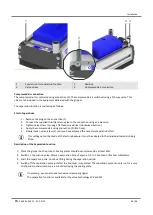
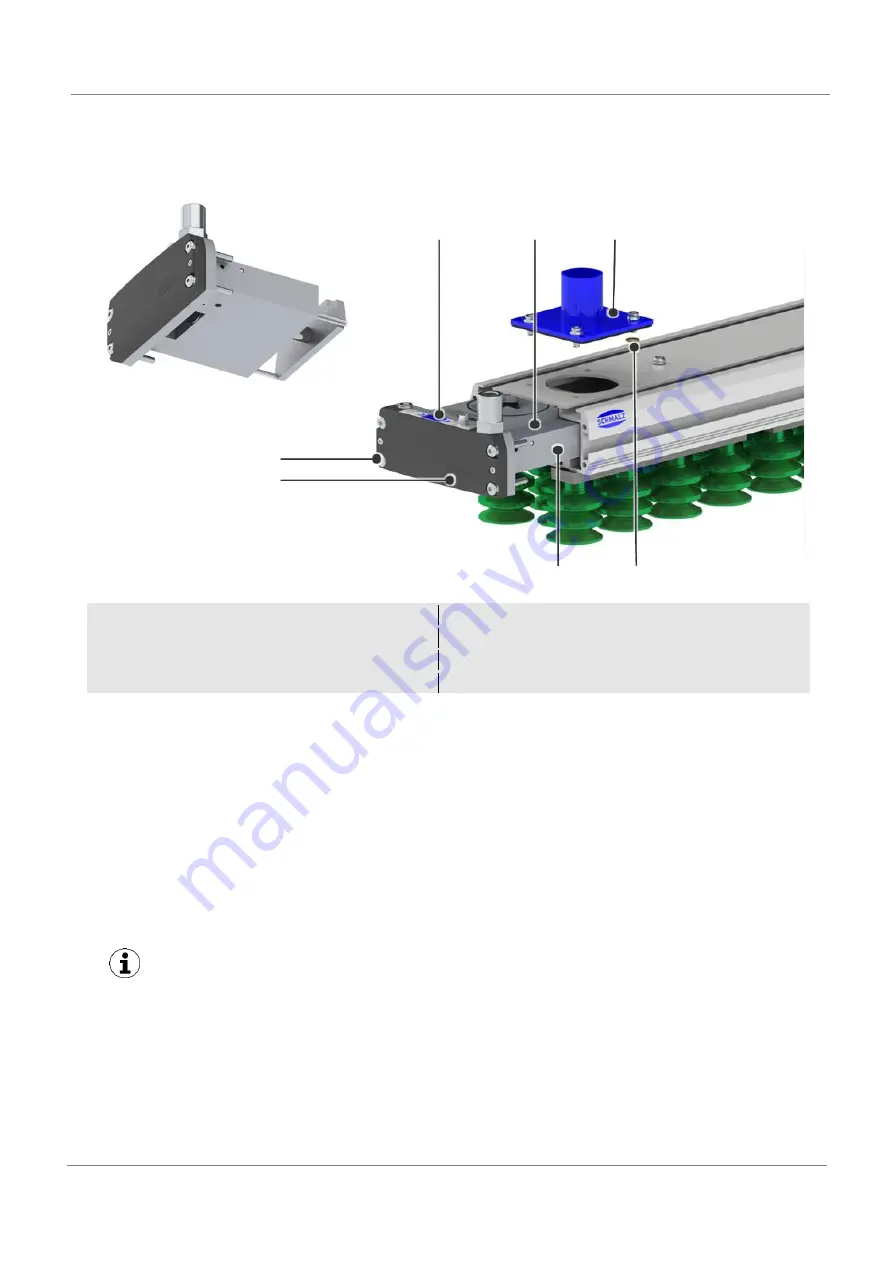
To make it easier to perform maintenance work, the valve that is integrated in the area gripper can be removed.
1
Control and display unit
2
Nameplate with QR code (not shown)
3
Vacuum valve
4
End cover with control unit
5
Self-tapping fastening screws (4x)
6
Filter screen
7
Hose connector
Removing the assembly
1.
Remove the four retaining screws (5) from the end cover and hose connector (7).
2.
Check the filter screen (6) and clean if necessary.
3.
If necessary, loosen the foam on the underside of the housing cover.
The assembly can be removed.
Installing the assembly
1.
Push the functional module into the main body.
2.
Insert the filter screen (6) into the milled recess in the gripper section.
3.
Gently tighten the four screws for attaching the hose connector to the top of the area gripper (1 Nm).
4.
Tighten the four fastening screws (5) on the end cover (4) (4 Nm).
5.
Tighten the fastening screws for the hose connector (7) on the top of the area gripper (2.7 Nm).
The vacuum valve (3) must not be opened or disconnected from the functional end cover (4).
If faults occur, replace it completely or send it to Schmalz for maintenance. For more information
about your assembly, refer to the nameplate.
1
2
4
3
5
7
6


