60
Elevator positioning system USP 30 / 100
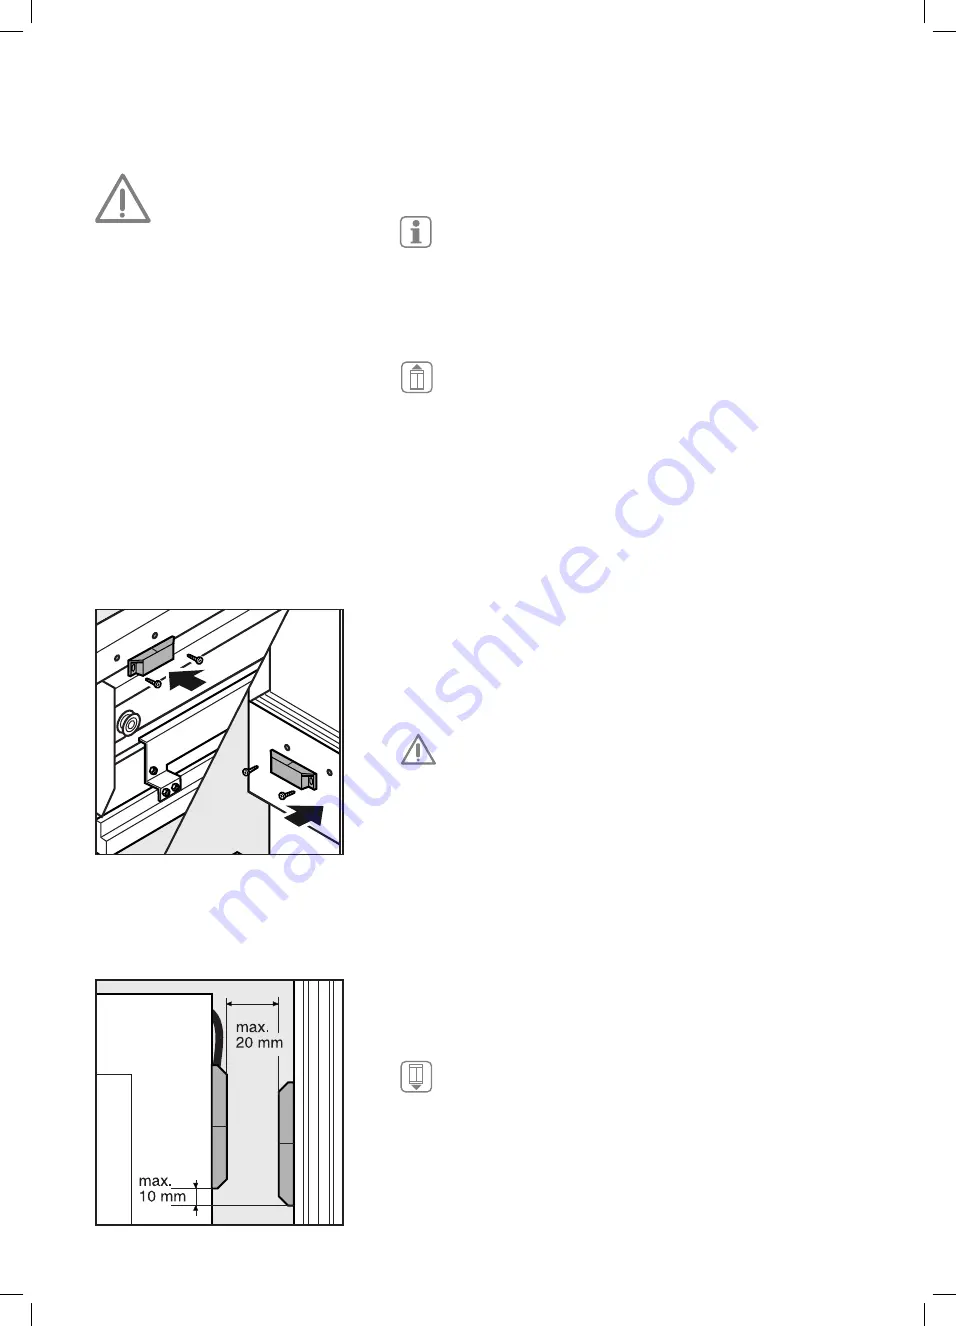
Installation of the actuating magnets
In order to achieve optimum correction values, you
should distribute 5 actuating magnets equally along the
shaft, i.e., if the shaft extends over 10 floors, then an ac-
tuation magnet should be installed at every second floor.
If less than 5 actuating magnets are used the accuracy of
the system decreases.
Go onto the roof of the elevator cabin with the actuating
magnets and travel in ”inspection travel” mode up to the
shaft head.
It is advisable to attach the actuating magnets to elements
that are firmly fixed to the shaft door (chamfer or threshold of
the floor). Ensure that the actuation magnet is not located on a
moving part and is installed so that it aligns precisely with the
correction sensor.
It has to be ensured, that the correction sensor drives by
the actuating magnet with a minimum speed of 0.1 m/s.
The correction sensor and the actuating magnets should
not be facing each other at the levelling position. Be-
tween the actuating magnet and other magnet switches
should be a safety distance of min. 0.5 m.
Each actuation magnet must be installed so that there is a maxi-
mum horizontal clearance of 20 mm between the correction sen-
sor and the actuation magnet. This figure may not be exceeded.
The sideways offset (vertical level) must be less than 10 mm.
Travel down in ”inspection travel” mode and install the
remaining actuating magnets on the same principle as
described above at points where the elevator cabin with
the correction sensor travel and pass frequently.
19
20
Functional errors due to incor-
rectly installed components!
Ensure that the actuating magnets
are installed correctly so that neit-
her the correction sensor nor any
other parts can be touched by the
moving elevator cabin.
The correction sensor only receives
pulses, if all actuating magnets are
installed in alignment with the sen-
sor and the maximum distances are
observed.
View from
top
USP_Montage_GB.indd 60
18.02.2013 15:39:46


