


13
3. Settings.
3.6 Adjustment of the back unit
(positioning of a seat pan / seat unit)
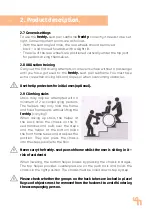
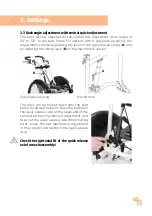
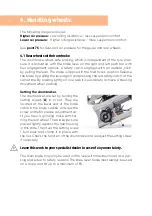
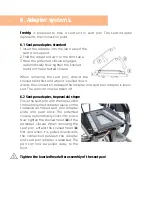
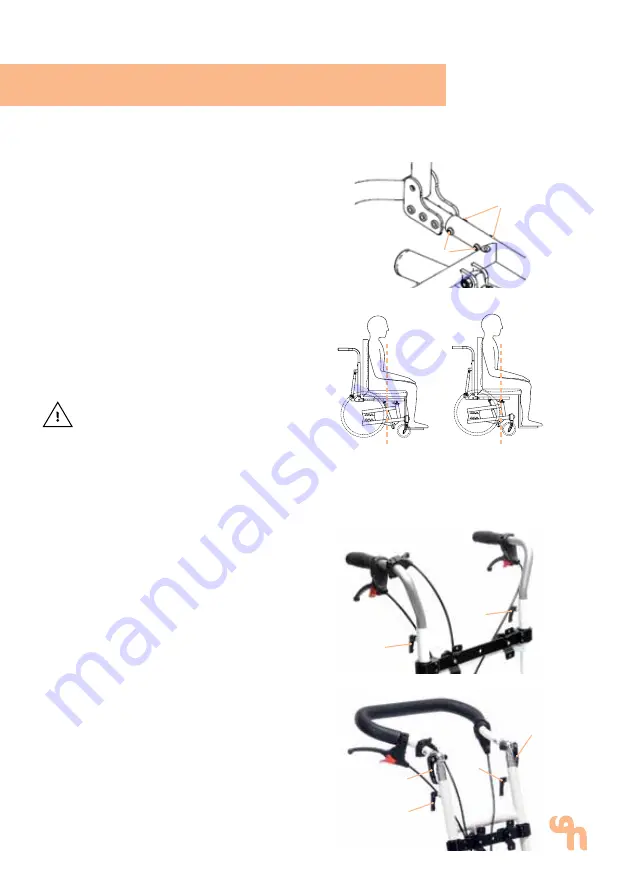
The complete back unit can be adjus-
ted in the depth of the seat pan / seat
unit. To do this, remove the 4 screws (
A
)
on the right and left of the top frame
and slide the back unit out or in. Then
install the screws again (
A
) and re-tigh-
ten them firmly. Ensure that the seat
pan / seat unit is positioned centrally
on the subframe (Fig. 1). Only in this way
can be subframe be used optimally. If
the centre of gravity of the seat pan /
seat unit lies on the front wheels (Fig.
2), the manoeuvrability of the subframe
will be adversely affected.
The seat pan / seat unit must be
placed centrally on the subframe.
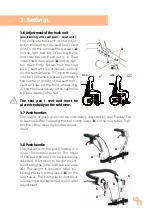
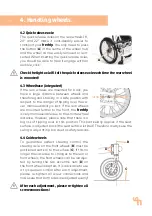
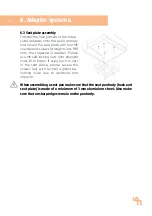
3.7 Push handles
The height of push grips can be individually adjusted on your Freddy. This
takes place after loosening the two clamp levers (
B
) on the rear tubes. Tigh-
ten the clamp lever again after adjust-
ment.
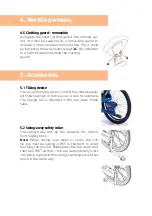
3.8 Push handle
The design with the push handle is a
more comfortable solution. The angle
of the push handle can be individually
adjusted in addition to height adjust-
ment using the joints with quick release
(
C
). The height is adjusted after loo-
sening the two clamp levers (
D
) on the
rear tubes. The clamp lever and quick
release must be tightened again after
adjustment.
ü
Abb. 1
x
Abb. 2
A
A
A
A
C
D
D
C


