11
2. Product description.
2.9 Getting in and out
After all pre-adjustments have been made,
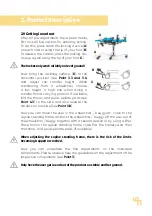
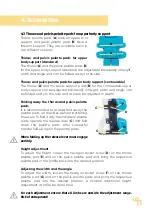
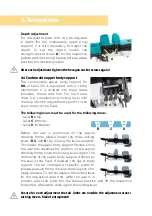
first lock all five castors for entering/exiting.
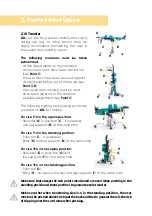
To do this, press down the locking device (
A
)
on each castor using the tip of your foot (
B
).
To release the castors, press the locking de-
vice up again using the tip of your foot (
C
).
The brakes only work reliably on level ground!
Now bring the reclining surface (
D
) to the
horizontal position (see
Point 3.3 and 3.4
)
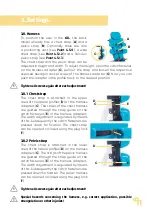
and adjust the transfer height. When
transferring from a wheelchair, choose
a low height, a high one when doing a
transfer from a carrying position. If available,
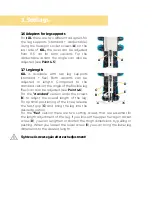
fold the thorax and pelvis pelotte pads (see
Point 4.3
) to the side and also release the
harness on one side (see
Point 3.8
).
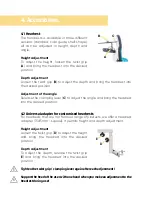
Now you can move the user in the wheelchair / buggy etc. close to the
supine standing frame and lock the wheelchair / buggy. Lift the user out of
the wheelchair / buggy together with a second person or by using a lifter.
Place him on the supine standing frame, close first the harness and then
the thorax and pelvis pelotte pads (if available).
When adjusting the supine standing frame, there is the risk of the limbs
becoming trapped or crushed.
Now you can undertake the fine adjustments on the individual
components. Please observe here the guidelines on the adjustment of the
respective components (see
Point 3
).
Only have the user get in and out of the product on stable and flat ground.
D
A
B
C


